Unfortunately, Goldfish crackers are not gluten-free, nor does the brand make a gluten-free Goldfish option. The good news is that you can still enjoy the taste of Goldfish crackers with the following six goldfish cracker alternatives and my delicious and surprisingly simple gluten-free Goldfish recipe. This post contains affiliate links. Please see my disclosures.
Pepperidge Farms Goldfish crackers are a staple childhood snack that most kids love, and with good reason. The crackers are cute, crunchy, and cheesy. They are the perfect snack.
Unfortunately, regular Goldfish crackers are made with wheat flour and are off-limits to anyone with celiac disease, non-celiac gluten sensitivity, and gluten intolerance.
People following a strict gluten-free diet cannot eat foods that contain gluten, a protein found in wheat, rye, barley, and sometimes oats.
At one time, Annie’s made gluten-free cheddar bunnies, but this product has been discontinued. For a long time, there were no good Goldfish alternatives.
But all that has changed of late, and as of February 2024, there are SIX gluten-free Goldfish alternatives you can buy, and they all come in fun shapes and sizes and meet various dietary restrictions even beyond gluten-free!
And if you’re feeling adventurous, I encourage you to make my ultra-delicious homemade goldfish crackers. This recipe is surprisingly simple to make and, dare I say, tastes better than anything you can buy in a store, but who’s keeping score?

Gluten-Free Goldfish Dupes
If you’re craving Goldfish, check out any of these Goldfish alternatives, many of which you can find at your local grocery store:
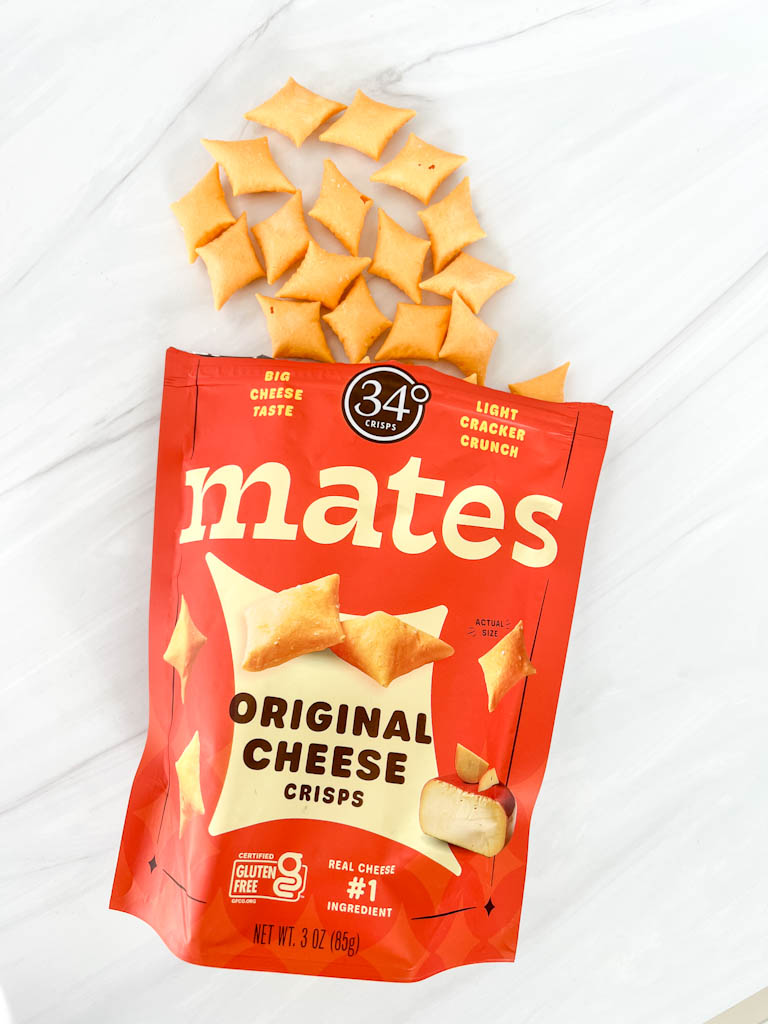
(1) 34º Crisps Mates
34º Crisps has a fantastic Goldfish cracker dupe called Mates. The puffy crackers are light, crunchy, and cheesy, mainly because real cheese is the #1 ingredient.
In the original cheese crisps flavor, the first ingredient is gouda cheese, and if you love cheese, these crackers will definitely satisfy you. They also contain nutritional yeast, which offers even more cheese flavor.
While these are excellent goldfish dupes, I find the texture different than I remember a goldfish cracker tasting. These are more puffed and crunchy than a Goldfish cracker. It’s hard to explain the difference. The good news is that you won’t regret trying these crackers because they’re good, even if not exactly like you remember a Goldfish cracker tasting.
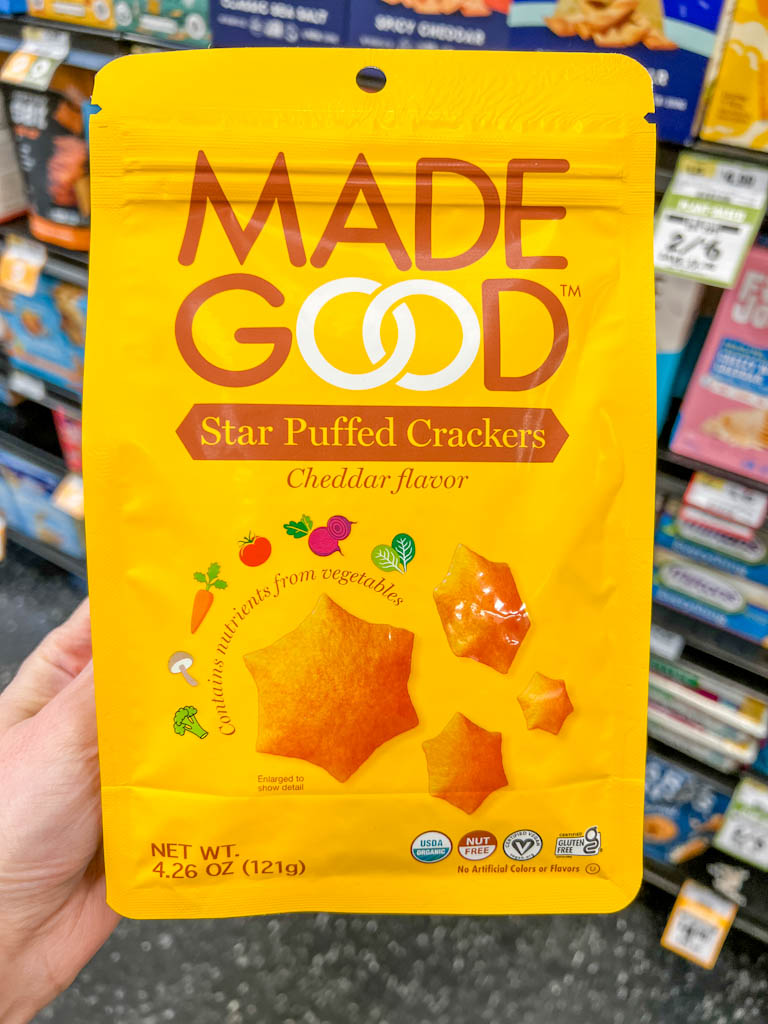
(2) Made Good Star Puffed Crackers
Made Good makes Star Puffed Crackers, a gluten- and dairy-free puffed cracker with a wonderful cheddar flavor despite not containing any cheese.
The Star Puffed Crackers are made from cassava flour, oat flour, tapioca starch, and seasonings that come together perfectly. They’re also free from artificial colors and flavors. They’re also certified gluten-free by the GFCO and certified vegan.
I found the Made Good Star Puffed Crackers to be the most similar to Goldfish crackers in texture and taste, so if you’re missing Goldfish, these are probably your best option.
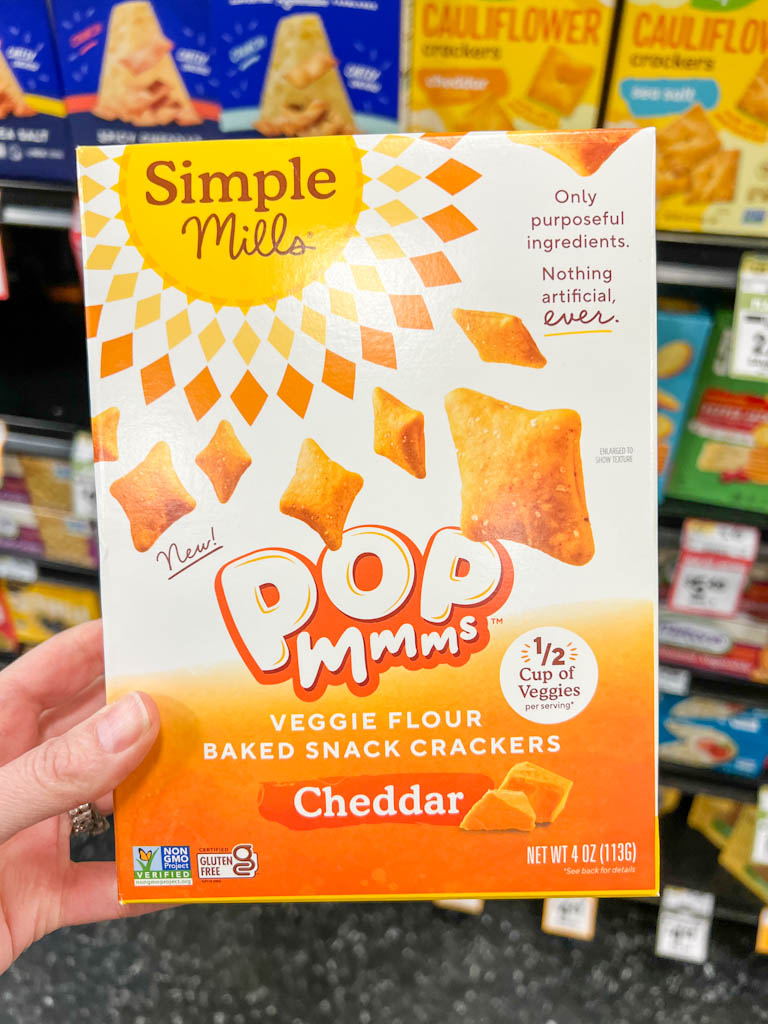
(3) Simple Mills Pop Mmms
Simple Mills also makes a wonderful gluten-free goldfish dupe called Pop Mmms. The super-crunchy diamond-shaped crackers are baked, not fried, contain real cheddar cheese, and are powered by veggies. The main ingredient in Pop Mmms is organic butternut squash, among other flavors and simple ingredients.
Pop Mmms are also grain-free, corn-free, non-GMO, and certified gluten-free by the GFCO. They’re a worthy alternative to Goldfish, especially if you need a grain-free option.
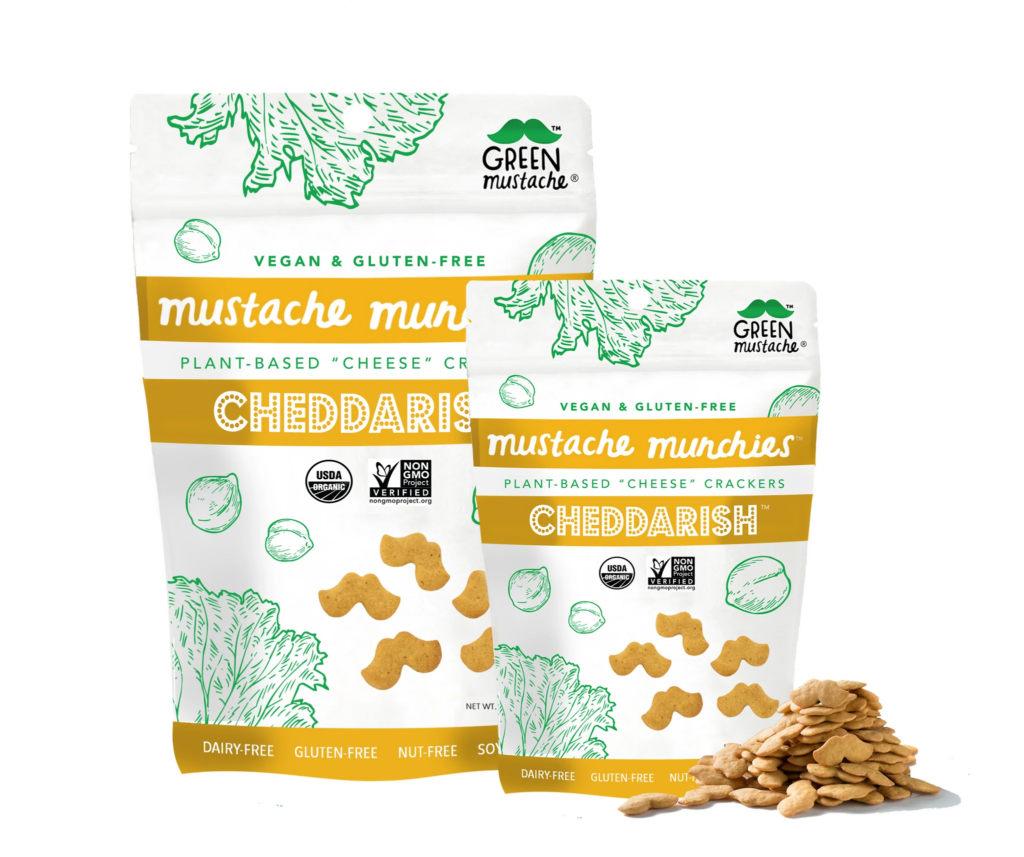
(4) Mustache Munchies by Green Mustache
I haven’t had the opportunity to try Mustache Munchies yet, but I’m excited about having yet another Goldfish cracker dupe, and the mustache shape is a hoot!
Mustache Munchies are organic, gluten-free, dairy-free, and vegan and are made with clean ingredients like garbanzo bean flour and organic kale, They’re crunchy and are described as having a very cheddar flavor.
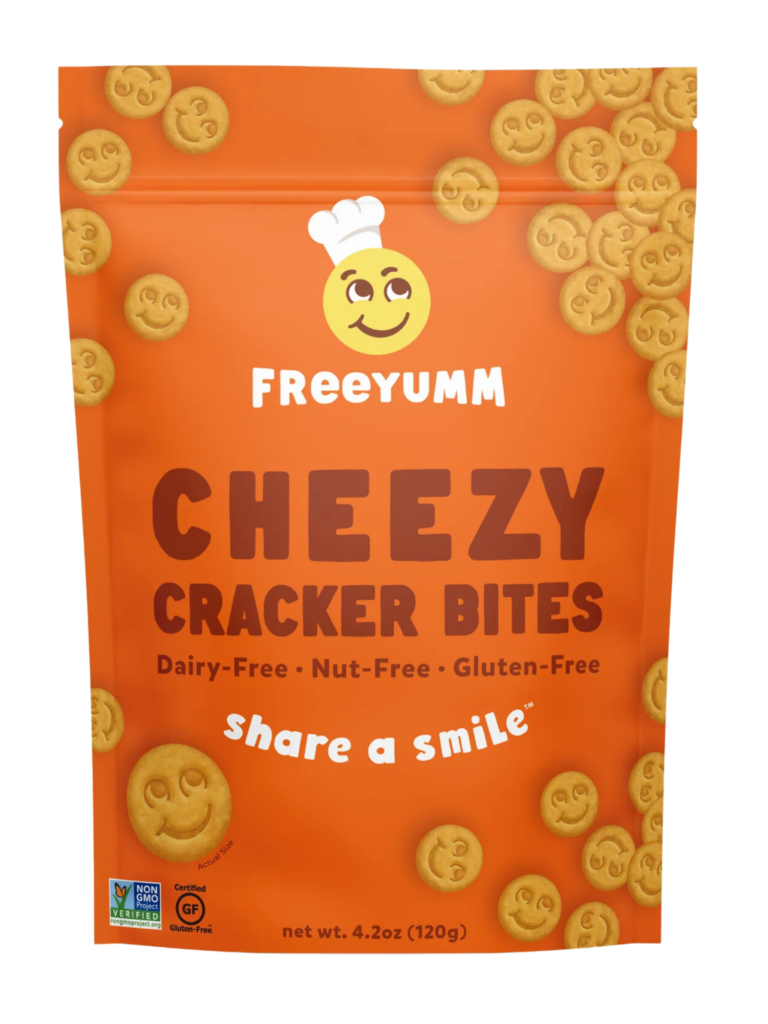
(5) FreeYumm Cheezy Cracker Bites
I haven’t tried FreeYumm’s Cheezy Cracker Bites, but they appear to be a gluten-free Goldfish alternative. The crackers are shaped like smiley faces vs. fish, and they’re quite a bit bigger than a small goldfish cracker.
FreeYumm crackers are dairy-free, nut-free, and certified gluten-free by the GFCO. They’re made from a blend of rice flour, oat flakes, and psyllium husk.
(6) Qwackers
I haven’t tried Qwackers because they don’t have good distribution at this time, but you can check the store locator to see if you can find them near you.
Qwackers are made from various rice, potato, and tapioca flour and contain real sharp cheddar cheese, so I bet they’re ultra-cheesy.

How to Make Gluten-Free Goldfish Crackers
Plenty of Goldfish alternatives are available today, giving you many ways to enjoy this classic snack.
However, if you’re ready for a challenge or want a fun baking project with your gluten-free kids, consider making homemade gluten-free goldfish from scratch instead.
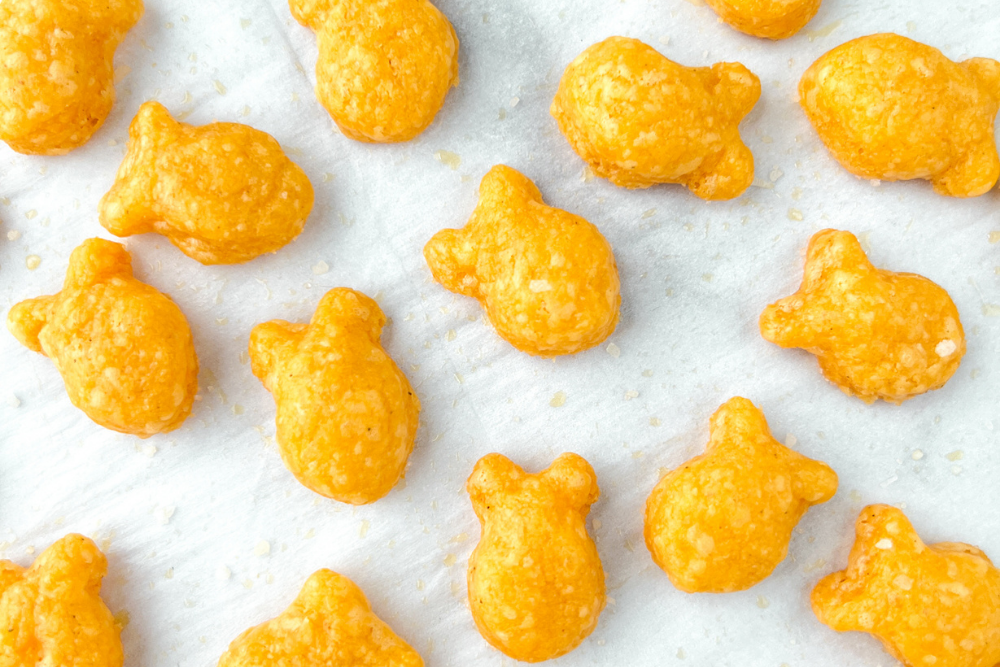
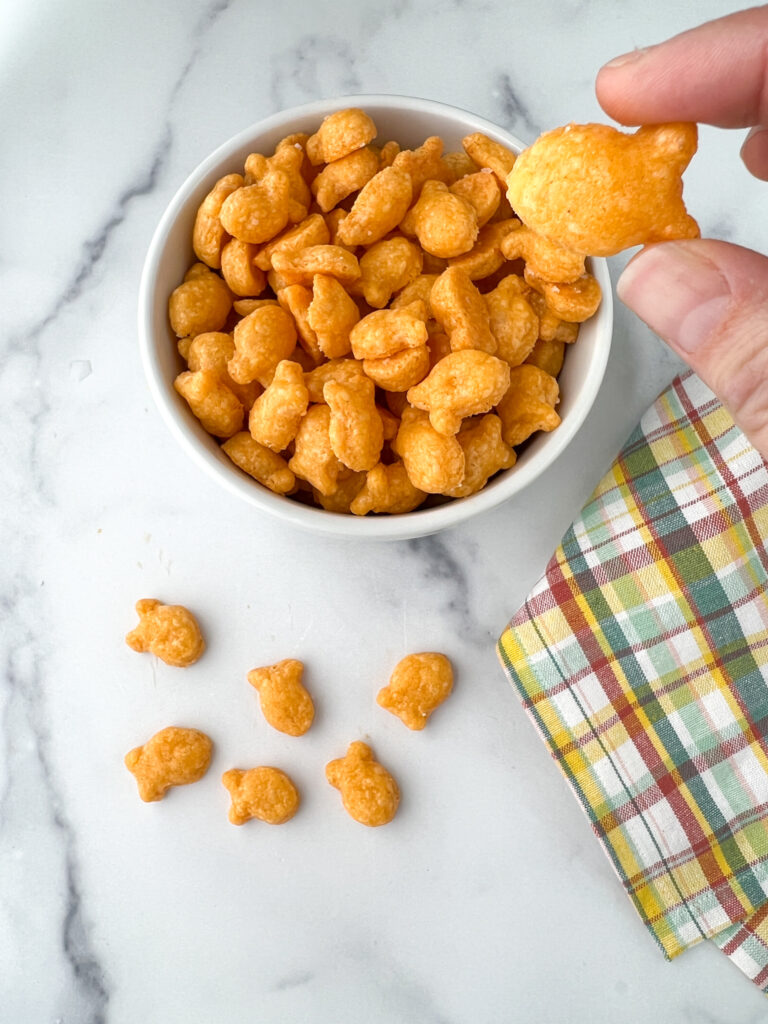
I’ve been testing various recipes and have settled on this one because it tastes incredible. The net result is a crispy and cheesy cracker that tastes better than any store-bought goldfish cracker.
And best of all, it’s made with real ingredients. Real cheddar, real butter, and authentic spices – nothing overly processed and certainly no preservatives, colors, or artificial ingredients.
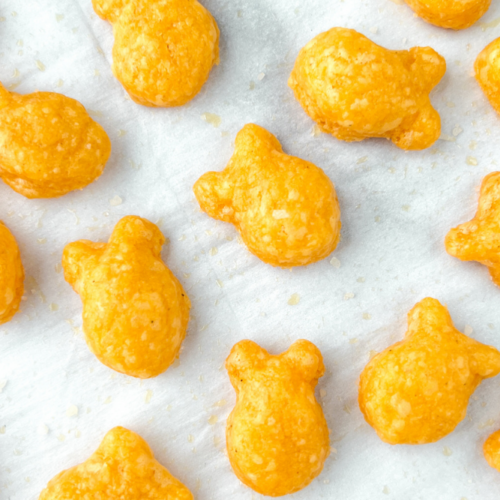
Please remember that these homemade gluten-free goldfish crackers do not taste exactly like the original Pepperidge Farm variety. Don’t get me wrong, the flavor is there, but they’re not as crispy as the original. I also find my homemade goldfish way cheesier, which is the most important quality in my book!
To make your gluten-free goldfish-shaped crackers, purchase a goldfish cookie cutter. The following cutters are the exact size of the Pepperidge Farm Goldfish crackers and what I used in this recipe.
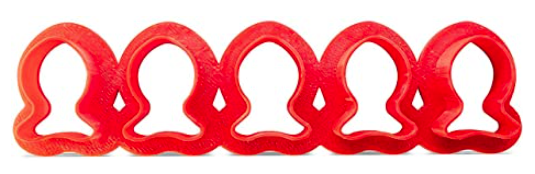
Start by lining two baking sheets with parchment paper and setting them aside. Add the goldfish cutouts onto the parchment paper as you cut them.
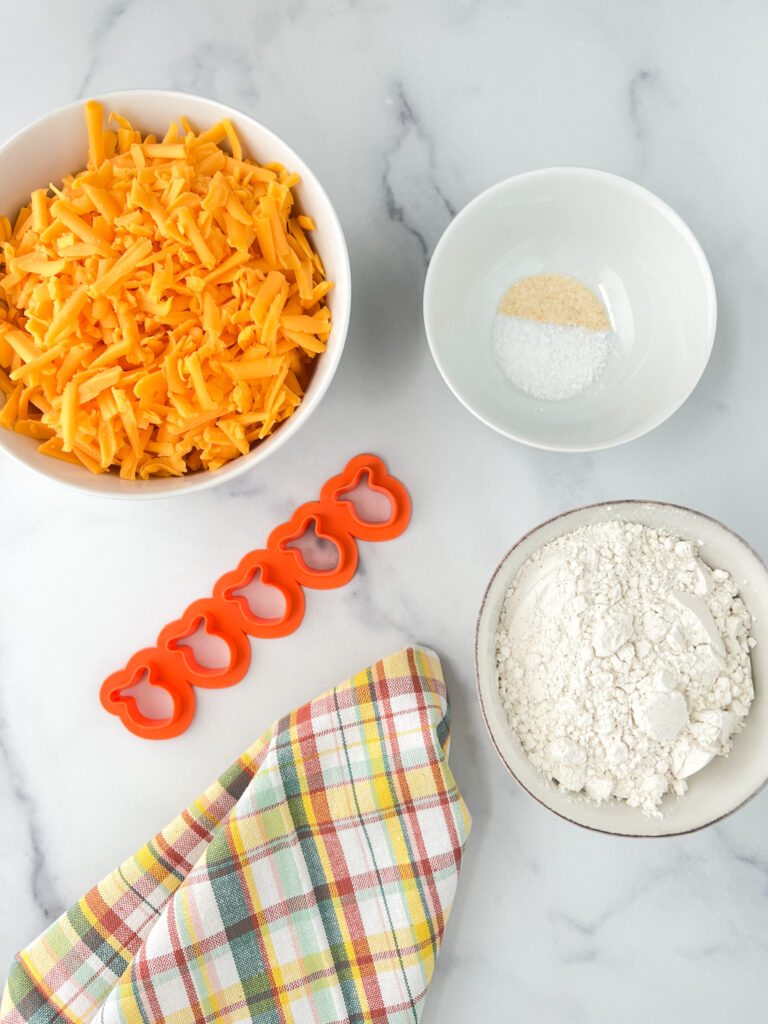
Once you have your goldfish cutters in hand, you’re ready to gather all the ingredients, including:
- 1 cup Bob’s Red Mill 1-to-1 Gluten-Free Flour Blend (or any gluten-free flour blend with xanthan gum)
- 1/2 tsp Kosher salt
- 1/4 tsp onion powder
- 8 ounces shredded cheddar cheese (I recommend a mild or medium cheddar)
- 4 tbsp cold butter
- 2 tbsp cold water
Add all the ingredients to a food processor and blend on low for five seconds at a time until a dough forms.
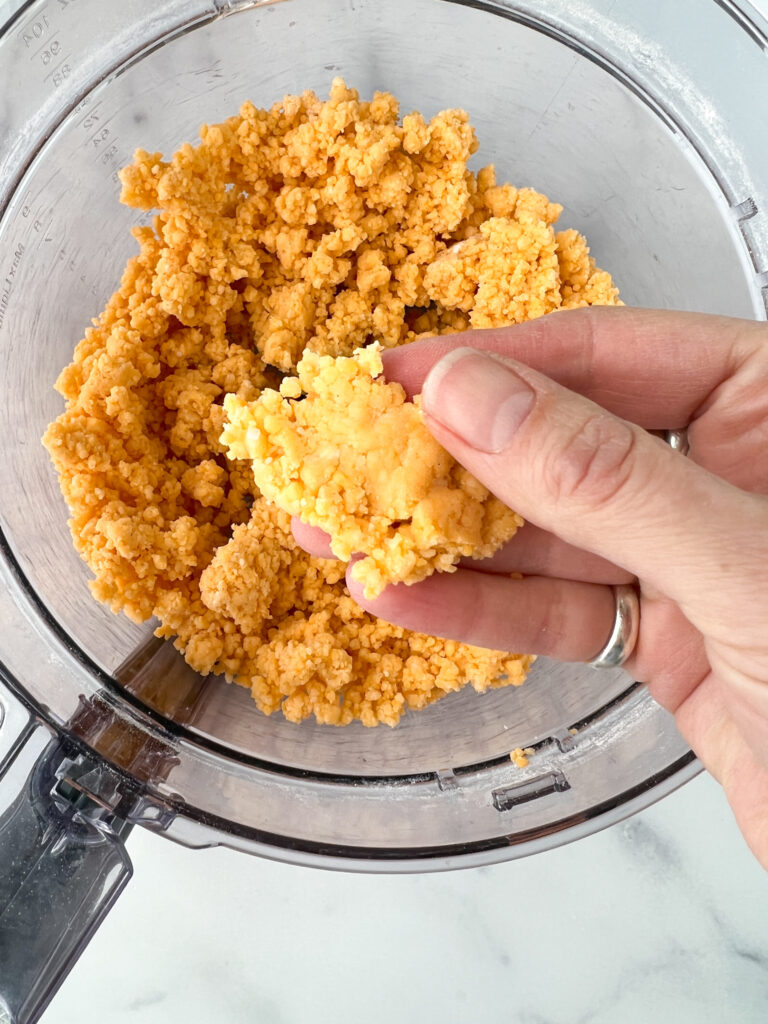
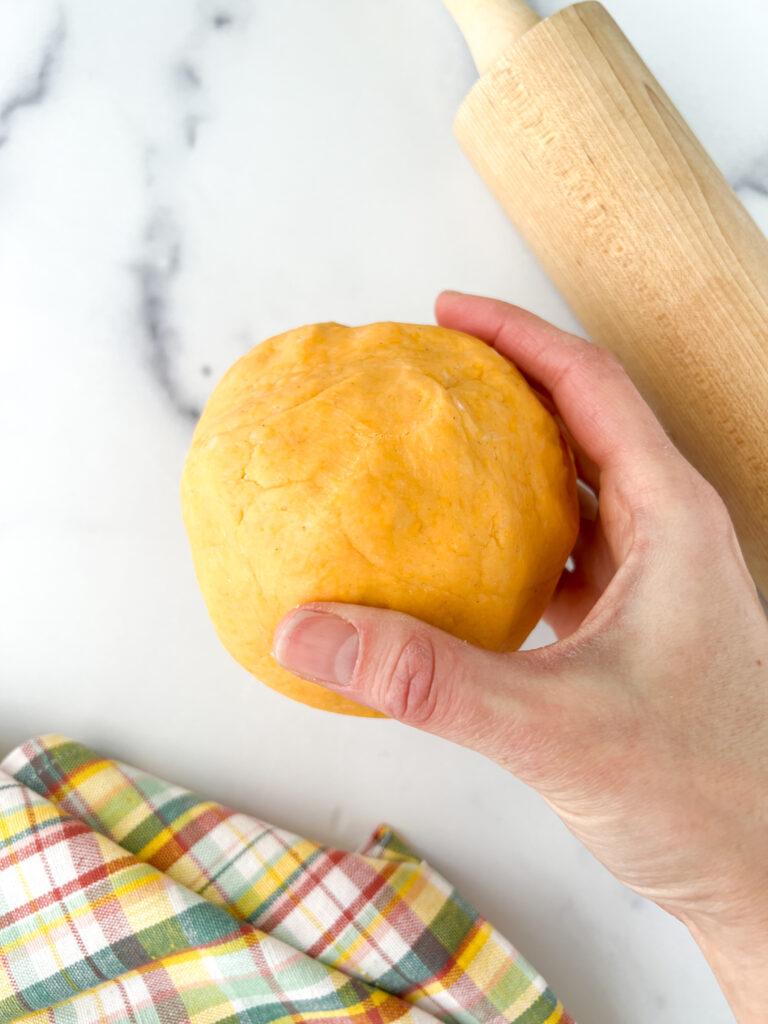
Remove the dough from the food processor and press it together to form a smooth dough ball using your hands.
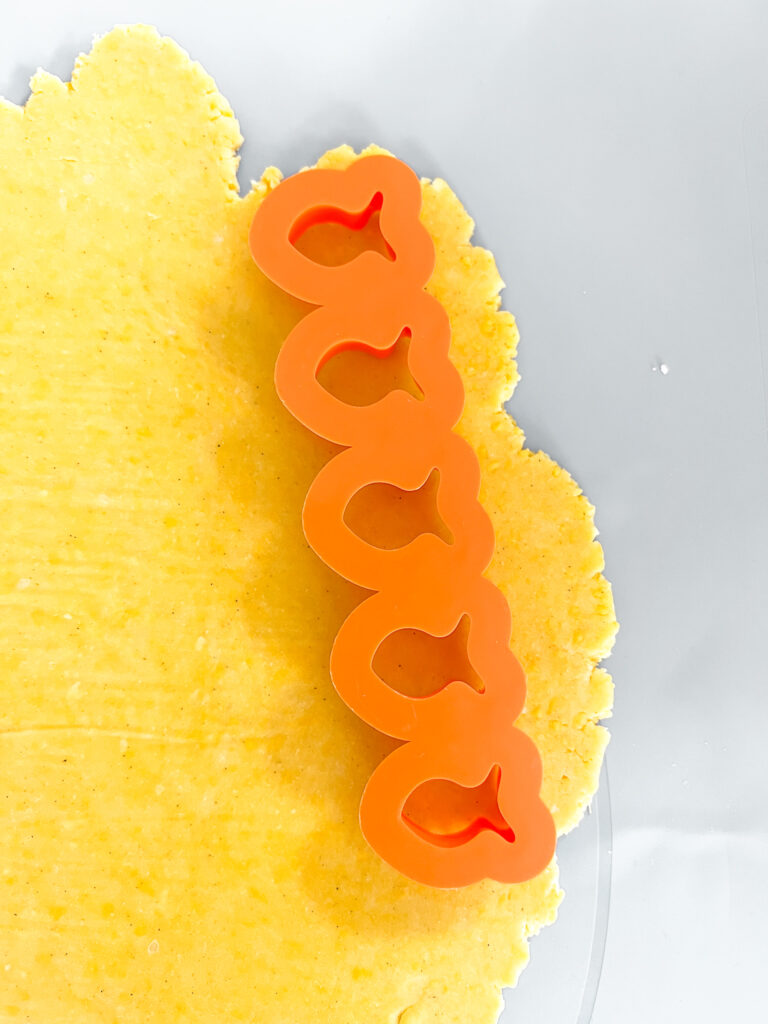
On a large silpat mat or piece of parchment paper, roll out the dough to 1/8-1/4″ thickness. Press the cookie cutter into the dough, then place the cutout goldfish on your parchment-lined baking sheets. The dough may stick to the goldfish cutters. Use your fingers to gently nudge out the dough without losing that signature goldfish shape.
Take the dough scraps, form another ball, and roll out the dough again. Cut more goldfish until all the dough has been used up. I was able to make about 175 goldfish. Cutting the goldfish is a tedious process, so give yourself plenty of time to get it done.
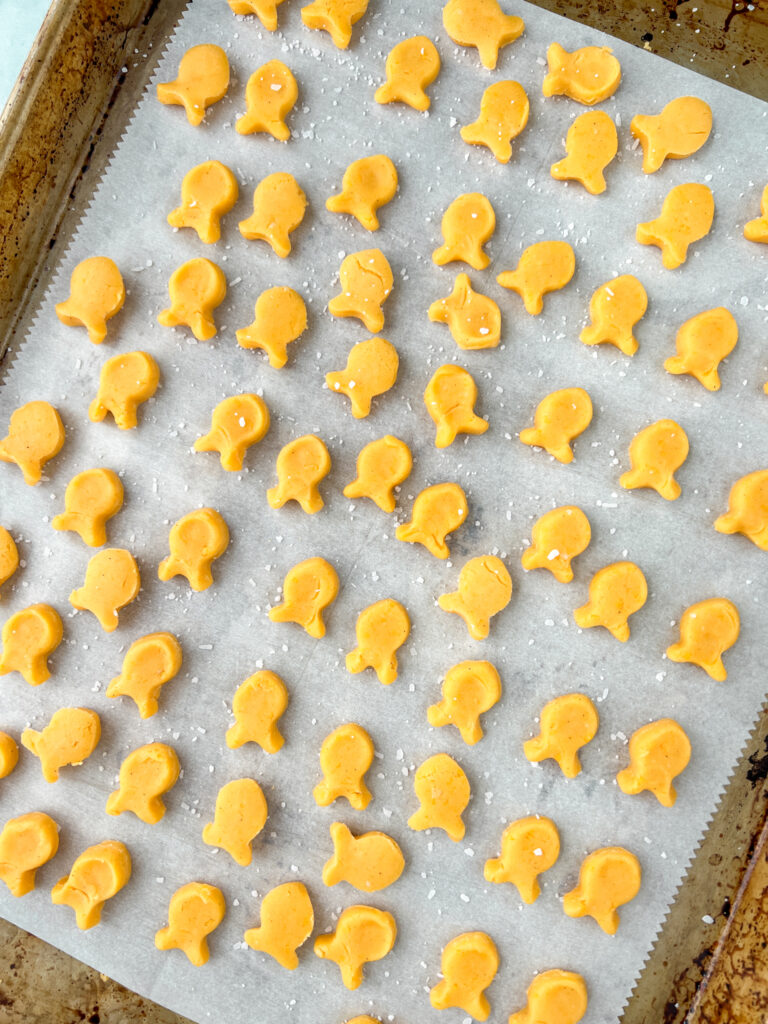
Spread the goldfish on the two baking sheets so they’re not touching, sprinkle with salt, and place the baking sheets in your fridge to cool for at least 30 minutes, longer if possible. This step is vital so the goldfish don’t spread when baked.
While the goldfish are chilling, preheat your oven to 350º F. After the goldfish have cooled for 30 minutes, bake them in batches for about 10-12 minutes until they’re bubbly but not burned or browned. They will puff up beautifully in the oven.
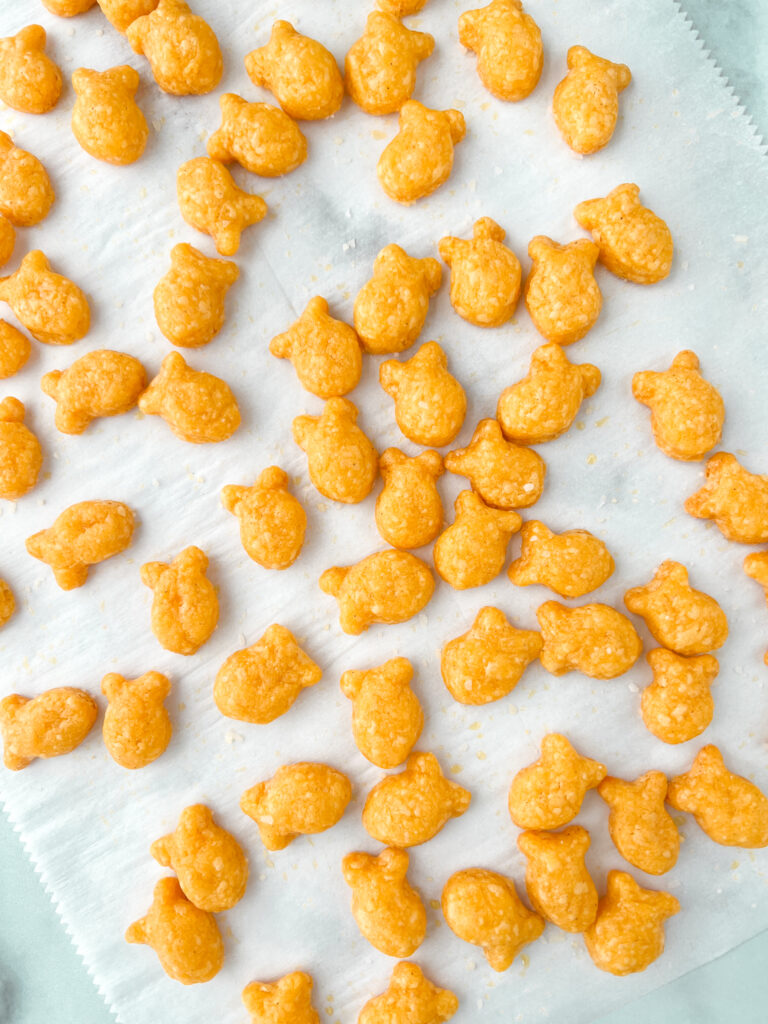
Remove the goldfish from the oven and allow them to fully cool on the baking sheet. They will crisp up more as they cool.
Store any leftover goldfish in an airtight container or zip-top bag for 3-4 days. I like to refrigerate any leftovers to preserve freshness.
Goldfish FAQs
Do I need to flour the surface before rolling out the dough? No, you can roll out the dough on parchment paper or a silpat mat. If the dough is cool, it won’t stick. As the dough warms with handling, it will become stickier. You can chill the dough or just roll it out gently so it doesn’t stick. Remember to chill your dough before baking. This step is essential to getting the right shape.
Can I make it dairy-free? No, these goldfish contain real cheese and real butter. I’m not sure a dairy-free cheese alternative would work well or melt evenly. This recipe might not work for you if you don’t eat dairy.
Can I use any gluten-free flour blend? I tested this recipe with Bob’s Red Mill 1-to-1 Gluten-Free Flour Blend and got terrific results. I highly recommend using gluten-free flour blends containing flour, starches, and xanthan gum. If your flour blend doesn’t contain xanthan gum, as a general rule, you’ll want to add 1/2 tsp for every 1 cup of flour.
What kind of cheese works best? I prefer mild or medium cheddar cheese. I haven’t tested this recipe with other cheeses, but a firm, semi-hard cheese should work (think pepper jack or gouda). It’s best to shred your cheese vs. buying pre-shredded cheese to ensure no other ingredients compromise your recipe. For example, many store-bought cheeses have preservatives and cornstarch, which may affect how the goldfish turns out.
Additional Reading
I hope you enjoyed making your homemade gluten-free goldfish. These guppies are addicting, and my family plowed through the first batch within 24 hours!
If you enjoyed this article, you might also enjoy the following articles:
- Best Gluten-Free Tortillas and Wraps (Brands and Recipes)
- Gluten-Free Queso + Movie Night Snack Board
- The Best Gluten-Free Snacks on the Market
- Are Doritos Gluten Free? And a List of Chips that are Gluten Free
Gluten-Free Goldfish Crackers
Equipment
- 1 Food processor
- 1 Rolling pin
- 1 Goldfish cookie cutter purchase on Amazon
- 1 Silpat mat if you have, if not use parchment paper
Ingredients
- 1 cup Bob’s Red Mill 1-to-1 Gluten-Free Flour Blend or any gluten-free flour blend with xanthan gum
- 8 ounces shredded cheddar cheese I used a mild cheddar
- 4 tbsp butter cold
- 1/2 tsp Kosher salt + additional salt for topping
- 1/4 tsp onion powder
- 2 tbsp water cold
Instructions
- Line two baking sheets with parchment paper and set them aside. Add the goldfish cutouts onto the parchment paper as you cut them.
- Add all the ingredients to a food processor and blend on low for 5 seconds at a time until a dough forms and the ingredients are well combined. Remove the dough from the food processor and press it together to form a ball using your hands.
- On a large silpat mat or piece of parchment paper, roll out the dough to 1/8-1/4" thickness. Press the cookie cutter into the dough, then place the goldfish cutouts on your parchment-lined baking sheets. The dough may stick to the goldfish cutters. Use your fingers to gently nudge out the dough without losing the goldfish shape.
- Form a new dough ball with the dough scraps, roll out the dough, and cut the goldfish until all the dough has been used up. You'll be able to make 175+ goldfish, depending on the thickness. (See notes below for further tips.)
- Spread the goldfish on the two baking sheets so they're not touching, sprinkle with salt, and place the baking sheets in your fridge to cool for at least 30 minutes, longer if possible (1-2 hours). This step is important so the goldfish don't spread when baked.
- While the goldfish are chilling, preheat your oven to 350º F. After the goldfish have chilled, bake them, working in batches, for about 10 minutes until they're bubbly but not burned or browned.
- Remove the goldfish from the oven and allow them to fully cool on the baking sheet. They will crisp up as they cool.
- Store any leftover goldfish in an airtight container or zip-top bag for 3-4 days. I like to refrigerate any leftovers to preserve freshness.
Leave a Comment