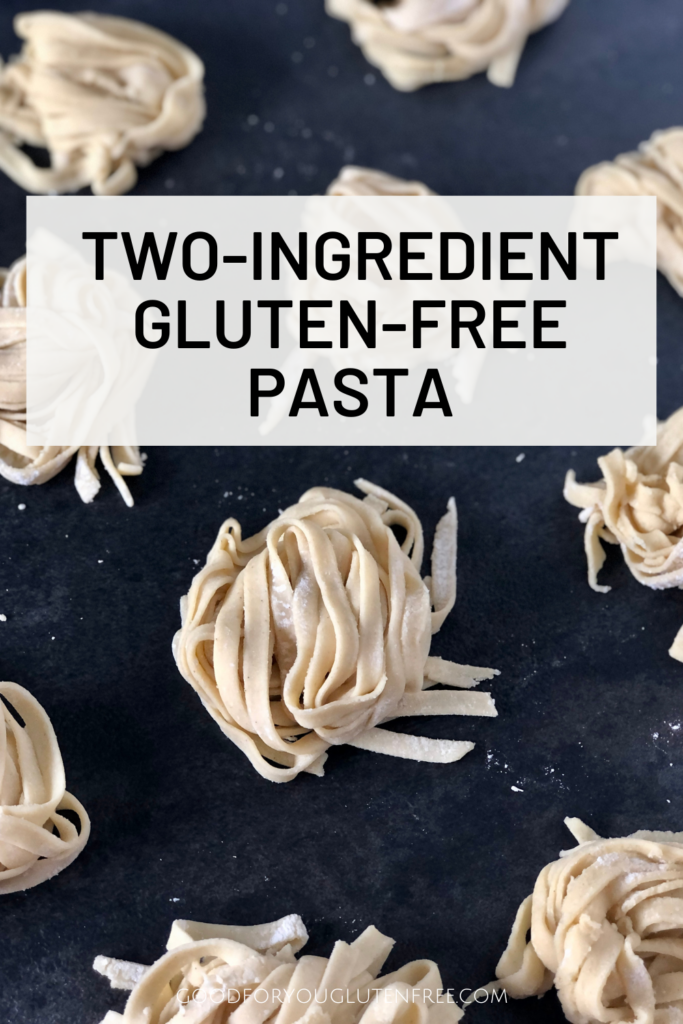
Making homemade gluten-free pasta with two ingredients takes only a few minutes to do and tastes like you spent all day cooking. This pasta has the perfect texture – a texture that you likely miss and crave since you started eating gluten-free. This post contains affiliate links. Please read my disclosures.
Chances are you miss the taste and texture of pasta since you gave up gluten, a protein found in wheat, rye, barley, and sometimes oats. Pasta just isn’t the same without gluten.
Whenever I feel sad about pasta, I bust out my amazing pasta machine and make homemade gluten-free pasta. It tastes so good and makes me feel normal again.
You might think making homemade pasta is hard to do, but all you need is two simple ingredients: gluten-free flour and eggs. The process takes about 20-30 minutes to create beautiful homemade pasta dough.
And once you get more comfortable rolling out the dough or putting it through your pasta machine, making homemade gluten-free pasta will become a weekly occurance!
Introducing the Pasta Machine!
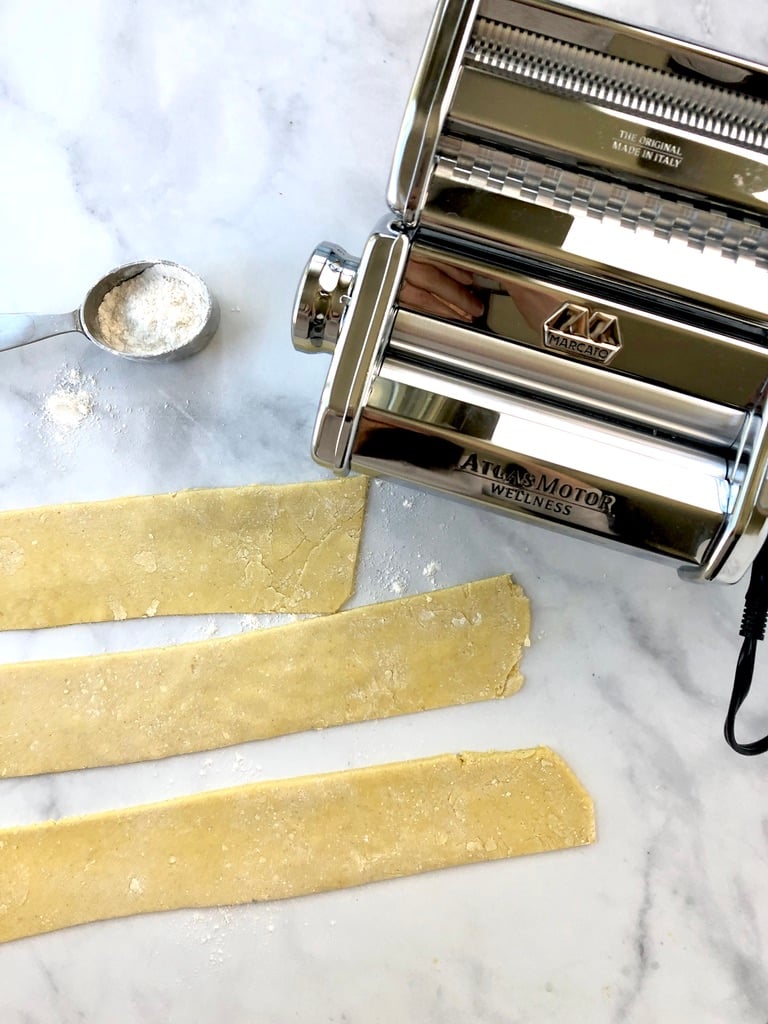
If you’re serious about making fresh, homemade gluten-free pasta, you’ll want to invest in a pasta machine. Be sure to make this YOUR dedicated gluten-free pasta machine so it doesn’t get contaminated by bits of gluten. Remember, a pasta machine can’t be shared for making regular and gluten-free pasta.
I own an electric Marcato Atlas Pasta Machine, and I love it. My mother-in-law bought it for me for my birthday the year after I was diagnosed with celiac disease. It’s the gift that keeps on giving!
You can get a less-expensive manual pasta machine with a crank, but it will be harder to work with, especially given that gluten-free pasta cracks easily. My pasta machine has a motor that lets me gently glide the pasta sheets through the machine with little effort or breakage.
You don’t have to own a pasta machine to make homemade gluten-free pasta, though. If you own a Kitchenaid Standing Mixer, you can purchase the pasta attachment and use that to cut the pasta into beautiful strands.
And you can even cut the pasta into strands by hand with a knife or pizza cutter. The strips may not be as thin or even as they would be if you used a pasta machine, but it’ll still work.
Ingredients For My 2-Ingredient Pasta
It’s hard to believe that this recipe requires only two ingredients, but all you need is three large eggs + 200 grams of a 1-to-1 gluten-free flour blend.
I use Bob’s Red Mill 1-to-1 Gluten-Free Flour blend, which always works well. Others have made this recipe using King Arthur Measure-for-Measure Gluten-Free Flour and Cup 4 Cup All Purpose Gluten-Free Flour. Your gluten-free flour blend should include xanthan gum; if not, add one teaspoon of it.
Making Gluten-Free Pasta
On a floured surface (I use a Silpat mat), add the gluten-free flour and create a well in the center of the flour. Add the eggs to the well.
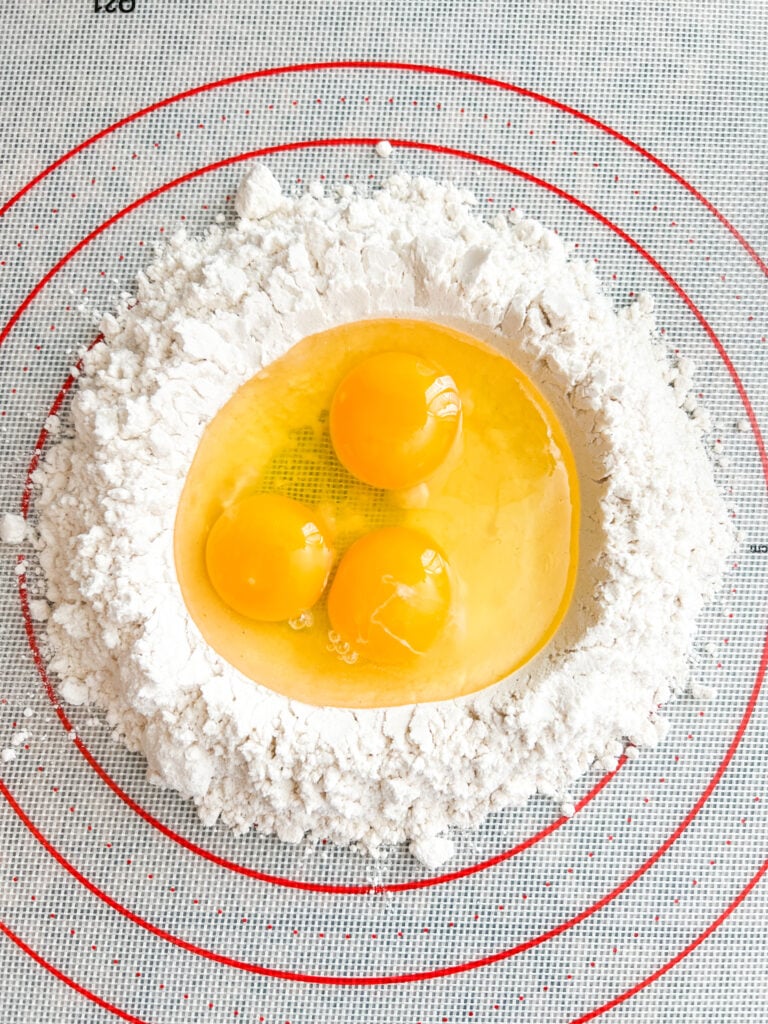
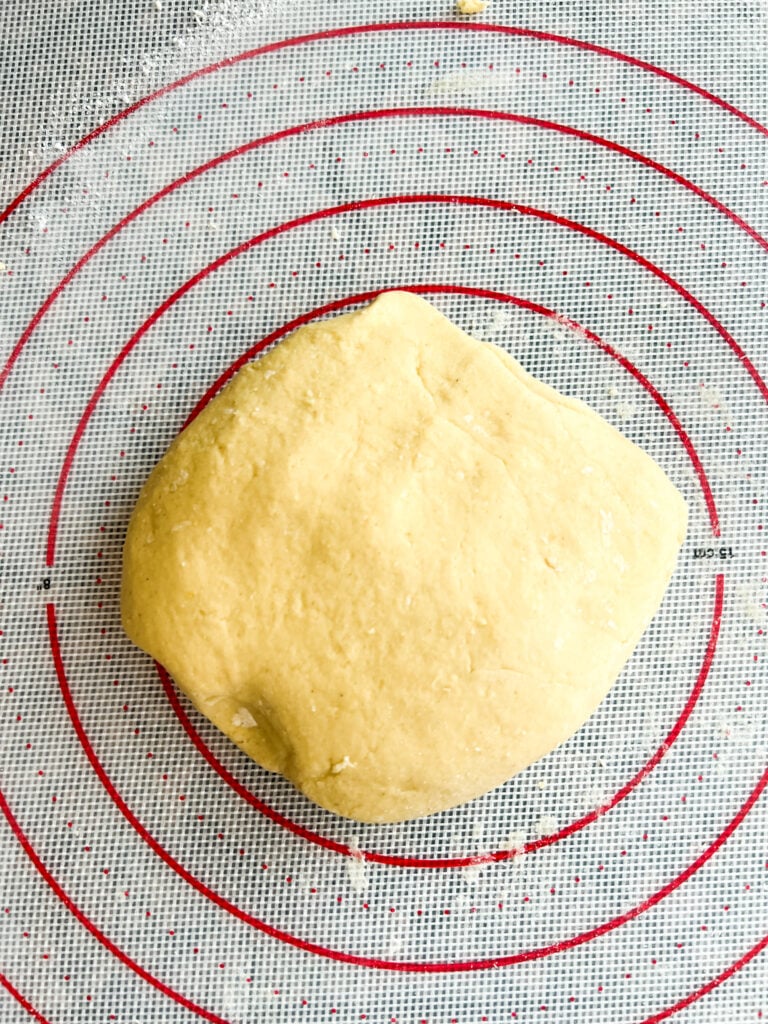
Next, use a fork to incorporate the flour bit by bit as you scramble the eggs. Once the dough comes together, use your hands to mix the dough and form it into a sticky dough ball.
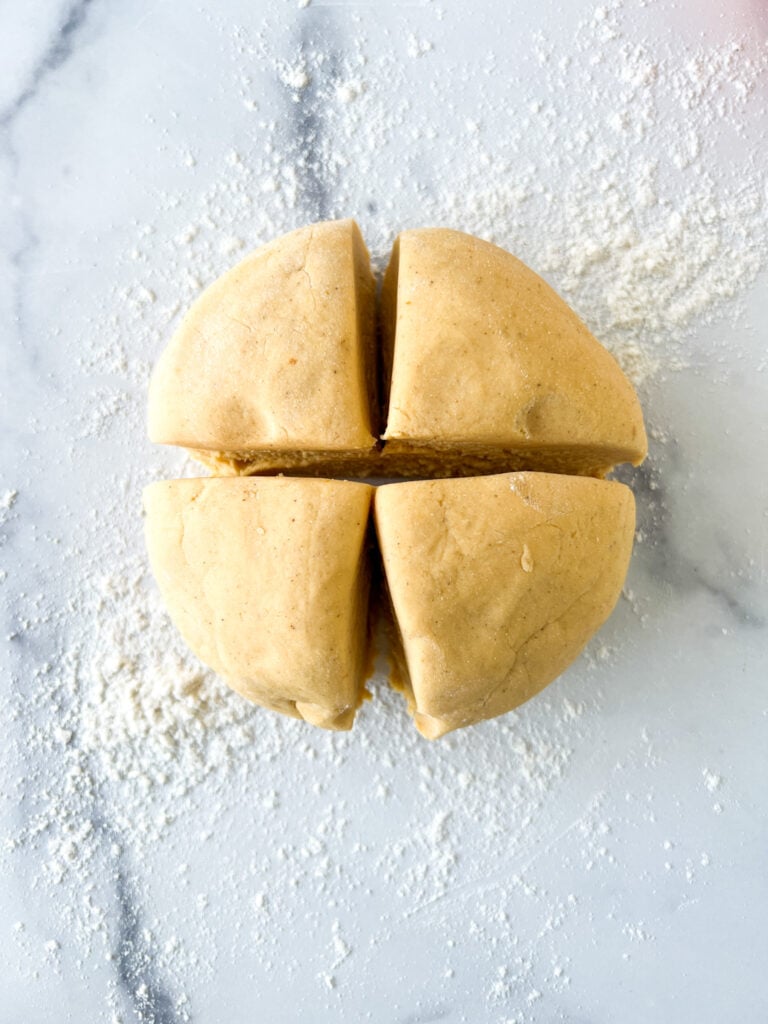
Divide the dough ball into four sections to make it easier to work with. Roll out each of the four sections into long strips using a rolling pin. This will make it thin enough to run through the pasta machine successfully.
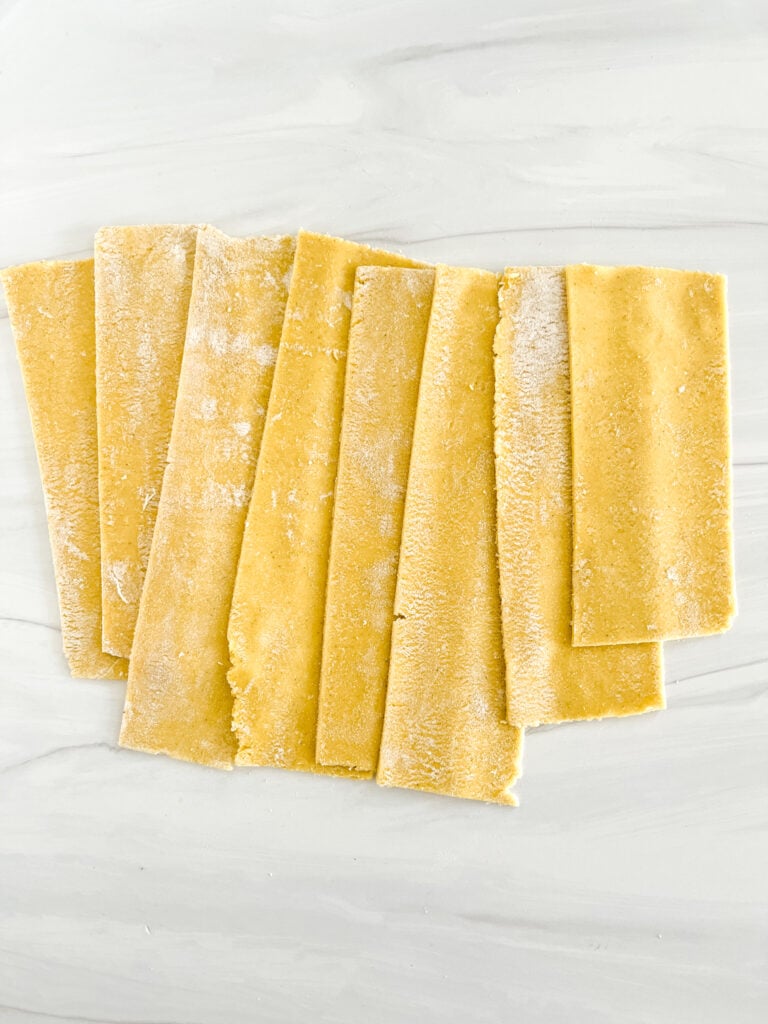
Feed each pasta sheet through the pasta machine twice, first on the #1 setting and then on the #2 setting, to get the sheets as thin as possible.
To make the dough easier to work with, I recommend cutting the sheet in half before running it through the pasta machine for round #2.
Cut off any frayed edges so the pasta sheets. Removing the frayed edges from the pasta sheets will ensure the pasta strands come out even and beautiful.
Feed each sheet through the pasta machine to cut it into the desired strands.
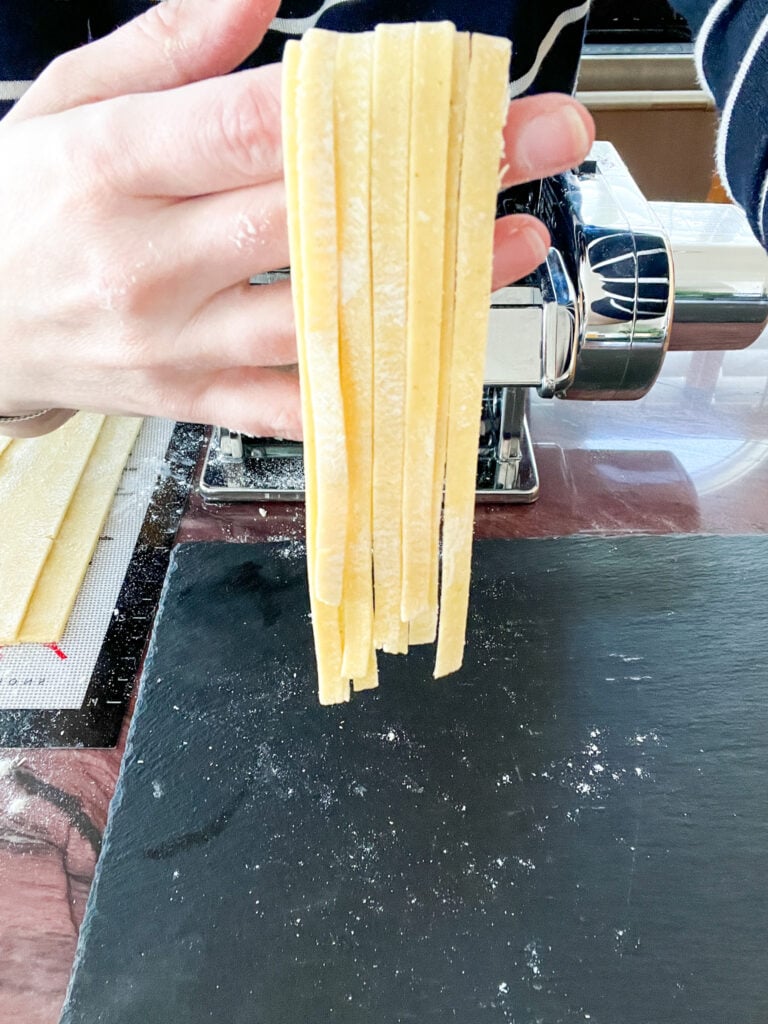
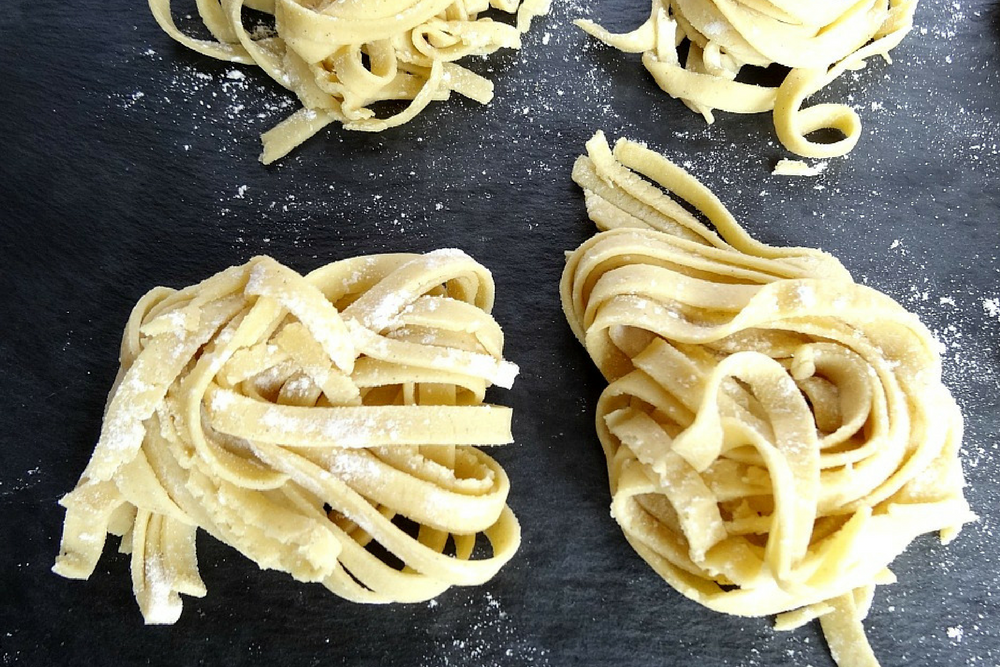
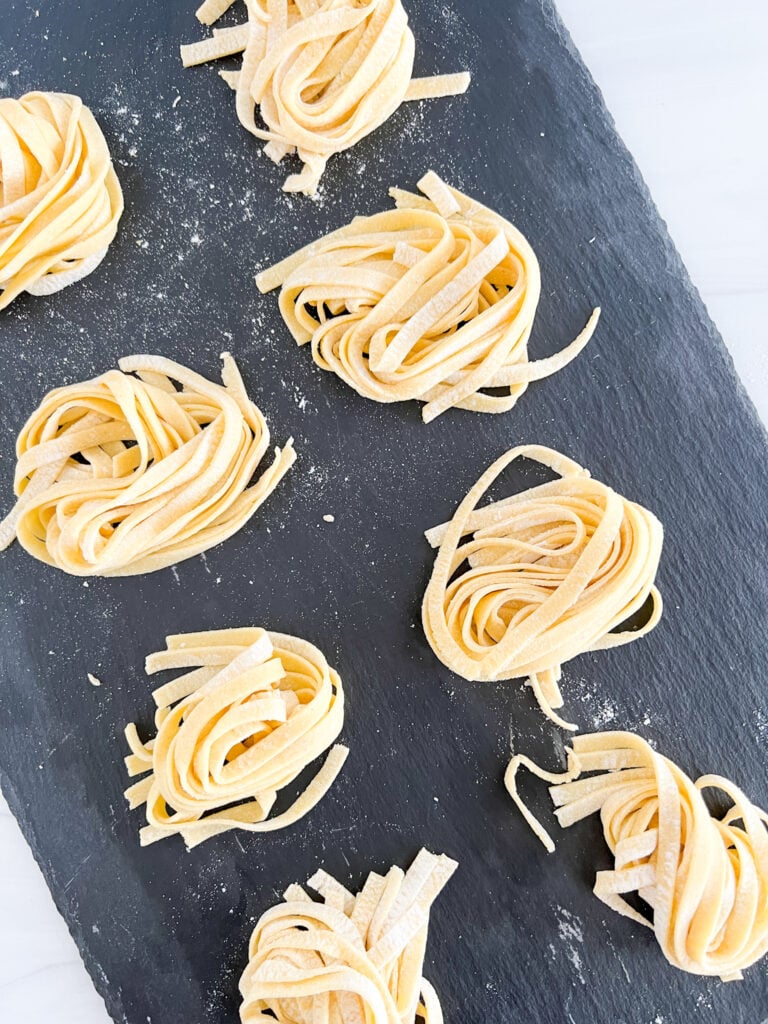
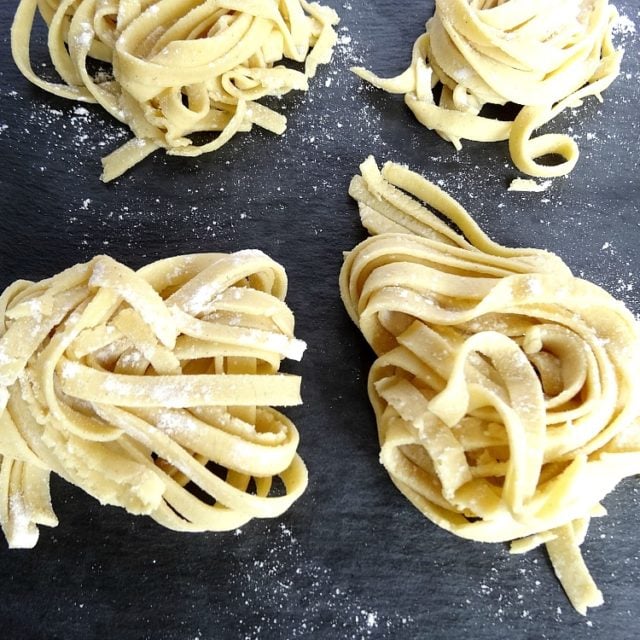
Place nests of the cut pasta on a floured tray until you’re ready to cook the whole batch.
Bring a large pot of salted water to a boil and add the pasta. Be sure to separate the pasta before putting it into the water so you don’t wind up with clumps.
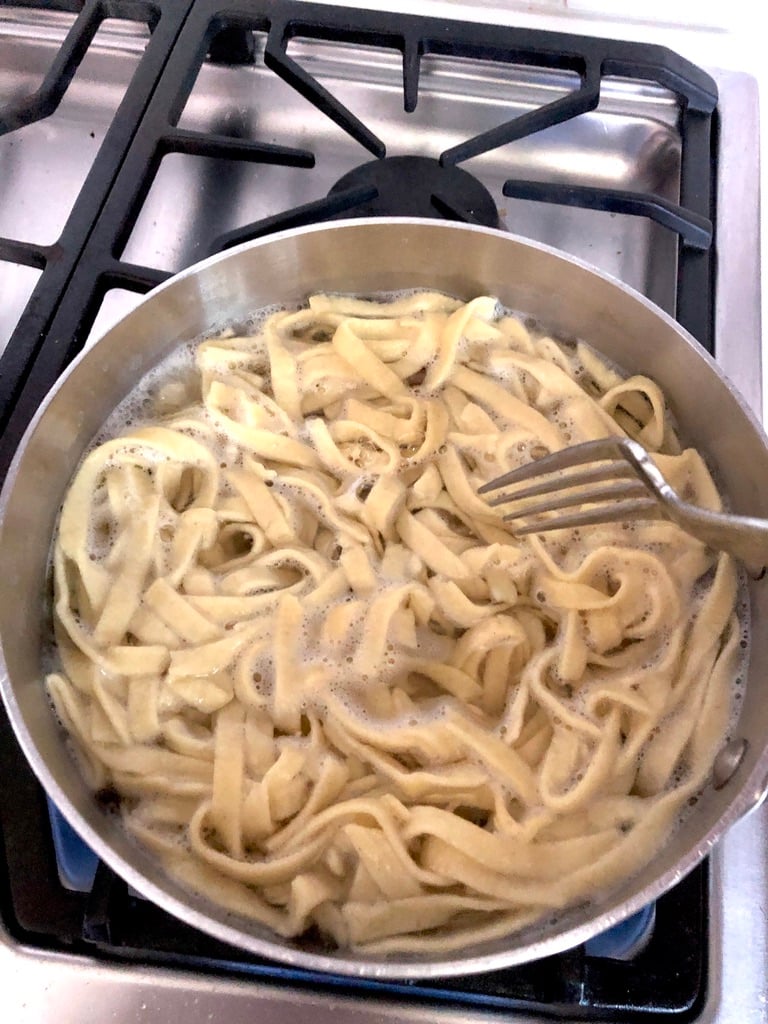
Boil the pasta for 1-2 minutes, then drain and serve. The noodles cook quickly, so watch them carefully.
How Do They Taste?
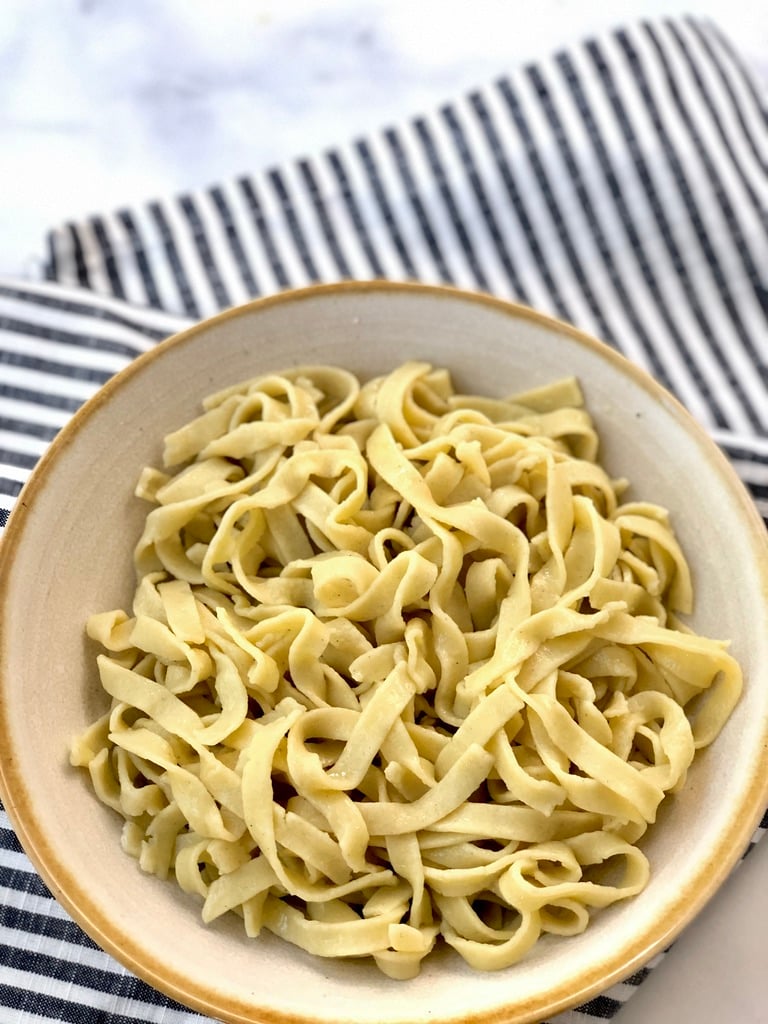
The pasta is chewy and doughy, offering that gluten-y texture you miss when you’re on a gluten-free diet. It tastes like homemade pasta and tastes as good as any pasta, even pasta made with gluten.
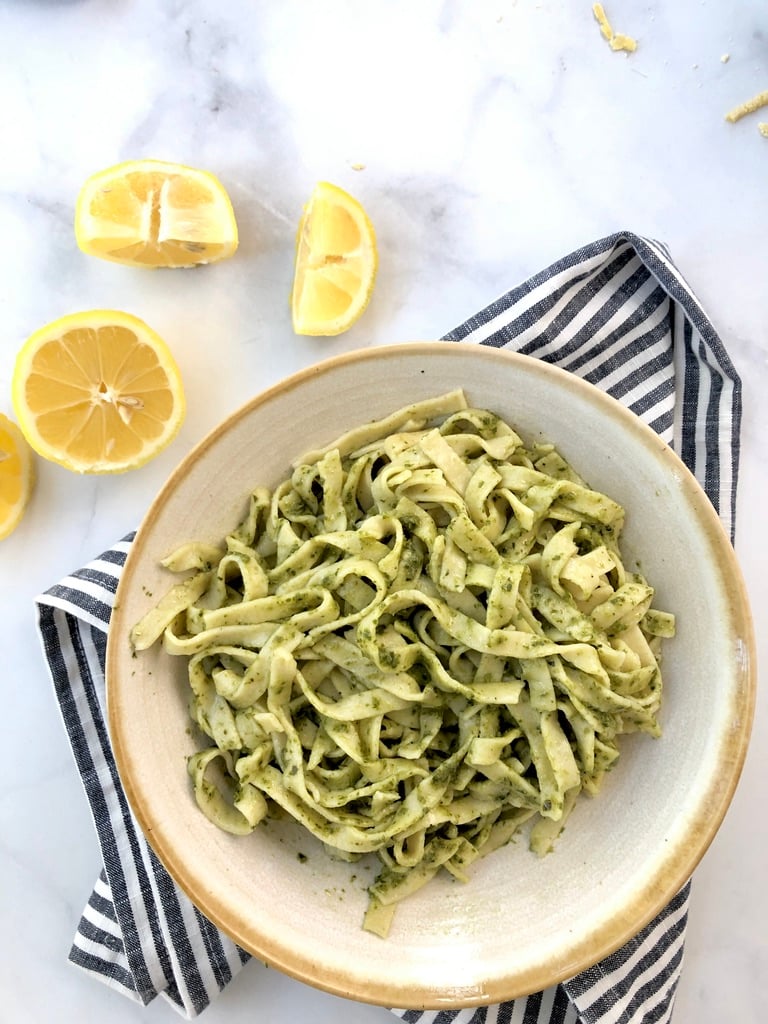
I think these homemade gluten-free pasta noodles taste fabulous when topped with a bit of olive oil and salt.
You could also top them with your favorite jarred or homemade marinara sauce, pesto sauce, or a garlic-butter sauce like the one I used to cover my homemade gnocchi.
Other Ways to Use Two-Ingredient Gluten-Free Pasta Dough
This from-scratch pasta dough can be used to create a variety of gluten-free foods.
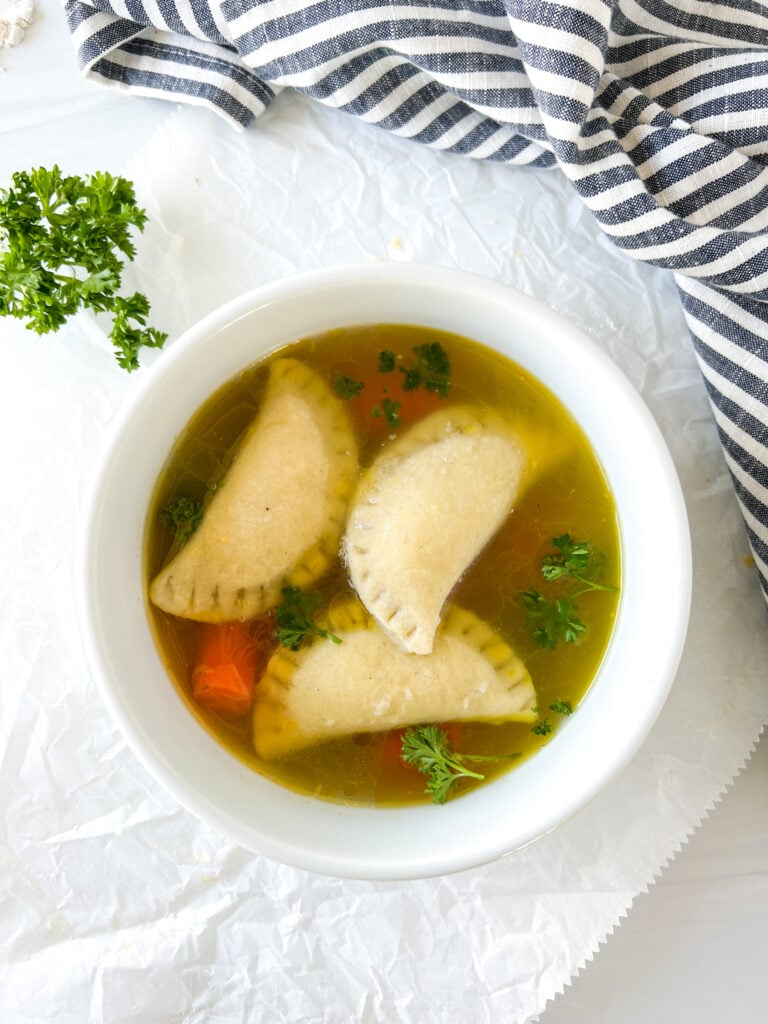
Specifically, I used it to create gluten-free pumpkin ravioli and my homemade gluten-free kreplach (Jewish dumplings).
You could also use it to make lasagna, perogies, dumplings, and any dish that calls for pasta sheets or wonton wrappers.

Additional Recipes
You might enjoy these recipes, too:
- Gluten-Free Pumpkin Ravioli: I love using my two-ingredient gluten-free pasta dough to make these delicious pumpkin ravioli. Don’t like pumpkin? Add any filling you desire.
- Gluten-Free Kreplach: Kreplach are meat-filled Jewish dumplings similar to wontons or perogies.
- Five Ingredient Gluten-Free Bagels: This recipe will have you reaching for the smear in no time!
- Gluten-Free Egg Noodles from Scratch: A slight variant on this recipe if you’re craving egg
- noodles.
- Slow Cooker Turkey Meatballs: These meatballs taste great over your homemade pasta, or serve them over steamed spaghetti squash.
- Gluten-Free Pumpkin Gnocchi: If you like pasta, I have a feeling you’ll love these delicious potato-pasta dumplings too.
Two-Ingredient Gluten-Free Pasta Dough
Equipment
- Pasta machine
- Rolling pin
Ingredients
- 200 grams Bob’s Red Mill 1-to-1 Gluten-Free Baking Flour* + extra for rolling out the dough (200 grams is equivalent to ~1 1/4 cups + 2 Tbsp) – see notes
- 3 large eggs
Instructions
- Add the flour to a clean, well-floured surface (I use a Silpat mat). Create a small well in the center of the flour. Add the eggs to the well, then use your fork to scramble the eggs and incorporate a little bit of flour at a time. Once the dough becomes too stiff to mix with the fork, use your hands to work the dough together into a sticky ball. The gluten-free dough doesn't require kneading, so it's ready to go once the flour is fully incorporated into the eggs.
- Place the dough ball on a floured surface and cut it into four equal sections.
- Roll out each section into a long, thin, flat layer on a floured surface. It should resemble a lasagne sheet. To evenly flatten the sheets of dough, run each sheet through your pasta machine on Setting #1. Then, run each sheet through the pasta machine on Setting #2. If the sheets are too long to feed through the pasta machine without breaking, cut them in half before running them through the pasta machine on Setting #2. Use a pizza cutter or butter knife to remove any frayed edges from the pasta.
- Add each sheet through the pasta machine again, this time on the pasta cutting setting of choice. Nest the strands of pasta on a lightly floured surface until you're ready to cook it.
- Add a pinch of salt to boiling water, then add the pasta strands to the water and cook for about 1-2 minutes. The pasta cooks fast, so watch it carefully.
- Drain the pasta and rinse with cold water (optional). Serve immediately with your favorite sauce or simply top with a little olive oil and sea salt.
Just made your gluten free pasta recipe! I was very nervous because one I tried before was a flop. This turned out perfect! Even my pasta loving daughter said it was very good. Will be using this recipe a lot. Thank you.
I haven’t tested it with egg substitute.
Can you use egg substitute? My soninlaw is allergic to eggs😟
99% of 1-to-1 flour blends have xanthan gum. How is that deceiving?
Sorry, this recipe is a little deceptive. Searching for a recipe without Xanthan Gum and this comes up as only two ingredients, but you only mention at the end that this is assuming your flour blend already has the gum in it…
I love hearing this! Enjoy!!
I am shocked! These came out perfect and were so simple! I used Cup 4 Cup blend and a rolling pin on lightly floured Silpat and cut in thin strips with a multi-wheel cutter about the size of a dry wide egg noodle. Added to a pot of seasoned chicken broth to make Chicken and Noodles. Because they were a bit thicker, I boiled about 12 minutes. They were perfect! I expected they would turn to mush, but didn’t and even thickened the broth like a real noodle. No more pricey disappointing GF noodles for me ever again! Thank you!
I have not but I think cassava flour can work. I haven’t tried it though.
Have you tried this recipe using paleo gluten free flour? I originally saved this recipe thinking that’s what it called for. Anyone try this using paleo gf flour (includes almond, coconut and tapioca flours)?
Great question. Fresh pasta would not need to be preboiled. I haven’t tried it in lasagne yet. Let me know how it goes.
When you make this for lasagna, do you boil the pasta sheets before assembling the lasagna?
No. You can roll it thin on floured parchment paper, then cut into strips with a pizza cutter or knife.
Do you have to use a pasta maker?
Yes it would work but I also have a ravioli recipe on my site. Good luck!
Can this dough be used for fresh ravioli as well? My husband was just diagnosed with celiac. Now I am an Italian on a mission…
This looks incredible! I can’t wait to give it a try!
I’m not sure. But if you try please let us know.
Could you add dried/powdered ingredients to the pasta, like spinach or such, without harming the already delicate balance? If so, what would be the best way?
Yes. I actually make them sheets and then cut them.
I can’t wait to try this recipe! Would this mixture work for lasagna sheets too? Thanks
I just made this last night and it was so quick and easy to make and tasted real good too! I’m in the process of trying to go gluten free(it’s so hard) because someone told me since they’ve gone gluten free they have had no migraines so I figured it’s worth a try especially since I just recently had 10 migraines within a two week span! Thank you so much for this recipe! Even my boyfriend really liked it!!!
The measurements are in the recipe card at the bottom.
Sounds great but it never says how much flower unless I missed it
I haven’t tried it. Let me know if you do.
I have an egg allergy. Can I use something like a chia egg substitute?
It’s for 1 portion. This recipe makes 2 generous portions or 3-4 side portions.
Are the nutritional values for the full recipe or just one portion please
You could try it without. Please share if you do.
Question. Do I have to use xanthen gum? Doesn’t egg help as a binder?
Definitely keep refrigerated – raw dough and cooked leftovers. If it lasts it’ll taste good for a few days. Just give it a quick zap in the microwave.
Hi! Sorry if I missed this— do you know how long will this keep? Is it best to keep refrigerated if raw?
I have not. The dough is very sensitive. You may want to add a tad of water to make it work best for ravioli. Let me know if it works for you.
Have you tried making raviolis with this recipe?
Awesome!!!!!
Yes just don’t let the noodles sit in hot water or they’ll go up. Add the broth as you serve.
Thanks for the recipe and the weight measurement for the flour. Weight measuring for gluten-free flour is so much more accurate. Dough was the right consistency the first time making it. Thanks again!
Will this recipe work if I add it to homemade chicken soup at the last few minutes of cooking?
We usually eat it up but it will reheat nicely the next day. It’s best served immediately.
Thanks for sharing! Does it keep long?
This looks so good! What a great way to get gf noodles! It would be fun to make with kids!
What amazing feedback. Thank you Laurie!!
This was the best gf pasta I have ever had! Thank you so much for the quick and easy recipe!
I haven’t tried drying it bc we eat it right away. You could always try.
Dear Jenny
I read the recipe of gluten free pasta.Can you freeze it & use it later.And if yes how will you freeze.Thank you for your time
Grace.
You could try it! I haven’t tried it yet with the APF
My daughter was recently diagnosed with an allergy to wheat and rice. The Bob’s Red Mill 1:1 has rice flour but his All Purpose GF doesn’t. Do you have suggestions about using that? Thank you!
I am SO excited to try this recipe out – I might actually finally invest in that pasta machine I’ve been eyeing off! I hate the fact that being gluten free restricts us from so much home-cooking, and home-made things like pasta. But if this recipe is as good as it looks, I’m glad that will be able to change! xx
I haven’t tried but so let us know if it works!
can I use black bean flour?
Regular pasta can be frozen after it has been cut so I see no reason why this can’t. We use to dry regular pasta and store it on a shelf even with eggs in it but there was not as much problem with food recalls because of contamination so I would not do that now. The frozen is better. More like fresh. You put the pasta into little serving size piles and freeze it then put it in a freezer bag to store. Bring it to room temperature on the kitchen counter before you cook it or use the microwave.
I’m excited for you to try it. Enjoy!!
Thanks so much for the easy pasta recipe. Can’t wait to try it. I’m going to check if Bob’s One to One has zantham gum so I can add it to the one-for-one that I’ve been using. I’m not home, now, and i can’t remember the name of mine.
You can mix with a fork and then knead by hand. Put your flour on a clean surface, carve a hole in the middle of the flour to hold your eggs, then incorporate the flour into the eggs little by little with a fork.
What would work instead of a food processor?
I recently tried the Banza noodles because I’m having issues with my liver and I want to be prepared in case I have to go gluten free… I found them ok, they have a little bit of a softer texture to them but the next day I couldn’t taste the difference between them and regular pasta, so if I have to I can handle it!
I’m not sure because I haven’t frozen the dough before – but I have a feeling it would be just fine. It might work best if you cut the dough into shape before freezing.
Can the dough be frozen? If so how would it be stored and thawed?
Yay glad to hear!!
Made this today. Used Kitchen aid w/dough hook. This dough came out awesome! Simply cut the ball of dough into walnut size pieces to feed into auger to produce rigatoni. I can’t believe how great this turned out! Anxious to taste I cooked a few and was extremely satisfied with taste and texture. Thanks so much for this recipe.
It may have need a little less flour? Maybe your dough was dry? So many things could have affected it but don’t give up! I also really like Bobs Red Mill 1-to-1 flour so try it with that.
I used King Arthur’s Gluten Free flour. It would not stick together. I have never made homemade pasta before so wasn’t sure about anything. Proofed the dough about a half hour but it still didn’t stay together through the pasta machine. Looked like shredded rags. I finally just jammed it through the pasta cutter and it was more like dumplings than pasta. I sure hope I get better at this because last night’s dinner wasn’t worth all the work. =/
I haven’t but I think it would work.
Have you made ravioli with this recipe? Do you think it would hold together?
Oh no! You may have to add more eggs or water. I use Bobs 1-to-1 and it worked well. Keep trying!
I tried it with the cup for cup and it kept falling apart. That chef made it look so easy… 🙁
Thank you for sharing Odette. Glad it worked so well for you!!
I have tried this pasta recipe. I even doubled the recipe for the flour and 5 eggs were perfect! So easy to make with the pasta machine! The family enjoyed it very much with my own sauce and if I had not told then gluten free they would not have guessed! Now I can make my own gluten free pasta! Yeah!!!!
We don’t get “Bob’s” flour here. Is it a regular gf baking flour with which ingredients? Some are more rice flour, some with Guar Gum etc. I will try a local gf baking flour and cross my fingers!
Hi Lisa – I’m not sure if it will keep if you dry it. I make and cook it right away.
is it possible to dry this pasta? if so how long will it keep?
I actually put all the flour and eggs in the food processor at once and let it work it’s magic. So 1 Cup + 1/4 Cup + 2 TBSP of flour in the food processor with the eggs, and then you’ll want some extra flour on top of that for rolling out the dough (it will be a little sticky) so just a tad more will make the dough wet, but not so sticky that you can’t roll it out. I hope that helps. I will update the recipe with these instructions, Sandy.
I use large eggs. I will update the recipe so thank you. Even large eggs are slightly different in size, so you’ll have to work to get the texture right. If it’s a little too wet, add a bit more flour.
What size of eggs? Better yet, how did they measure? You are very specific with the flour: “plus two tablespoons” and I would like a specific measurement for the eggs (since I always use jumbo)!
I live your recipes and your blog! Debbie
The recipe calls for 1 Cup + 1/4 Cup + 2 TBSP of flour, but nowhere in the instructions does it say the breakdown. Do you start out with the 1 cup, then add more or is the 1/4 cup for the rolling out?