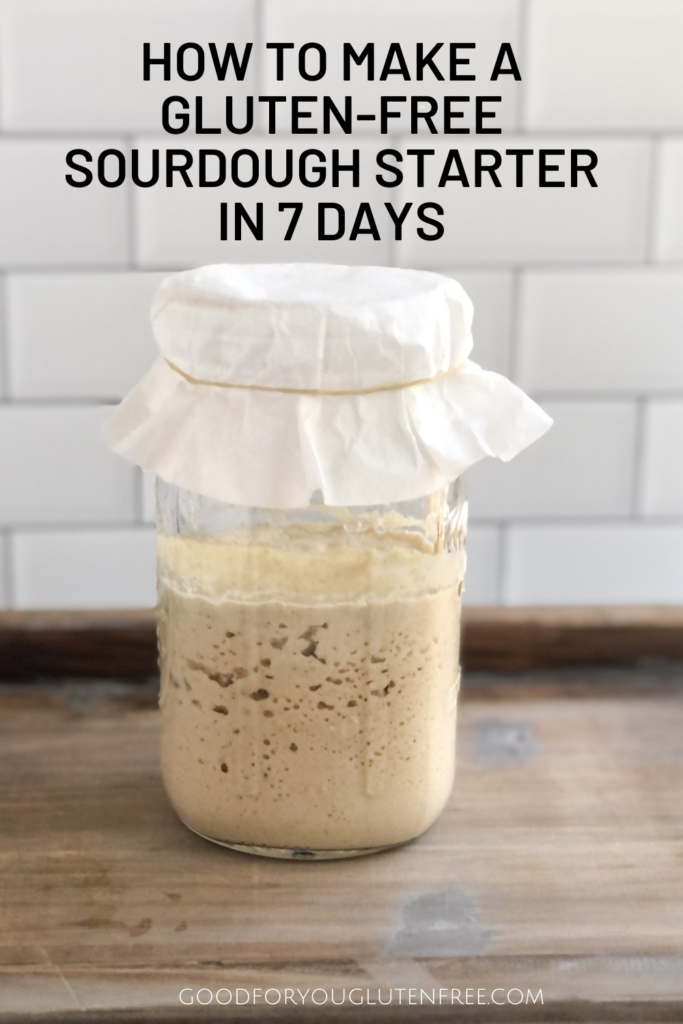
Curious about how to make a gluten-free sourdough starter? Miss that tangy sourdough bread taste now that you can’t eat gluten? I’ll show you how to make a traditional gluten-free sourdough starter in seven days so you’re ready to make your own gluten-free sourdough bread in no time! This post contains affiliate links. Please see my disclosures.
I’ve been having all sorts of cravings for bread these days… and I figured there was no time like the present to perfect my gluten-free bread-making skills than now.
I love the smell of freshly baked bread and the taste of sourdough bread; it’s an olfactory experience I can never get enough of.
On top of that, sourdough bread is just better for you. The wild yeast breaks down the proteins and carbohydrates in the bread, making it more easily digestible.
Remember, sourdough bread made with wheat flour is not gluten-free. Yes, the fermentation process will break down the gluten proteins but it does not fully eliminate them. You’ve been warned.
For the past few months, I’ve been working on creating a gluten-free sourdough starter and then using that starter in a slew of recipes.
Today, I want to share everything I’ve learned about making a homemade gluten-free sourdough starter so you can get busy making that delicious sourdough bread, too.
Tip! If you’re looking to buy gluten-free sourdough bread and don’t want to fuss with making it yourself, I highly recommend ordering fresh gluten-free sourdough from this company – you won’t regret it!
Beginner’s Guide to Making a Sourdough Starter
Making a gluten-free sourdough starter from scratch is simple, but it takes a little work (like babysitting!).
Give yourself at least a week to make your starter before making bread, although ideally, you’ll allow your sourdough starter to develop longer. The older your sourdough starter, the more tangy and flavorful it will be. Some sourdough starters have been passed on from generation to generation, giving a sourdough taste like no other.
While making a homemade sourdough starter is an exercise in patience, I promise you the taste of fresh gluten-free sourdough bread is well worth the effort and wait.
You’ll need a few simple supplies to make your starter.
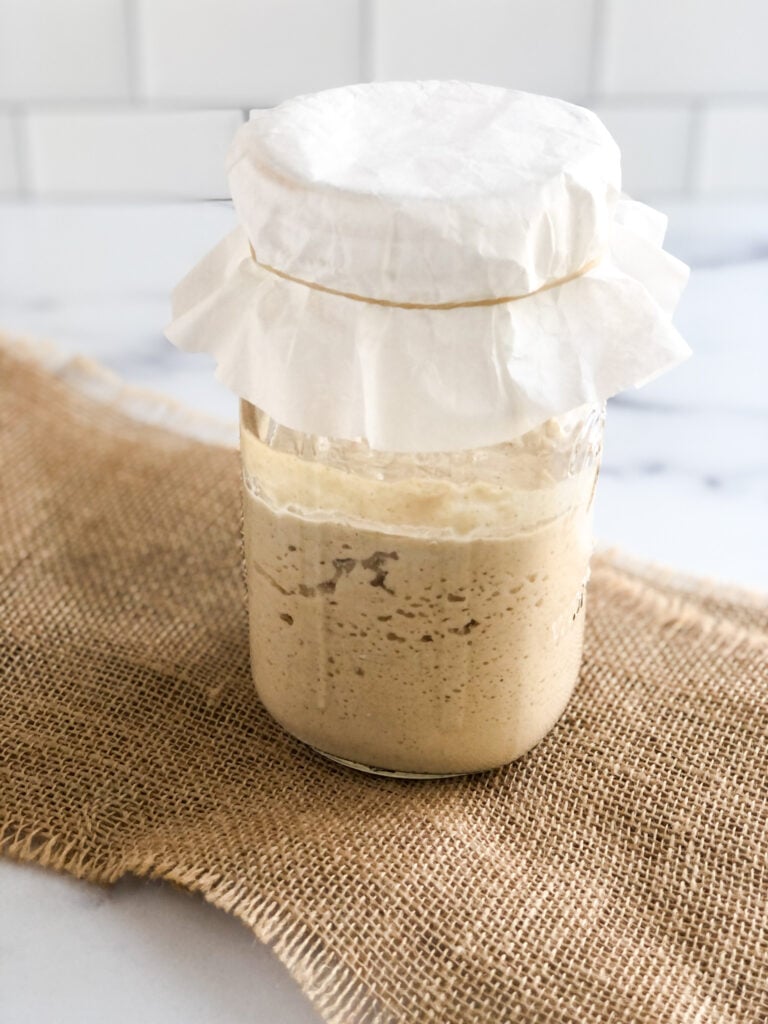
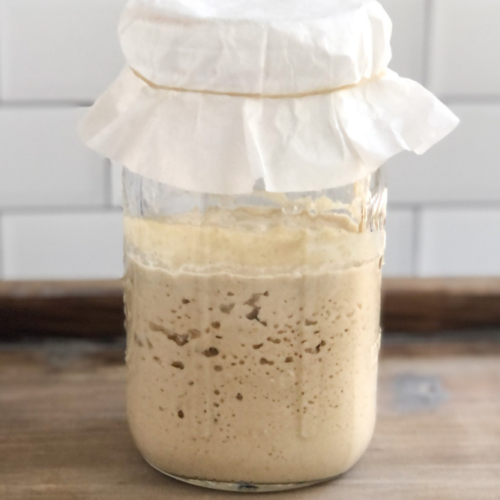
Mason jar: I start with a small pint-sized mason jar to hold my starter, but as the starter grows, it will need to be transferred into a quart-sized mason jar. Do not use metal. Use a wide-mouth mason jar if possible.
Gluten-free flour: You can use any gluten-free flour to create your starter. I typically use a brown rice flour or sorghum flour. Use whatever you have (or whatever you want to get rid of). The flour is tasteless.
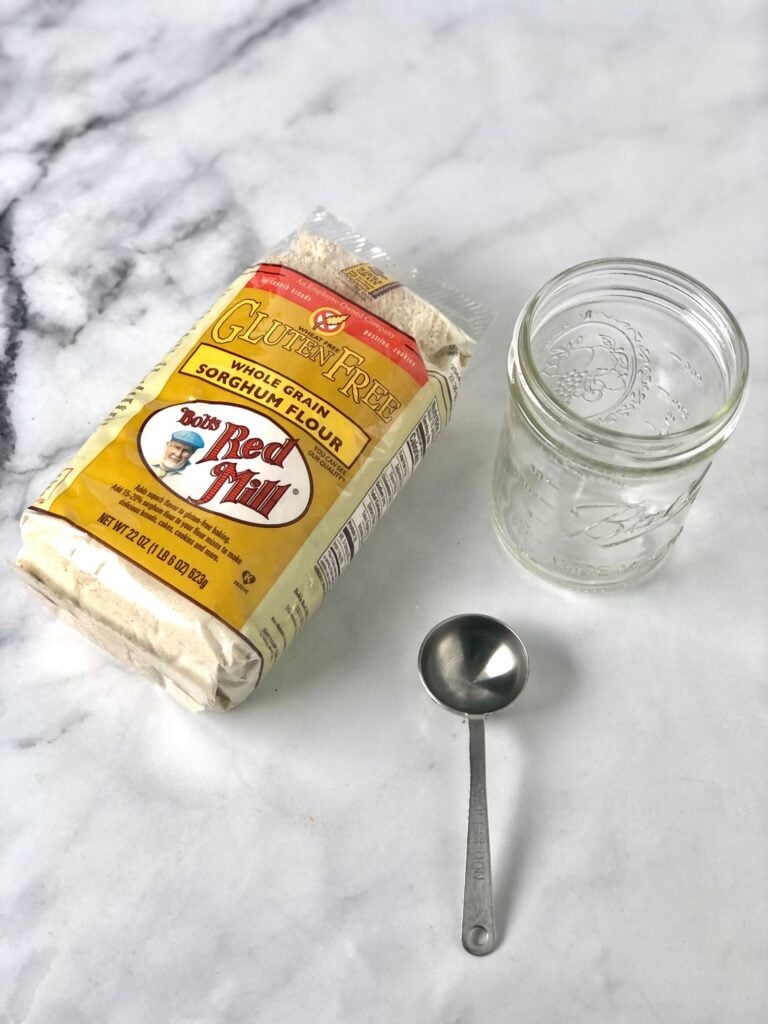
Filtered water: I use filtered water from my tap.
Coffee filters: While you could use a light towel or even plastic wrap to cover your starter, I prefer to cover it with a coffee filter. The coffee filter allows the air to circulate, but it won’t let any particles into the jar that could taint your sourdough starter. You’ll need a rubber band to secure the filter in place.
Warming mat (optional): I know most sourdough starter recipes do not call for a warming mat, but let me tell you, my house is so cold even in the summer. It’s typically 67-69º F in my house year-round. This is just too cold for the sourdough to do its thing. I use a warming mat when making kombucha or to help my gluten-free challah rise. It’s magic.
Day #1:
Add to your clean mason jar the following ingredients:
- 2 tbsp flour of brown rice or sorghum flour
- 2 tbsp filtered tap water
Mix the flour and water together to make a thick but stirrable slurry.
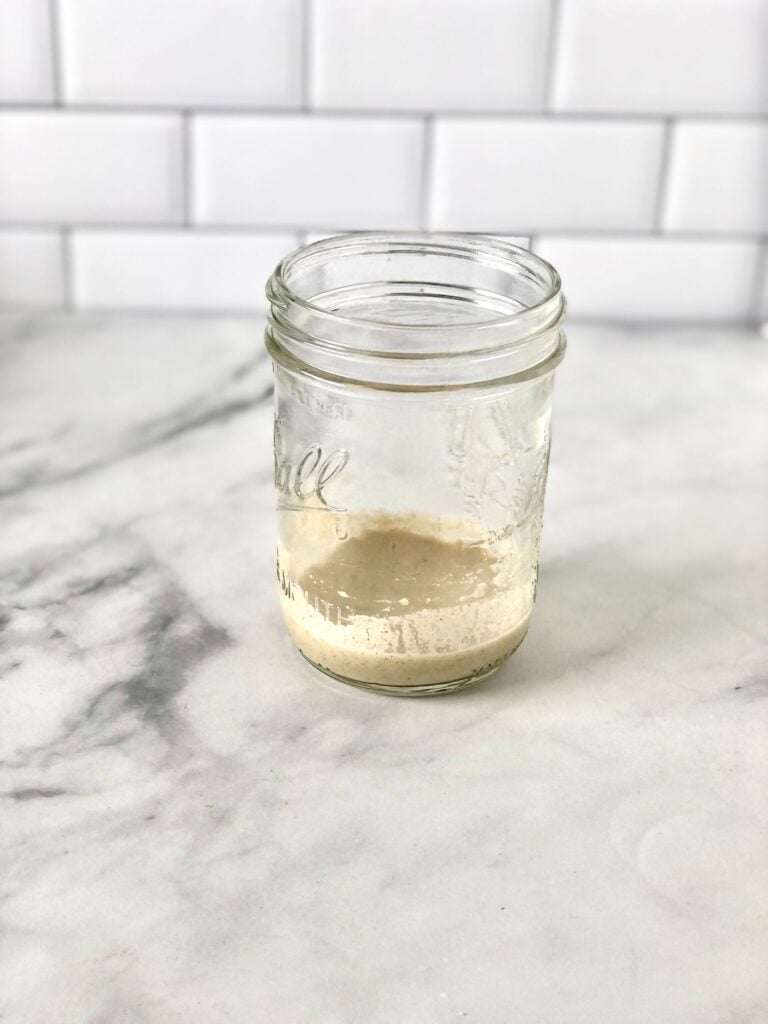
Cover the jar with a coffee filter, secure it with a rubber band, and place the jar in a warm place in your house (or use the warming mat I talked about earlier).
Day #2:
You’ll want to feed your starter twice per day. I typically feed it in the morning when I wake up and again before bed.
To feed it, discard half of the starter from the jar. Then add 2 tablespoons of water and 2 tablespoons of flour. Mix it together, scrape down the sides, then cover it and allow it to do its magic on your countertop (at room temperature or on the warming mat).
You’re creating an atmosphere that is wet and moist, the exact conditions where yeast and bacteria thrive. Feeding it allows the yeast and bacteria to proliferate.
Tip! Some people do not discard half of the starter. However, discarding allows the yeast to feed on new flour without as much “competition,” helping to develop your starter more quickly. I usually discard the starter for the first week, but then don’t discard any starter after that.
Day #3-6:
Continue to feed the starter twice daily, first discarding half of the starter and then adding 2 tablespoons of flour and water to the mix. Mix it well, scrape down the sides, and cover it until its next feeding.
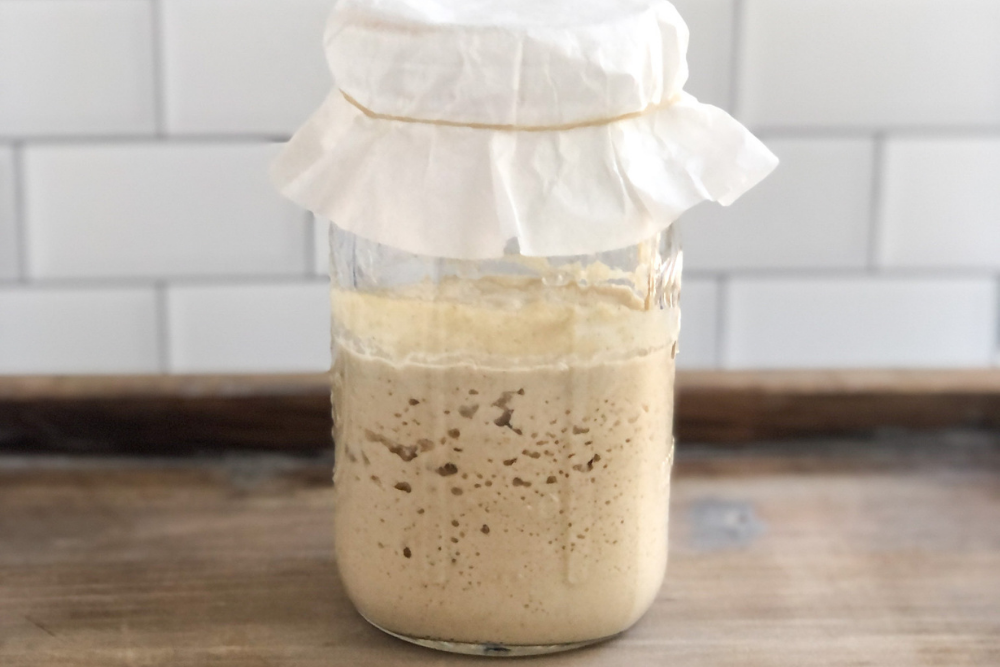
By this time, the starter will puff up and have a bubbly head or bubbles throughout. It will also start to smell sour. This is good. Your starter is developing more and more each day and officially transforming into yeast.
As you continue to feed the starter, you’ll see it rise (almost double in size) and then fall after feeding it. This is normal and good.

Day #7:
By day seven, the starter should be bubbly and airy. This means you’re almost ready to bake with it. Take a whiff. Do you smell that tangy, sour aroma? Can you hear it bubbling? It’s alive!
If your starter is not light and bubbly, continue to feed it for a few more days, and be sure to store it in a warm place. Yeast and bacteria work faster in warmer climates.
Is It Ready to Bake With?
You’ll know your sourdough starter is ready to use when it’s bubbly and has doubled in size.
When you’re ready to bake with the sourdough starter, remove the portion you need and use it. The yeast in the sourdough starter will work better if it’s been fed, so consider feeding the portion you need for your bread and then allowing it to sit at room temperature for a few hours before using it. This is especially important if your starter has been in the fridge. A room-temperature, well-fed starter will work faster and better.
When using your sourdough starter in lieu of yeast, the general rule-of-thumb swap goes as follows: 1 cup of sourdough starter equals 1 package of yeast.
However, you’ll want to subtract about 1/2 cup of water and 3/4 cup of flour from your bread recipe to compensate for the extra water and flour in your sourdough starter. Make sense?
It’s always easier to work from a gluten-free sourdough bread recipe (like mine), or I sometimes use pre-made bread mixes and just use 1 cup of start in lieu of the yeast. It works really well and gives those boxed bread mixes a tangy, sourdough taste.
Storing Your Starter
If you plan on baking with your sourdough starter often, you can store it at room temperature; just make sure to feed it once daily to maintain it. You can continue discarding half of it, then add more flour and water to the mix. Or, honestly, after my starter is in good shape, I feed it once a day and don’t discard any of it.
Any discarded starter from here on out can be used in pancakes, muffins, and other fun quick breads, which I will experiment with more in the coming months and years.
If you don’t plan to use your sourdough starter for a while, store it in the fridge. The cool environment will slow down the ferment and allow you to keep your sourdough starter happy for a long while.
If you see a cloudy liquid forming on top of your starter (called a “hooch”), it means your starter is hungry. Stir your starter and feed it!
When storing it in the fridge, be sure to feed it once weekly with equal amounts of water and flour and discard some of it as you go along. Have a set night marked on your calendar to feed it. (Now you can see why a sourdough starter passed down through generations is such a prize. You have to feed your starter once weekly to keep it alive.)
When you’re ready to bake with your sourdough starter again, remove it from the fridge 12-24 hours ahead of time. Mix it and feed it as you would if you were storing your starter at room temperature (once per day). When it gets bubbly, it’s activated and ready to use to bake up those delicious gluten-free sourdough bread loaves!
Keep feeding your starter and allow it to grow as you need it. An active starter will quickly bubble and be more readily available than a beginner starter.
Troubleshooting
Your gluten-free sourdough starter is in jeopardy if any of the following occur:
Mold: If you see mold on or inside your starter, discard the starter. It has gone bad. I have seen mold on the sides of my jar but not on the starter. I transferred the starter to a clean jar, and all was good again.
Bad Smell: Your starter will have a sour, tangy aroma, but if it smells awful, it will probably taste awful.
Need it to Grow Faster: Feed your starter more often, and it will grow faster. Also, divide it into two jars to get more starter action and to prevent your jars from overflowing.
I’m still learning and will add to this post over time. But please leave your questions; I will try to respond, and we can learn together.
Ready to Bake Bread?
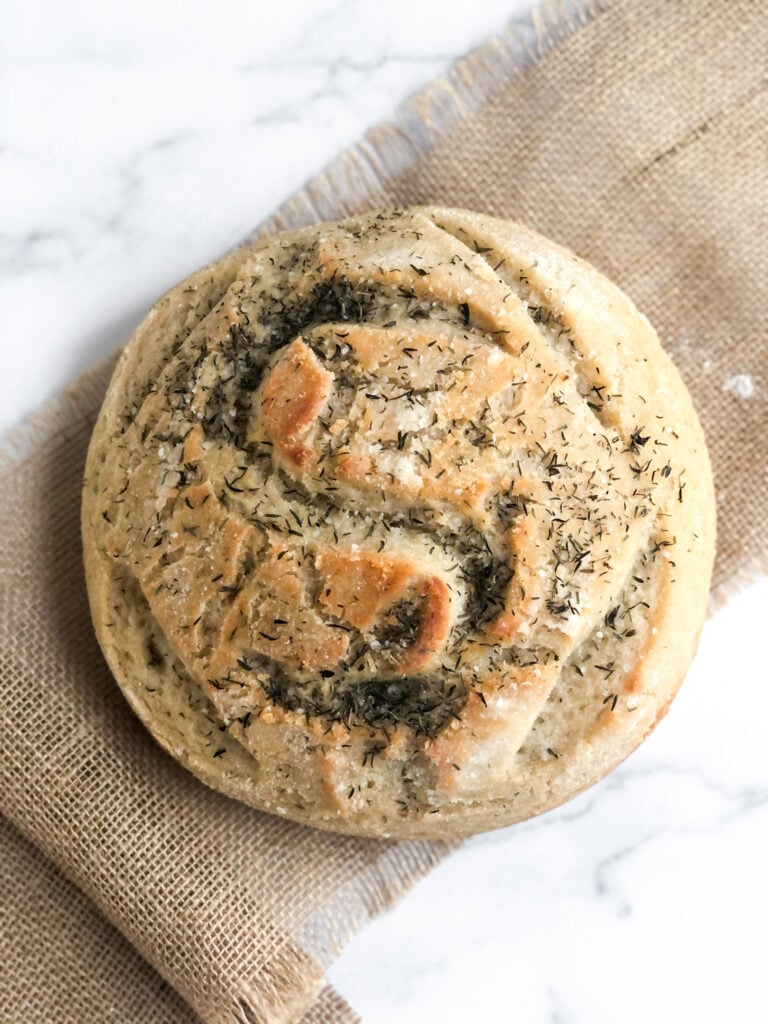
Take a look at my gluten-free sourdough bread recipe. It’s delicious, and the sourdough makes it light, airy and tangy. Get the recipe here.
Gluten-Free Sourdough Starter
Equipment
- 1 quart mason jar
- Coffee filter with rubber band
Ingredients
- 22 ounce bag of sorghum or brown rice flour
- filtered water
Instructions
- Day #1: Add to a clean mason jar 2 tbsp of flour of brown rice or sorghum flour and 2 tbsp of filtered tap water. Mix the flour and water together to make a thick but stirrable slurry. Cover the jar with a coffee filter and secure it with a rubber band and place the jar in a warm place in your house.
- Days #2-6: Feed your starter twice per day. I typically feed it in the morning when I wake up, and again before bed. To feed it, discard half of the starter from the jar. Add 2 tablespoons of water and 2 tablespoons of flour. Mix it together, scrape down the sides, then cover it and allow it to do its magic on your countertop at room temperature. As you continue to feed the starter, you'll see it rise (almost double in size) then fall after feeding it. This is normal and good.
- Day #7: By day seven, the starter should be bubbly and airy. This means you're almost ready to bake! Take a whiff. Do you smell that tangy, sour aroma? Can you hear it bubbling? If so, it's ready as it has fermented nicely. If not, continue to feed it twice daily for a few more days, and make sure you're storing it in a warm place so the yeast and bacteria can do their magic.
I thought it said at the top of the post you do not have to discard ? Can you clarify this
And can you use Bobs 1-1 GF Flour for this recipe?
How many grams of water and flour do I feed my starter for maintenance once in the fridge? I didn’t find that on your post. Thank you.
Not at all. It likes to be fed.
Is it bad (ruinous) if I fed it the evening of the first day I mixed it? I didn’t follow (the very clear) directions and fed it last night, then realized my error when I went to feed it this morning (day 2).
Thnk u Jenny Levine I appreciate u and the Information u share!
If GF flours are low protein to begin with, do u think this may be why they don’t seem as active as say, using a rye flour to feed a homemade starter?
Am wondering if GF flours are GMO or do they have to be labelled organic/non GMO specifically …Thnk u for your site!
From T.O.
It may have needed to be cooked longer if it was wet.
Hello – thanks for answering my previous question. It just needed a few more days. I made my first loaf. The taste was good but the loaf was huge (in circumference) and ‘heavy’ (almost tasted ‘wet’). Does this description give you any clues as to what I did wrong? Also, I’m feeding twice per day but I’m not getting more than a little over a cup of starter in just over a week….any tips?
Water on top means it’s hungry. It should be brewing. I would give it more time.
Are you still answering questions? I started mine with brown rice flour and today is day 6. The first 2 days it was bubbly and rising but since then it hasn’t grown at all. It smells sour and ‘yeasty’ but there are no bubbles. I’ve been discarding and feeding/water twice daily. The last two days there is a tiny bit of mirky water on the top before I stir, discard and then feed. What am I not doing right? (btw, I’ve been leaving it in my oven with only the light on just for a bit of warmth but have also tried leaving it on the counter)
Ok. Thanks! I’ll do that. Hopefully it’ll come back and I can use it!! I really want to try your sourdough bread!
Mix it well. Discard some of it. Add some new water and flour. Mix well. And see what happens. The water means it’s hungry, not dead. As long as there’s no mold you should be fine.
I think I killed my starter! When I get up in the morning, it’s watery. 😭it’s been 12 days now. I feed it, and it’s bubbles and smells like yeast. Then I got up yesterday and this morning and it’s watery. Did I kill it?? Is it time to use it or throw it away and start a new starter??!!
Keep feeding it daily. The longer the better. Or if refrigerating to maintain it, you’ll feed it less frequently as advised.
During the last 7 days I’ve only fed my starter once a day for 5 of those days. The other two days I fed it twice. I forget to fed it at night. But it’s bubbling and rising and smells like yeast. Do I need to keep feeding it a few more days still?
Yes, always discard when feeding it.
For starting it, every day, twice a day… you are discarding half of the starter every time you feed it right? So twice a day for discarding too, right? So in the morning, discard half and feed it, and then again at night discard half and feed it, right?
You should still discard when it’s in the fridge. The cold will slow down the fermentation so it doesn’t need to be fed as often.
If your starter is in the fridge and you don’t discard, How much do you feed your starter weekly? For some reason this part confuses me
Mold would take awhile to form. It could be that particles got into it, it wasn’t feed daily, or the ingredients were old. Try fresh flour and filtered water. And keep it covered with a coffee filter secured to the top of the jar with a rubber band.
Mine got moldy after a few days, I’m sad! Was it too warm? I did forget to stir and feed it a few times, is that the reason?
I leave it with the filter on top. But some people put a plastic cover on top to prevent it from drying out. If you leave the filter, check it and feed it every week to avoid dry out.
How do you store in your fridge with out it absorbing odors from other items in there?? Do you put the metal lid on at that time?? My logical brain is saying yes… but just want to make sure.
It should be a thick but mixable solution. Not runny. You may want to play with the ratios. You also may only need to discard 1 tbsp. Keep it lightly covered (with a coffee filter and rubber band is best) and in a warm place in your kitchen. Some ferments take longer than 1-2 weeks. Keep at it. Watch for bubbling on the sides and top.
It will last a few days but heat it up to bring it back to life. Like ANY fresh bread made without preservatives and isn’t “shelf-stable” for months, so it’s best enjoyed right away. Enjoy!!
What is the shelf life of this bread? Does it go stale quickly like most gluten-free baked products? Can the bread be frozen?
Not having much success with my starter. I started using Sourgum, occasionally added Brown rice flour. It was a bit runny so I then tried adding GF flour.
My mix is always two tblsp flour and two of water.
I have been discarding half when feeding twice a day. I have a heat box with temp 27c.
Just not getting much action . Any ideas on how I can improve my starter.
Yes if it’s pooling water it means it’s hungry and needs to be fed.
Thank you! I unplugged the warmer, we’ll see what happens. I keep my house pretty cold that’s why I tried the mat. Do you think I should do more flour/less water per feeding?
It might be too warm. Maybe try without the warning mat? I think it’s fine as long as there’s no mold. Mixing before discarding is wise too.
Hi! I’m on day 5 of my starter. I’m feeding twice a day and using a warming mat. I’ve noticed my starter is watery on the bottom and bubbly and thicker in the top layer. Before feeding I stir it and then discard. Is this normal? The “hooch” is on the bottom not top
Thank you. I just bought the warmer you suggested because I also think my house was too cold and it just stopped growing until I put it in my oven with just the oven light on. I was feeding it twice a day too so I wasn’t sure if I had killed it somehow. I’m now on day 8 and hope to try your sourdough bread recipe tomorrow. Thank you for your time to answer me and this amazing website.
Make sure you discard a little of the starter then feed it with more flour and water. The water on top means it needs to be fed.
Hi I was so excited to see this post and your recipes. I started my sourdough starter 6 days ago and it was doing great I think. It was foaming and bubbling and growing but all of a sudden it stopped. It gets a small amount of water sitting on the top and I stir it down and it comes back. It doesn’t bubble or grow anymore. What did I do? Is it still good? Also when throwing out 1/2 at each feeding how accurate does it need to be?
It may not double but it should keep growing. It could depend on how warm it is in your home. Good luck!!
Hello! I am so excited to finally see my starter bubbling quite a lot up the sides, but my question is whether it’s alright that it isn’t fully doubling in size? It really only raises a little bit after 24 hours even those there’s clearly a lot of air & bubbles. It’s been over a week so far. Thanks for your help!
Mine just plugs in. No temperature adjuster. But I recommend keeping it between 70-74 at least. I’m not 100% sure though.
I am purchasing the warming mat because I have the same temp here as you do. What temp should the mat be set at? Thanks!
You can use any flour for the starter and I don’t think it matters if you switch from brown rice flour to sorghum. Just be sure to feed it. I haven’t used a GF starter outside of making GF bread but I don’t see why it wouldn’t work. Let me know if you try!
Hello! Thanks for this great post, this info is just what I was looking for. I’m looking forward to making this with my son, as he enjoys learning how to bake. I have 2 questions, though…
-Do you have to be consistent with the type of flour? Like if we start with sorghum can we ONLY feed it sorghum thereafter?
-some in my family are not GF. Can I use my GF starter to make them wheat bread, do you think, so I don’t have to have two separate starters?
Thanks again for this super helpful post!