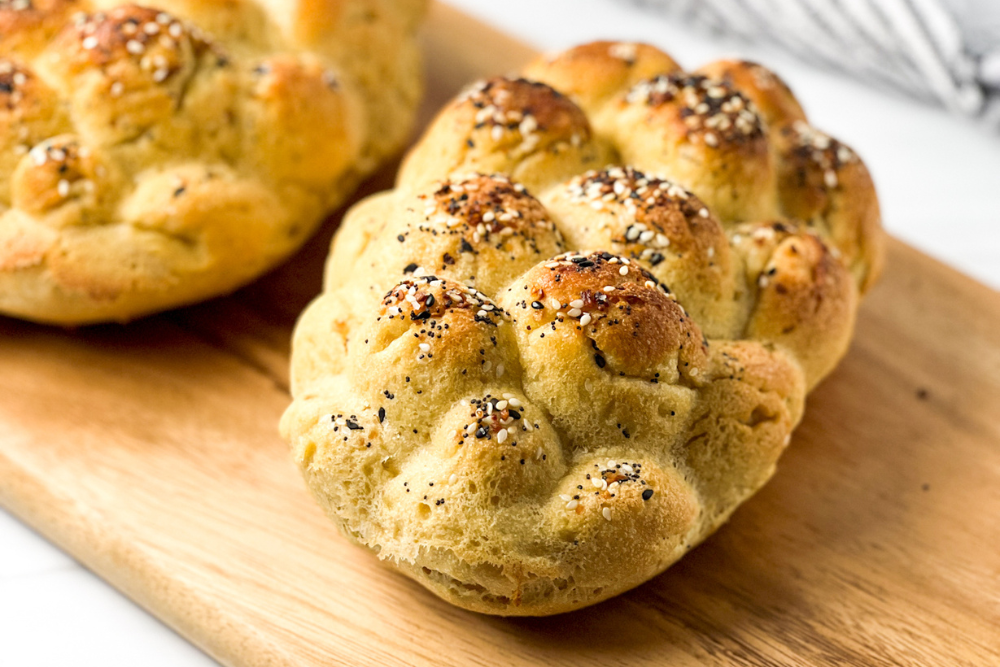
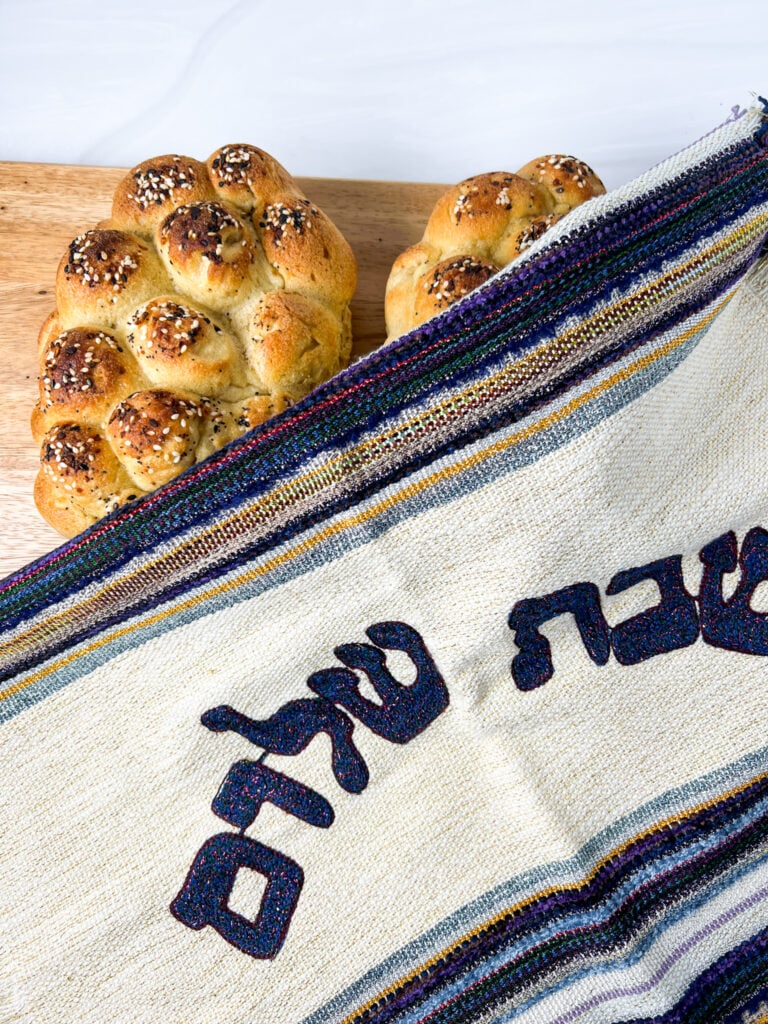
I can’t wait for you to bite into this moist, fluffy, and doughy gluten-free challah. Challah is a yeast-leavened bread enjoyed by Jews on the Sabbath. This recipe is dairy-free (pareve) and can be made egg-free too. Enjoy this wonderful Jewish bread again, only this time without the gluten. This post contains affiliate links. See my disclosures.
If you love challah bread but have struggled to make it gluten-free (and kosher for Shabbat), allow me to be your guide. I make gluten-free challah weekly for Shabbat and have been playing with this recipe for 7+ years.
This gluten-free challah recipe results in a doughy and eggy bread, similar to traditional challah made with wheat flour. And while it’s not quite the same because it’s missing wheat flour (gluten), it’s a worthy opponent and delicious in its own right.

I love making challah every week and participating in this important Jewish ritual. Here are some of the many reasons why my family and I love this recipe:
The Texture is Amazing: This challah turns out doughy and stretchy. I love the pillowy-soft inside. Don’t worry; it won’t crumble; rather, it stretches when you rip it apart.
It’s Hamotzi-Worthy: Hamotzi is the Jewish prayer over bread, but it can only be said if the bread contains at least 51 percent of one of the grains mentioned in the Torah. These grains include wheat, barley, rye, spelt, and oat.
The only grain mentioned in the Torah that a gluten-free person can eat is oats. When using oat flour, make sure it’s labeled gluten-free.
Not all oats are safe for people with celiac disease and gluten sensitivities. Read Are Oats Gluten Free? Unpacking Confusing and Contradictory Information.
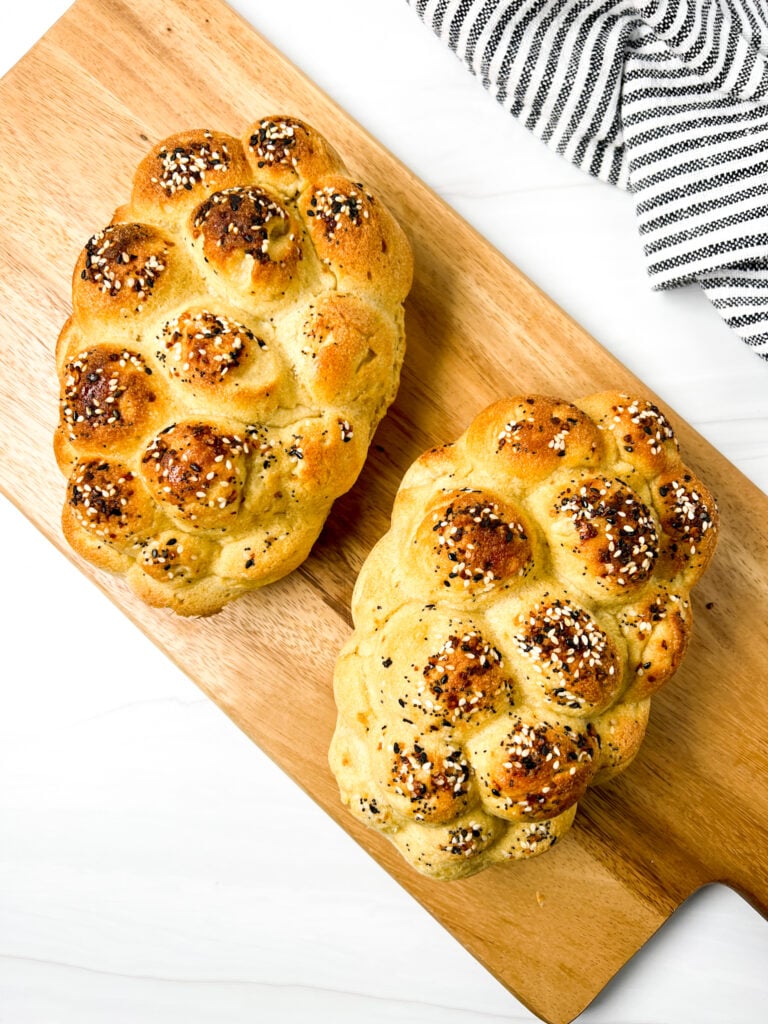
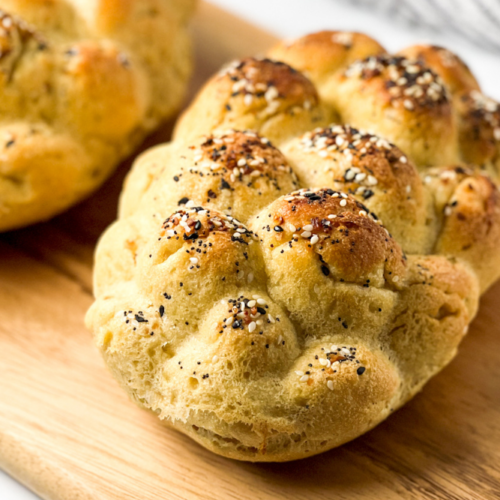
It’s Sweet and Savory: The honey gives the bread a rich sweetness that I love. And when you top the bread with Everything Bagel seasoning, you add a savory touch too.
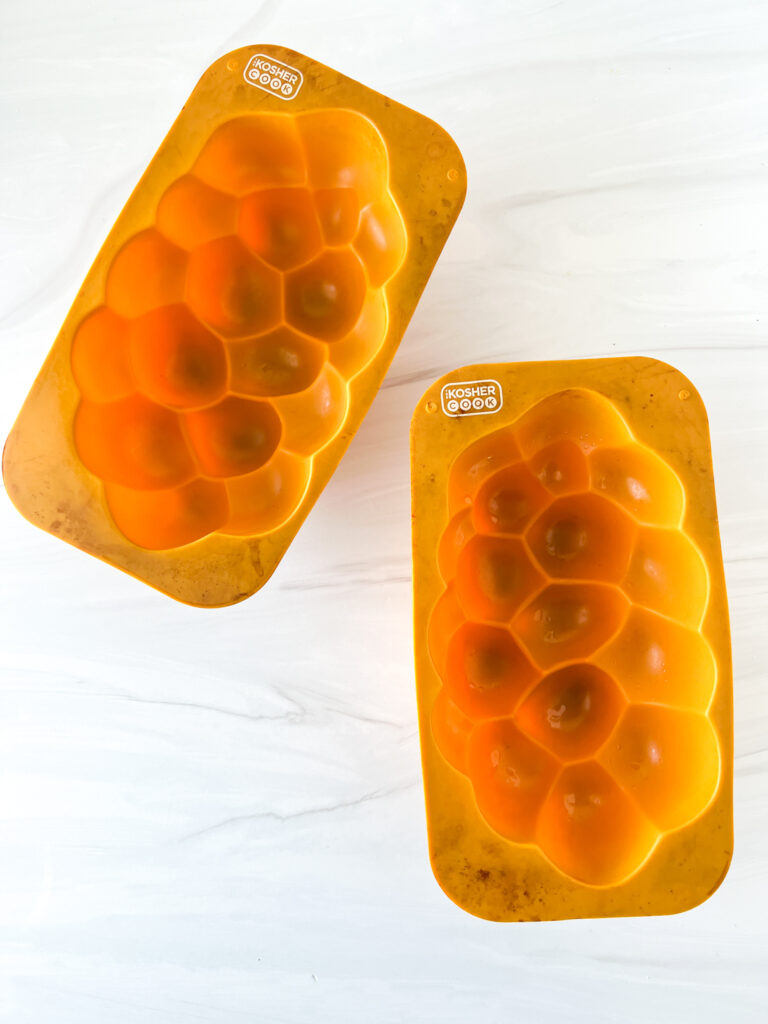
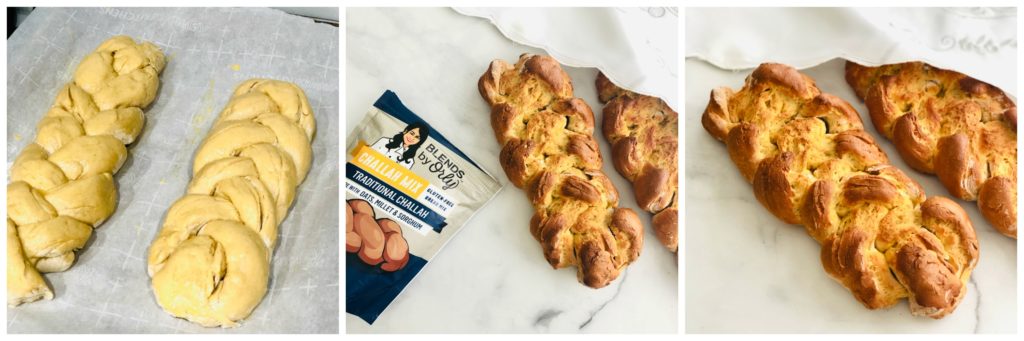
It’s Beautiful: Thanks to my silicon challah-shaped mold pan, my challah looks like it’s been braided. It may not be as beautiful as wheat flour challah masterfully braided by hand, but it’s a close second. (Please note that I now use two small silicon challah-shaped mold pans vs. one large pan.)
There’s No Gluten, Baby! Gluten, a sticky protein found in wheat, rye, barley, and spelt, is missing from this recipe, and with good reason. Gluten makes people with celiac disease and gluten sensitivities extremely sick.
It’s not easy to create yeast-bread recipes without gluten. Gluten is the “glue” that holds bread together and gives it its signature texture and taste.
However, this gluten-free challah works with the right combination of gluten-free flour, starches, and binders, all of which mimic the properties of gluten.
How to Make Gluten-Free Challah
Here’s how to make this wonderful gluten-free challah recipe:
Step #1: Gather Your Ingredients
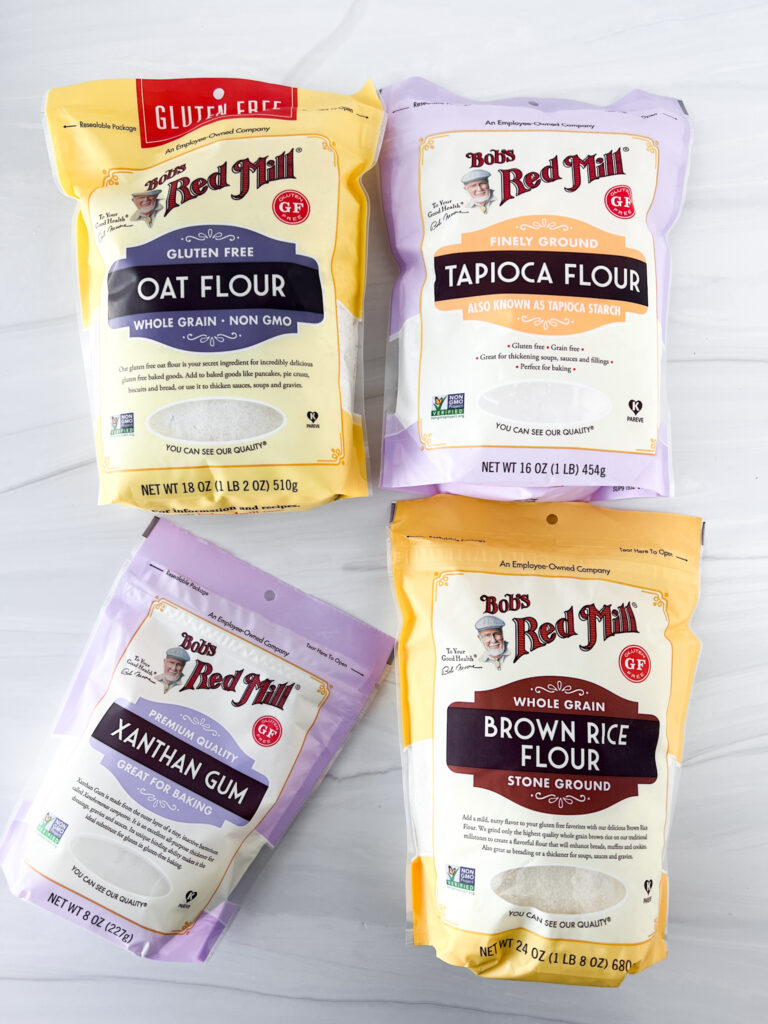
Like any gluten-free bread recipe, this recipe requires a variety of flours, starches, and binders to mimic the taste and texture of gluten.
You cannot use a one-to-one gluten-free flour blend; rather, you must use the ingredients specified as follows. You can find all of these flours in my Amazon store:
Gluten-Free Oat Flour: Oat flour contains a high-protein content and adds elasticity to the challah. More importantly, oat flour is what makes this recipe hamotzi-worthy.
The hamotzi is the Jewish prayer over bread. Not all oat flour is gluten-free. Look for ones labeled gluten-free.
Bob’s Red Mill Oat Flour is labeled gluten-free and made in a dedicated gluten-free facility. You can also make your own oat flour using ground gluten-free rolled oats.
Tapioca Starch: Tapioca starch (also called tapioca flour) comes from the cassava plant and works as a starch in the flour blend. It has a similar texture to potato starch; in a pinch, you can swap tapioca for potato starch.
Brown Rice Flour: Brown rice flour offers some protein content, again helping give the bread a doughy texture. You can substitute sorghum flour for brown rice flour. Sorghum flour has a medium-high protein content and is similar in flavor and texture to brown rice flour.
Xanthan Gum: Only a small amount of xanthan gum is needed in this recipe, but a little goes a long way to give gluten-free bread elasticity and flexibility. Without it, bread crumbles vs. stretches. You can substitute guar gum for xanthan gum.
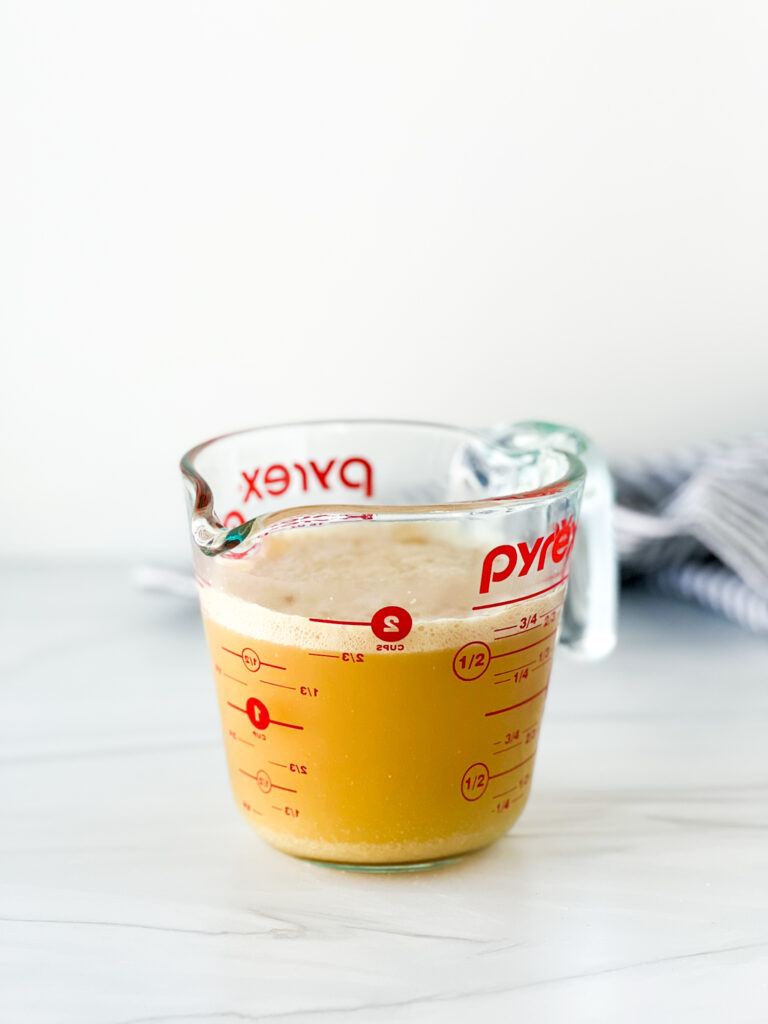
Step #2: Activate the Yeast
To activate the yeast, combine the warm water, yeast, and honey in a small bowl. Let the mixture sit at room temperature for 5-6 minutes.
The frothy top is a dead giveaway that the yeast is activated and ready. New yeast will froth more than old yeast. I store my yeast in my fridge to keep it fresh longer.
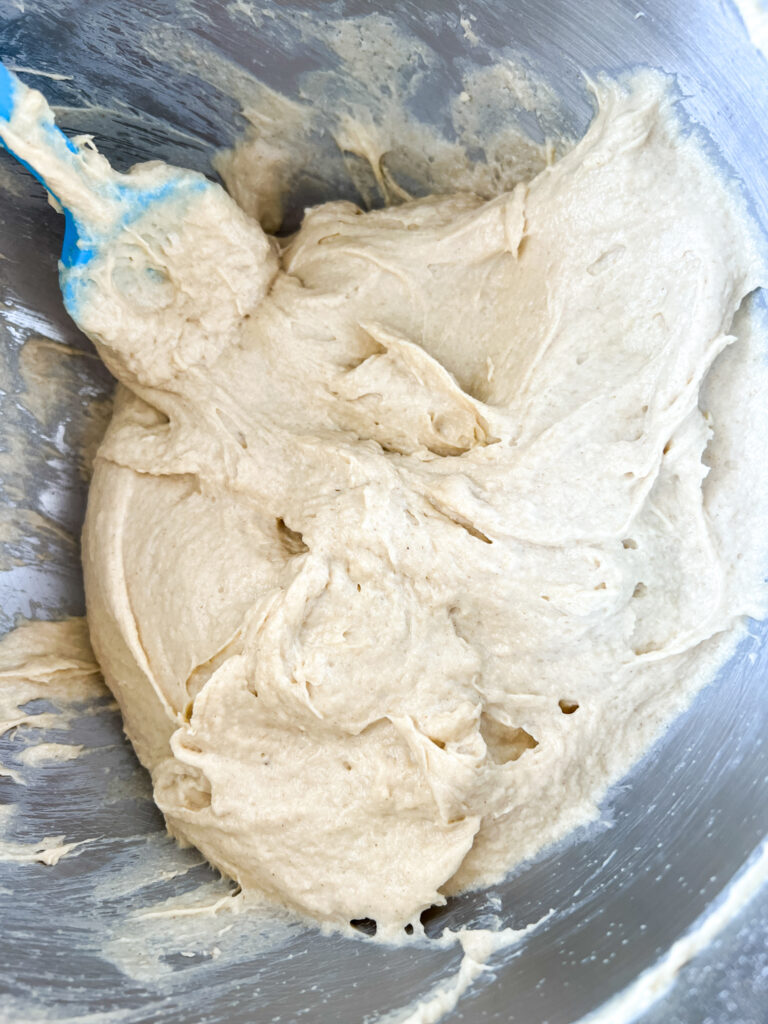
Step #3: Make the Dough
While the yeast is activating, combine the oat flour, brown rice flour, tapioca starch, xanthan gum, and salt in the bowl of your standing mixer fitted with a paddle attachment.
Then add the yeast mixture, eggs, oil, and apple cider vinegar to the dry ingredients. Mix the ingredients on low speed until semi-combined, then mix at medium-high speed for two minutes until the ingredients are well combined, scraping the sides as needed. The dough will be sticky and should be well blended.
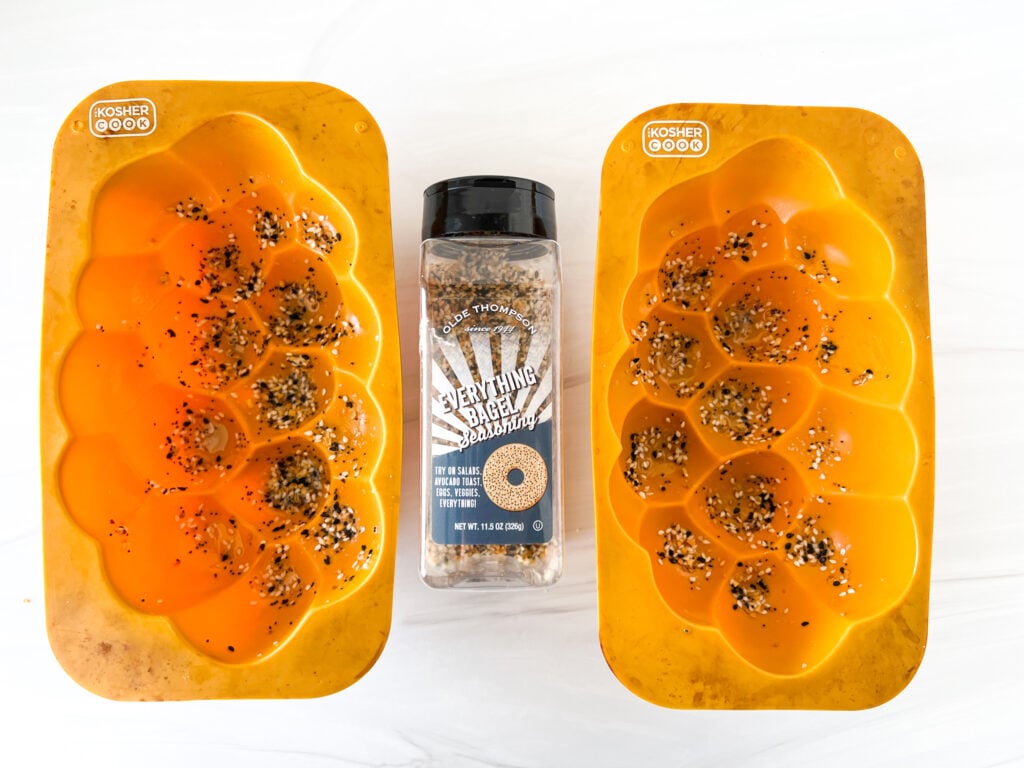
Step #4: Rise
Lightly grease your challah mold pan(s) with vegetable oil. Then add seasonings directly inside the challah mold pan, such as the Everything Bagel Seasoning.
Alternatively, you can add sesame seeds or poppy seeds or leave the challah as-is (plain).
(If you don’t have a challah pan, you can use two metal bread loaf pans instead.)
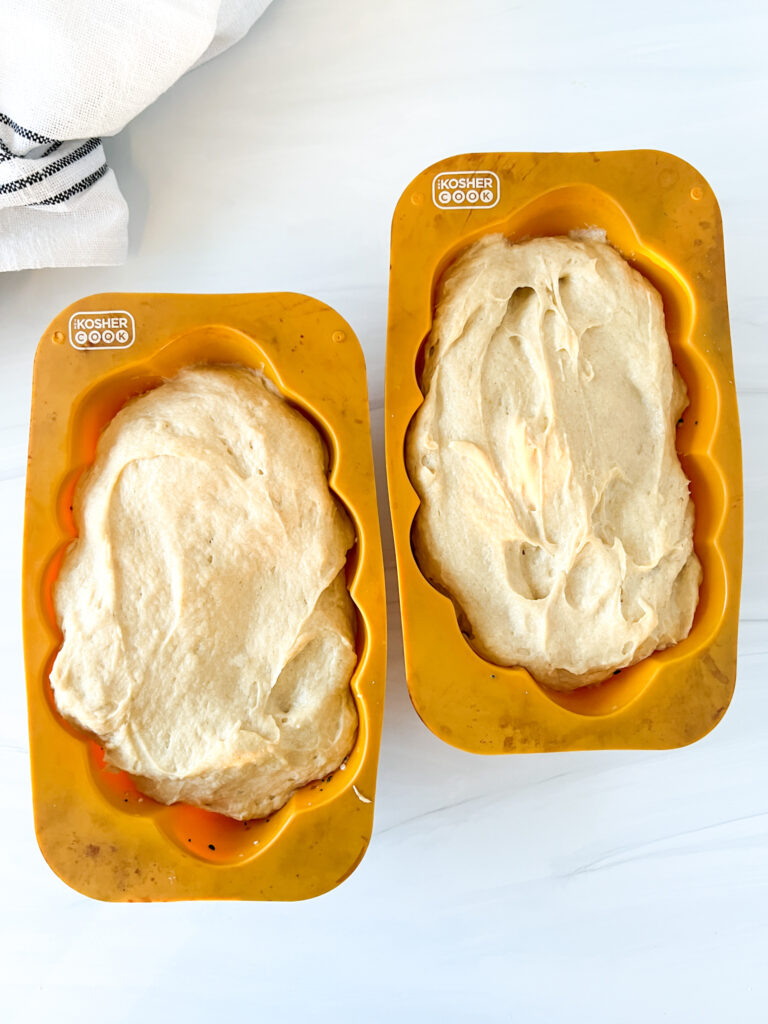
Add the dough into the pan(s) and spread it evenly with a spatula.
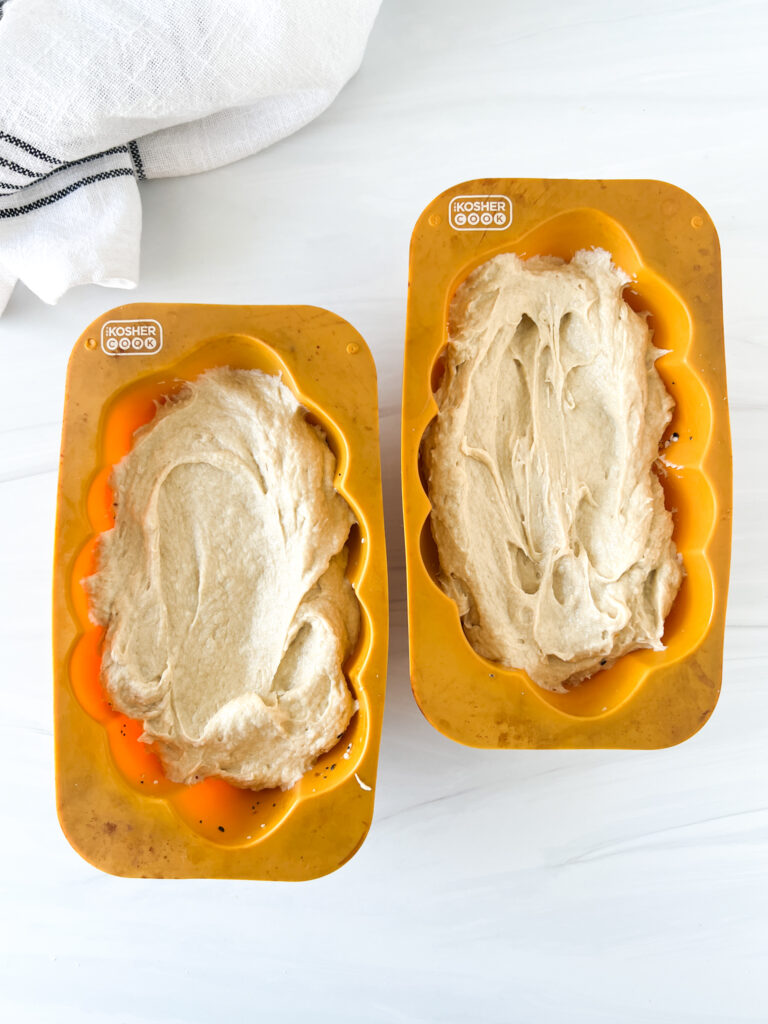
Cover the dough with a clean dish towel, and set it in a warm place to rise for two hours until it about doubles in size.
Step #5: Bake
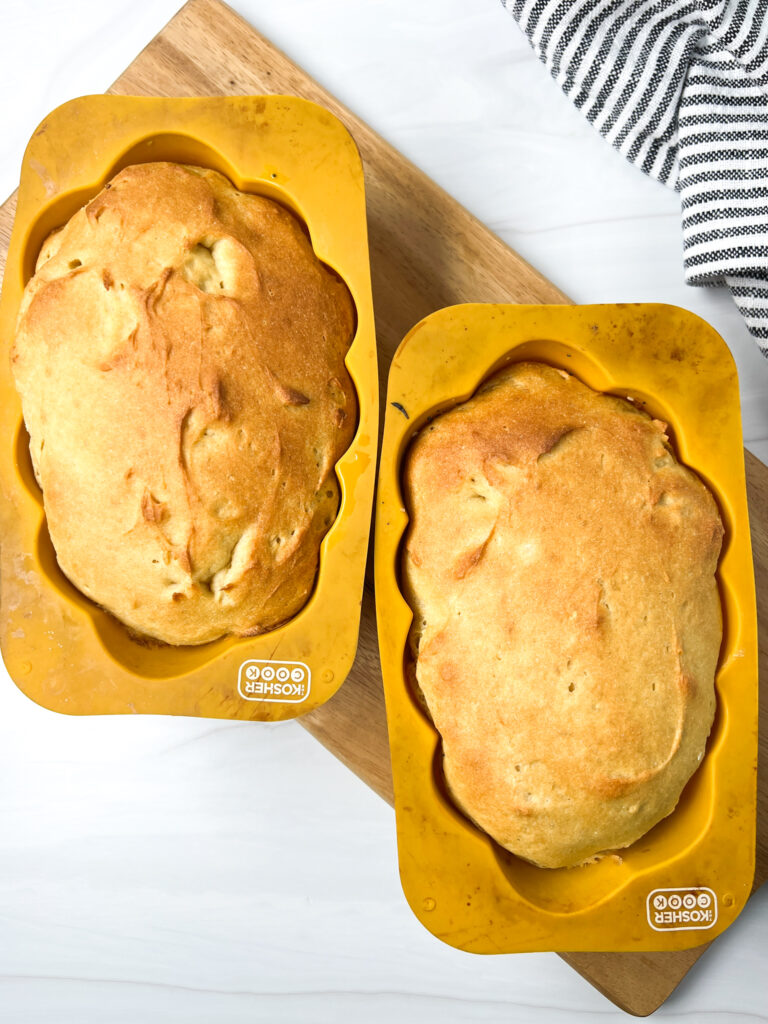
Once the challah has about doubled in size, preheat your oven to 375º F, then bake the challah for 23-25 minutes for two small pans or 25-26 minutes when baking one large challah pan. The top of the challah will be brown. That’s when you know it’s done.
If using a metal pan, the challah may need less time. Adjust as needed. I always err on slightly undercooked (and doughy) vs. overcooked (and crumbly).
Allow the challah(s) to cool in the pan for five minutes before flipping it onto a wire rack. The bottom of the challah is now the beautiful faux braided top!
Suggestions, Substitutions, and Variations
Egg-Free: To make this recipe egg-free (and vegan), substitute flax eggs for real eggs. One flax egg is 1 Tbsp of flaxseed meal + 3 Tbsp of warm water. Mix them together and allow them to sit for five minutes to gel. You’ll need two flax eggs for this recipe.
Round, Sweet Challah for Rosh Hashanah: You can easily transform this recipe into a round, sweet challah for Rosh Hashanah. Simply add an additional 1/4 cup of honey or 1/4 cup of applesauce and 1 teaspoon of cinnamon to the batter and mix well. Then fold in 1/2 cup or more of raisins.
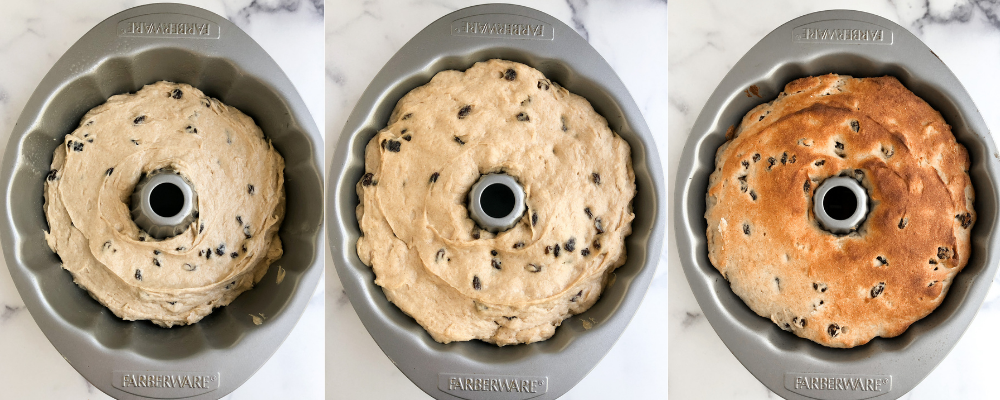
To make it a round challah, add the dough to a round bundt pan instead of a challah mold pan to rise and bake.

Don’t have a challah mold pan? Anyone making gluten-free challah with any sort of regularity should invest in a challah mold pan, but if you don’t have one, simply divide the dough and place it in two greased 8½ x 4½ inch loaf pans.
Is this challah kosher? Yes, all the ingredients I recommend are kosher. Check labels carefully. This recipe is pareve, meaning it can be enjoyed with dairy and meat meals.
Why can’t I braid this challah? You cannot braid this challah because it’s too sticky. Gluten-free flour requires more moisture (liquid) than wheat flour. I’ve tried adding extra flour and braiding it, but I fear this results in dry challah. If you’re going for moist, fluffy, and stretchy challah bread, the dough will be too sticky and wet to braid.
Pre-made challah mixes: There are two gluten-free challah mixes I’ve tried. One is by Blends by Orly, which is braid-able. I think the challah is a bit dry. Below is what it looked like:
Another kosher gluten-free challah mix is Rories Gluten-Free Oat Dough Mix. My friend gave me one as a gift, and they stock it at East Side Kosher Deli in Denver as well. You need to bake Rorie’s mix in a muffin tin pan. I think the challah turned out a bit dry, so next time, I might add more liquid and honey than recommended. The ingredients in Rorie’s mix are quite similar to my recipe.
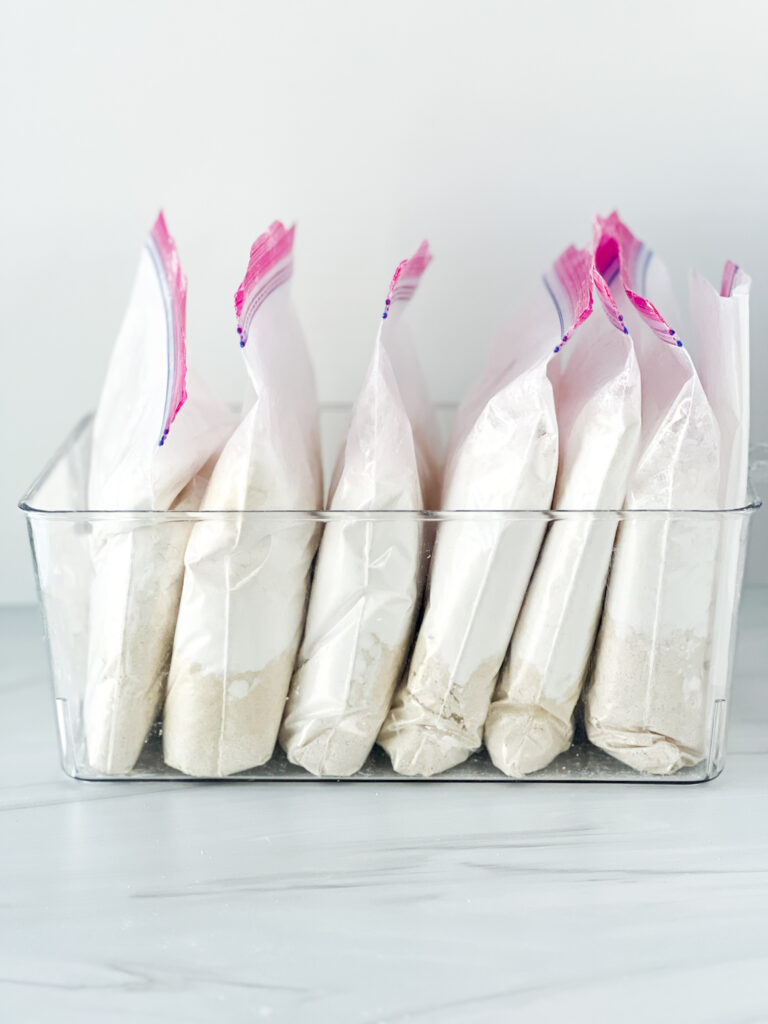
Time-Saving Tip: If you’re going to make challah every week, I suggest creating your pre-made challah mixes filled with all the pre-measured dry ingredients (oat flour, tapioca flour, brown rice flour, xanthan gum, and salt). I measure eight bags of challah mix at once, so I’m set for two months.
Measuring the flour each week is messy and time-consuming. I make the mess at once, then all I have to do is add the pre-measured bag of flour to my mixer, then add the yeast-water mixture, eggs, oil, and apple cider vinegar. It takes only a few minutes to make the dough each week.
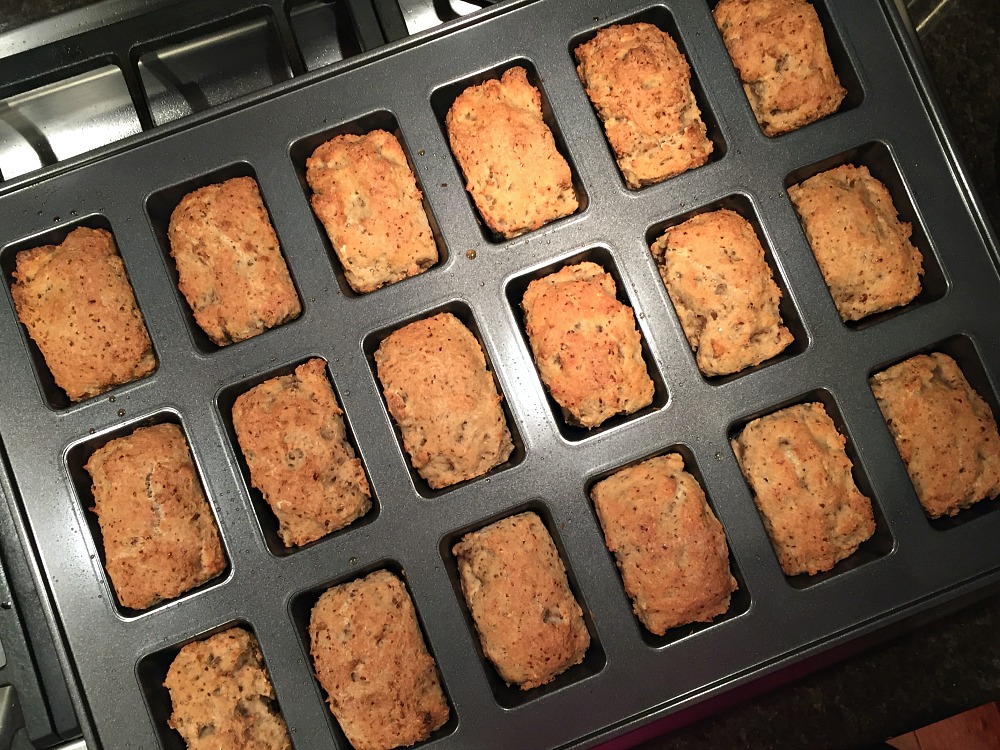
Mini Challah Loaves: If you’re the only one enjoying gluten-free challah each week, make mini challah loaves or muffins instead of making one big challah.
To do this, divide the dough into 8-10 greased cavities of a mini loaf pan or 10-12 greased muffin cavities, allow the dough to rise, and then bake it for about 15 minutes in the oven or until the tops brown. You can freeze the loaves and take one out each week to enjoy on Shabbat.
Remember, you can find all the ingredients you need to make this recipe in my Amazon store.
This recipe was inspired by and adapted from Kveller.com.
Other Recipes for Shabbat
You might enjoy these other recipes for Shabbat.
- Gluten-Free Cholent: A hearty-slow cooked stew ready to feed a crowd after Saturday Shabbat services.
- Savory Beef Brisket: A delicious brisket perfectly slow cooked and gedempt.
- Gluten-Free Carrot Ring: This festive side dish is sweet but goes perfectly with any festive dinner.
Gluten-Free Challah Recipe
Equipment
- 1 Challah mold pan (large) or 2 small mold pans or loaf pans
- 1 Standing mixer fitted with paddle attachment
Ingredients
- 1 1/4 cups warm water
- 1 tbsp active dry yeast
- 1/4 -1/2 cup raw honey see notes
- 1 1/2 cups gluten-free oat flour 180 grams
- 1 cup tapioca starch 120 grams
- 1/2 cup brown rice flour 80 grams
- 2 tsp Kosher salt
- 1 tbsp xanthan gum
- 2 large eggs see notes for the egg-free version
- 1/4 cup vegetable oil
- 1 tsp apple cider vinegar
- 1-2 Tbsp Everything Bagel Seasoning or other topping such as poppy seeds or sesame seeds (optional)
Instructions
- Activate the yeast by combining warm water, yeast, and honey in a small bowl. Mix it together and allow it 4-6 minutes to begin to froth. If it doesn't froth on top, your yeast may be expired.
- While the yeast is activating, mix together the oat flour, tapioca flour, brown rice flour, xanthan gum, and salt in the bowl of your standing mixer fitted with the paddle attachment.
- Add the yeast mixture, eggs, oil, and apple cider vinegar. Mix on low for 30 seconds, then mix on medium-high speed for 2 minutes. You cannot overmix the dough because it doesn't have gluten. Gluten-free dough needs to be mixed thoroughly.
- Lightly grease the challah mold pans with vegetable oil, then sprinkle the challah pan with any seasonings you'd like on top of the challah (optional). I add Everything Bagel seasoning, others like poppy seeds or sesame seeds. Add the dough to the pans and spread it out evenly. Cover the dough with a clean dish towel and let it rise for two hours to double in size. (Remember, the bottom will become the top of the challah after baking.)
- Preheat the oven to 375º F and bake the challah for 23-25 minutes if baking in two small silicon challah pans or 25-26 minutes if baking in one large silicon challah pan until the top of the bread is lightly browned. Note: Metal pans may require less baking time. See notes.
- Remove the challah from the oven. Let the challah mold pan cool for 5 minutes before flipping them onto a wire rack to continue cooling. Shabbat shalom!
I have been making these for a while now and have happily passed it on to others who use it as well.
Fantastic recipe that can be used for challah on shabbos.
Delicious with great consistancy.
(I use flax seed egg and love putting everything-but-the-bagel blend ontop)
Thank you!
Love this! It’s something I make every week and we enjoy it for days!!
This recipe is amazing! I made the Rosh Hashanah version in a Bundt. It’s so springy!!! I think I will make individual loaves or muffins and freeze for Shabbat because it was so good that we couldn’t lay off of it and 2 people devoured it in 2 days.
AMAZING!!
Thank you so so much for perfecting and posting this recipe. I had my doubts on how this would turn out as I know with most gluten free items you can always tastes the grains in flours used (for ex- rice flour) but this did not taste at all like gluten free Challah and was not nearly as complicated as any of the other recipes I searched.
I will say that I measured & sifted all the dry ingredients on a scale to get it to perfection and that I don’t believe my bread rose as much as the one in the video did but nevertheless the consistency was perfect.
The next best thing would be if we could get it to be able to braid 😉
I can’t thank you enough and thank you for not asking for psyllium husk!!
I love that you love it! I make it every Friday too.
Thank you so much for this recipe, I’ve been baking it for about a year now and have been passing it around at shul. Every time I have a new guest on Shabbos, they are shocked that the challah isn’t gluten!
I love this challah i have been making it for years thanks so much for the recipe – but i realized recently that only 50% of the flour ingredients are oats! for it to qualify as hamotzai and bench after, has to be 51% oats! also im not sure if you have to count the other ingredients too, or just the flour part to calc the percentage. but even just with the flours, its not 51%. i if its less than this amount, I think would have to have double the shiur to qualify for benching …may want to let people know since your recipe is so popular!
I make it at 5,280 feet every week as is. What altitude are you at? My friends at GF Jules have some great tips for baking over 6,000 feet. https://gfjules.com/high-altitude-gluten-free-baking-tips/
What adjustments would have to be made at high altitude?
1 tbsp of active dry yeast.
What type of yeast do you use – instant, fresh, dried, the little 7g packets?
I only have the sachets/packets containing approx 7g of yeast and they look like brown tiny granules. Can I use one packet for this recipe?
And thank you for your work and this recipe. The Gluten free community is such a blessing!
We’re getting ready for Shabbos here in Eretz Yisroel. I tried your gluten-free hamotzi challah. AMAZING…DELICIOUS… MOIST…WONDERFUL FLAVOR! It’s really beyond belief. I can’t thank you enough. I work on recipes for a long time and the fact that you’ve been tweaking this one for seven years caught my eye. Hatzlocha and bracha to you and your family.
Shabbat Shalom.
This is a great recipe! Came out just as instructed and my family loves it. Asking me to make it every Shabbat. I made it in regular bread metal pan.
It was too sweet for me, half cup honey is too sweet IMO but probably helps the dough.
I’m glad you like it. It could have sunk for so many reasons. Maybe your oven temp is off a bit, or it over proofed, or what kind pan did you use? Some pans can force rise. It’s hard to say. Sometimes my bread will deflate a bit as it cools but it doesn’t sink. I use the challah mold pans.
I did your recipe as directed with sorghum flour instead of brown rice and potato starch instead of tapioca starch and about 1/3 cup honey. The dough rose well and the bread rose well in the bake. But then it sank right after taking it out of the oven. Still delicious!! Any ideas why it would sink?
Best Gluten free recipe! One suggestion I’d make is that I heat the water and honey to 105-110 degrees and then take off the heat and add the yeast. Raises even better!
THANK YOU soooo much!! I can’t believe I found a ‘company good’ gluten-free AND vegan challah recipe. I have tried and dumped sooo many recipes and you were my last hope (last recipe I could find). I used the sorghum flour and psyllium husk (does it matter if it’s whole or flake). I also only had a packet of yeast left, which I think is less than 1 TBS – so I’m looking forward to making it 100% correct tomorrow (Shabbat). I used 1/2 cup honey, which was a bit too sweet for every week so will use your 1/4 c from your video. Also, your dough in your video was thicker than mine (could it be the flax eggs? Has anyone ever successfully tried the ‘egg replacers?’). I had the molds already so made two small challahs. My taste-tester (husband) just finished off the first loaf. So thank you, thank you.
You could try guar gum or psyllium husk. It definitely needs a binder. Good luck!!
Hi! I’m looking to try out this amazing looking challah and I’m enjoying reading all the reviews, but I can’t eat xantham powder. Any suggestions for a substitute? I know it does a lot for the texture…
I haven’t tried this but I think you’ll have more than enough for four round molds. You’ll probably need 8 molds.
Have you ever used the silicone mold with 4 small round shaped challahs? If so, would this recipe fill all 4 molds?
No extra flour. The texture is just more doughy and sweet.
This is one of the best gluten free breads I have made. We all love it here!! One question, if you add the extra 1/4 cup of honey, do you add extra flour?
I’ve since update the weight. It should work. The dough is quite forgiving. I don’t think the dough quite doubles but it does have a nice rise. Is your yeast fresh? I’ve never had it collapse before and I make it every Friday. I usually don’t use a loaf pan but you would need at least two loaf pans for the dough.
You have the correct weight measurements. I’ve updated it.
Your gram measurements don’t match your volume measurements, if I go by the information on the packages the recipe links to (Bob’s Red Mill products). The oat flour package says that 1/4 cup equals 40 grams. That would make the 1.5 cups the recipe calls for weigh 180 grams, not the 200 listed in the recipe. Similarly, based on the information on the Bob’s Red Mill tapioca flour package, 1 cup ought to weigh 120g, not 140. And 1/2 cup of the brown rice flour ought to be 80g, not 40g. So I’m just trying to figure out which measurements should be followed for those ingredients: the weight or the volume?
Thank you, I’ll try lowering the temp and keeping it in longer.
It can be a little doughy in the middle (which I love but it’s not for everyone). Maybe consider lowering the heat in your oven and cooking it a bit longer. I’m not sure it will work but it might 😊 I also have two small challah mold pans and it bakes well in those. I split the dough to fit both pans.
I’ve made your GF Challah a few times, my daughter and I like it. I follow your directions to a T. I even purchased the silicone Challah mold. My only problem is that when I bake it there are still uncooked doughy parts. The first time I made it as muffins, using the all edge muffin tin I have. I also made it in a Bundt pan. Decided to get the Challah mode because I like the look of braided Challah. After making it today, I was interrupted and left it in the oven too long, almost burnt. There are still uncooked sections when I slice the Challah. Any suggestions will be helpful. Thank you.
I haven’t tried your method so I’m not sure.
Can the flours be substituted for a 1:1 GF flour mix? I have the king Arthur and the Bobs Red Mill gluten free mixes. Would I match the cup measurements or the gram measurements? Thanks
For all you Canadians out there…I made this challah with President Choice gluten free all purpose flour (plus the psyllium)…I also added 1/4 cup applesauce and about 1/2 cup raisins for Rosh Hashanah.
It turned out AMAZING
Shana Tova
For bread (not cake or cookies)I have been using ground psyllium husk, with much better results than xanthan.
Excellent! So happy that I finally found this recipe! Thank you 🙂
Dear Jenny,
I just took my gluten free challah out of the oven. My husband who isn’t gluten free went crazy over it. This is the answer to my prayers. Light and wonderful texture. BTW, I followed your recipe to a T. It was quick and easy. Thank you so much!!!
Shabbat Shalom,
Rochelle
I removed it from the recipe but added it to the notes for Rosh Hashanah. Add 1/4-1/2 cup. It’ll make it extra doughy.
What happened to the apple sauce ? It used to be an ingredient and it came out amazing with it and now I don’t remember the measurements
According to the sefer Birchas Hanehenin of Rabbi Shneur Zalman of Liadi, quoting shulchan a rich, there is no need for it to be 51 percent oat flour to be hamozi..any amount of flour of grain mixed with flour of kitnius becomes hamozi because the grain flour is considered the main thing.
Hooray! A gluten free challah that is edible and enjoyable. I think the best part is how simple it is to make. I have the silicone mold so I think that requires a little more baking time in my oven. Even though it was a little doughy, it was so tasty that my gluten-eating hubby wanted more! I appreciate the make ahead tips. This recipe is a keeper!
Yay I’m so glad you love it!! Shabbat shalom
I made this for the first time 6 weeks ago as muffins and took out 2 every Friday. I used buckwheat flour in place of brown rice flour. I’m about to bake another batch tomorrow. It’s so wonderful to have challah again! My husband, who would normally be eating regular challah, really likes these too, which is nice for both of us. Thank you for this excellent recipe.
What a great idea! So glad you love this recipe.
Wonderful recipe, I modified it by doing 2 cups of oat flour. 1 1/2 Tbs xanthan gum. The consistency comes out just thick enough that it can be rolled into small balls (like matza balls). I used mini loaf pans & putting 3 or 4 balls of dough into the pan and it comes out looking like it was braided across 1 or 2 times. No need for a mold.
I’m so glad you love it. I think the small/medium one will work. The large is good if you double the recipe.
Good morning Jenny!
I wanted to tell you how happy I am to have found your Challah recipe. I follow a whole food plant based diet and I have always struggled replacing the white flour in any Challah bread recipe. Whole wheat Challah just ends up like a brick…so then a light bulb went on…why not make it gluten free and use other whole grains ? My daughter and her partner are gluten free so I could also share the Challah with them. I found your recipe online, bought the Challettes silicone molds (easy to share and it helps me eat less of it :)). https://www.thekoshercook.com/challah-pans/royal-challah-silicone-pans/royal-challah-silicone-pan-challettes.html.
Now every Friday my daughter and her partner are looking forward to their special Shabbat delivery and my non-gluten free husband loves the Challah too.
To be completely vegan, I substitute the honey with date syrup. I often use lupin flour instead of rice flour. When I was once out of xanthan gum I used psyllium husk powder and it worked very well too.
Thank you so much for this wonderful recipe! I try not to eat too much bread but this has become now our Shabbat treat.
I was thinking of purchasing also the regular Challah mold. The company offers 3 sizes: small/medium and large. Would you mind telling me which size is best for your recipe?
Thank you!