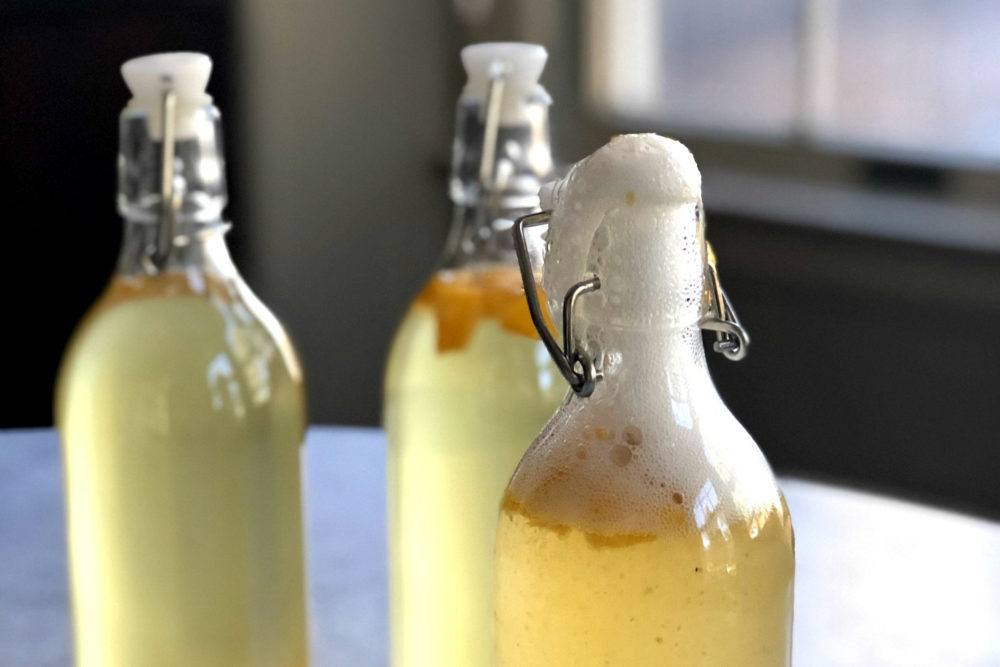
New to kombucha? In this article, I’ll discuss the benefits of kombucha as well as show you how to make your own kombucha from scratch with a few simple techniques. You’ll never go back to drinking store-bought kombucha again. This post contains affiliate links. Please read my disclosures.
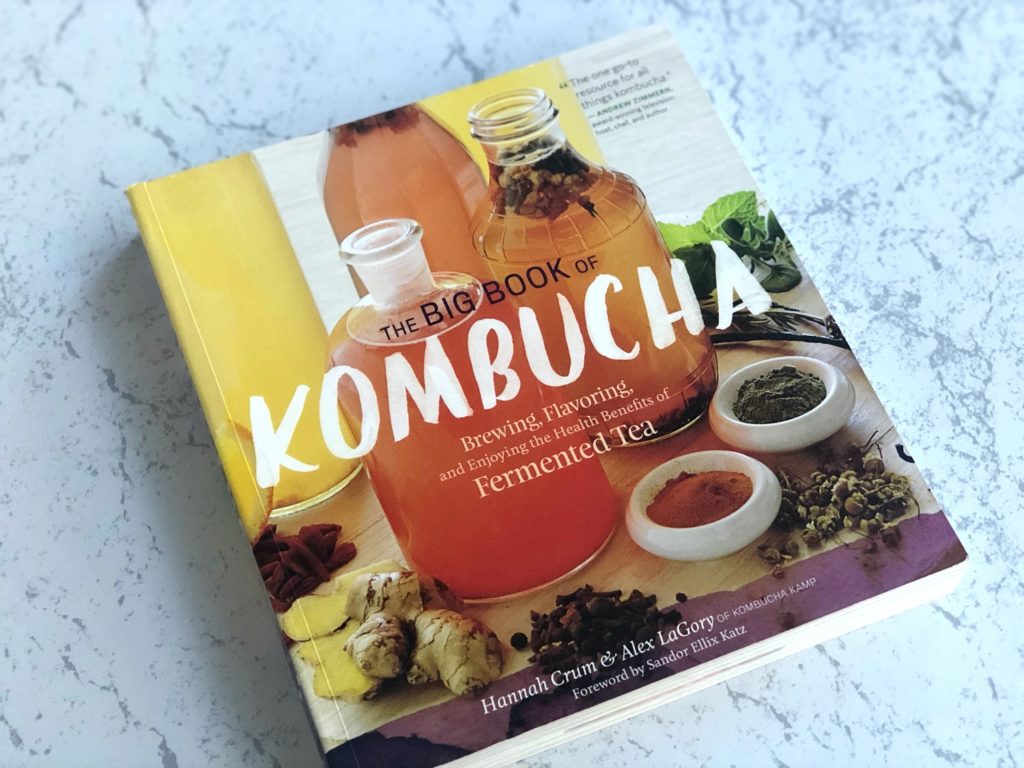
Last year I met a wonderful author named Hannah Krum from Kombucha Kamp. She is an expert kombucha brewer and author of The Big Book of Kombucha.
After listening to her presentation about the health benefits of kombucha and how easy it is to brew at home, I knew I had to try it myself.
I bought her book, one of her SCOBYs, as well as a slew of other supplies on Amazon, and began my journey to brewing my own kombucha.
In this article, I will answer the following questions:
- Is kombucha gluten free?
- Is kombucha good for you?
- What supplies do you need to get started making your own kombucha?
- How do you make your own kombucha?
- How do you get your hands on kombucha (if you don’t want to brew your own).
While I’ll go into detail about the process of making your own kombucha, please keep in mind that this is more of an overview article to help you get started.
If you want to brew your own booch and learn every detail about the process, I highly recommend getting The Big Book of Kombucha.
Is Kombucha Gluten Free?
Yes, kombucha is gluten free, but of course, when buying store-bought kombucha, read the label to look for any gluten-free claims or gluten ingredients. Gluten is found in wheat, rye, barley and sometimes oats.
Kombucha is fermented tea. You probably understand the “tea” part of things, but “fermented?” … that might leave you stumped. This isn’t moldy tea, rather it’s tea that is brewed with healthy bacteria and yeast.
Bacteria is essential to human health. The human body is comprised of a bunch of bacteria. In fact, humans have only 10 trillian human cells and 90 trillion bacterial cells – true story!
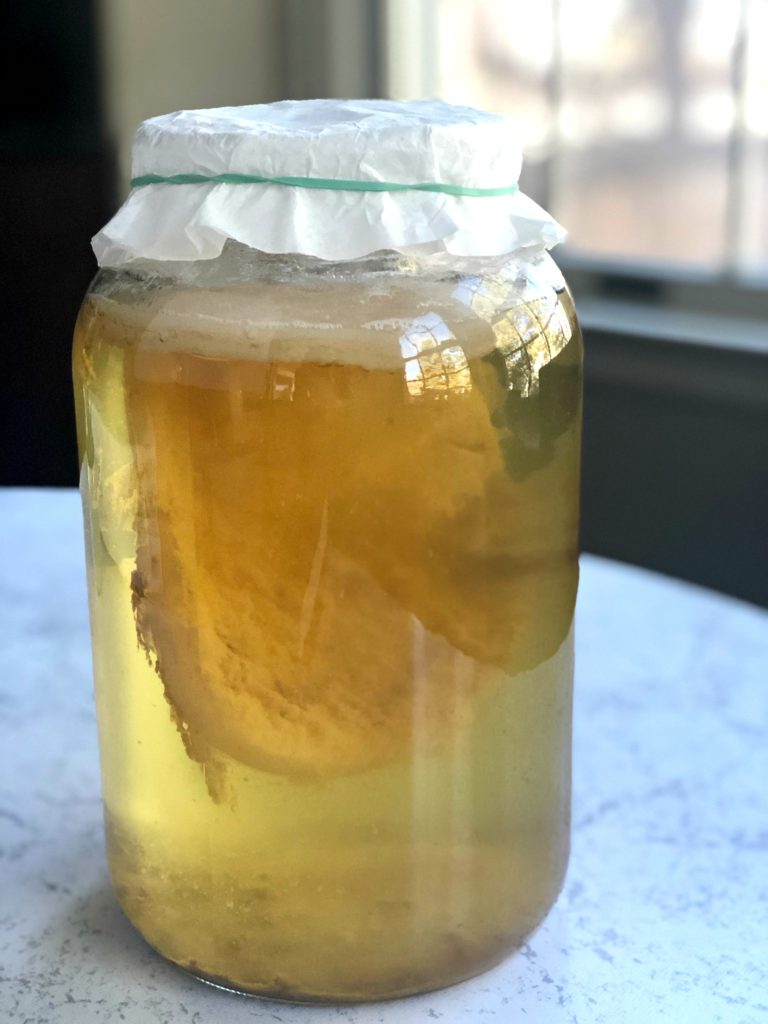
Kombucha is brewed using a SCOBY (Symbiotic Culture of Bacteria and Yeast). That’s the white frisbee you see in the following picture:
Kombucha also needs an inoculant (starter liquid from a previously brewed kombucha). The SCOBY and inoculant are added to the tea, along with sugar, and it’s left to ferment for seven or more days before it is bottled, flavored and aged with a secondary ferment. The secondary ferment makes the kombucha bubbly (I’ll explain later).
Jun is a form of kombucha. A jun SCOBY is taught to feed off of honey (vs. sugar) and is typically brewed with green tea vs. any old tea. Jun is my beverage of choice and what I make.
The process of making kombucha and jun are identical, just the SCOBY used (and subsequent sweetener) is different. Again, a kombucha SCOBY feeds off sugar; a jun SCOBY feeds off honey.
Is Kombucha Good For You?
Yes, kombucha is good for you, and is especially useful in improving your gut health.
Below are some of the numerous health benefits of kombucha:
Nutritionally beneficial – Kombucha is loaded with beneficial bacteria that is good for your tummy.
There are 1-2 pounds of bacteria living in your tummy, and if you’re generally healthy, these are good bacteria.

However, if you experience bloating, gas, diarrhea or other digestive issues, it’s likely you have a lot of bad bacteria floating around in your gut. Kombucha is also loaded with Vitamin B-rich yeast, an essential nutrient your body needs plenty of.
Improves digestion – If you’re looking to improve your digestive system, or you have a compromised digestive system (like those of you with celiac disease), drinking kombucha is a great way to soothe the tummy and improve overall digestion.
Kombucha is alkalizing vs. acidic, which can vastly improve the pH balance inside your gut.
It also aids in the absorption of nutrients because it contains a number of enzymes as well as acetic acid, which provides plenty of gut support as well.
Boosts immunity – The famous quote by Hippocrates, “All disease begins in the gut,” rings awfully true today. Our body’s first line of defense against pathogens is the gut.
Kombucha offers living organisms and healthy acids to aid in supporting your gut – and whole body – health. If I’m not mistaken, almost all preventable diseases can be traced back to some sort of gut issue.
Crowds out bad stuff – One of the biggest benefits of drinking kombucha is that it crowds out the bad stuff. I often recommend that my clients swap their daily Diet Coke for a kombucha.
Kombucha is sweet yet contains very little sugar as the yeast eats any sugar you put in the brew. It’s also carbonated like soda; the main difference, however, is that Diet Coke is filled with icky ingredients that challenge your health while kombucha is loaded with beneficial bacteria that boosts your health. It’s a no-brainer swap if you ask me!
How to Make Your Own Kombucha
If you’re ready to brew your own kombucha, you’ll first need to gather a few supplies:
The SCOBY + Starter Liquid
No kombucha (or jun) making process can begin without a SCOBY. As mentioned, SCOBY stands for Symbiotic Culture of Bacteria and Yeast.
This is a LIVING thing (yep, kombucha is alive!) and the mother SCOBY “births” a baby SCOBY when the brew is complete.
According to The Big Book of Kombucha, a SCOBY is “a mass of bacteria and yeast tied together with cellulose nanofibers.” The bacteria and yeast within the SCOBY are dependent on one another in a sense that the by-products of the yeast fermentation feed the bacteria and the by-products of the bacteria fermentation feed the yeast.
OK, that’s probably too much information, but whenever someone sees the SCOBYs floating around in my kombucha jars, they ask these kinds of questions. I’ve had to up my kombucha knowledge to be able to explain it intelligently.
The SCOBY will reproduce itself (the mother SCOBY will have a baby SCOBY) when the brew is complete, leaving you with two healthy SCOBYs.
You can either save your extra SCOBYs, toss it in the trash (so sad!), or give it to someone to start their own booch brew.
You can get a SCOBY from someone who is currently making their own kombucha (if you’re in Denver, hit me up!) or simply buy one online.
You want to make sure you get one from a reputable person who has healthy SCOBYs. I purchased mine from Kombucha Kamp to get started, but ask around (maybe put up a Facebook post?) and see if anyone can give you one of their baby SCOBYs plus 1 cup of starter liquid.
You’ll want older starter liquid, if possible, because it will assist in the fermentation process. I find the longer I brew my own kombucha, the faster things go because my starter liquid is mature.
Other Supplies
In order to make your own kombucha, you’ll need to order the following supplies, much of which can be found on Amazon (or Ikea):
- Gallon Glass Jar(s): I recommend having at least one gallon jar for brewing, and one gallon jar for storing extra SCOBYs. You can order two glass gallon-sized jars here. (You could also use a stainless steel jar, high-quality wood barrels, or food-grade plastic buckets). Avoid metals (brass, cast iron, or aluminum) as these will leach chemicals into the brew.
- Heating Mat: I highly recommend ordering a heating mat (a heating mat is traditionally used for heating seedlings). Your kombucha must be kept at a warm 78-80 degrees during the brewing process. Unless it’s summer and you don’t use air conditioning, consider keeping your kombucha warm on a heating mat. This is the exact one I own.
- Glass Bottles: You’ll need about 5-6 glass bottles for your kombucha brew. Get ones with airtight lids, which is essential for the secondary brew (I’ll explain in a bit). I got my bottles at Ikea, but you could easily order these beautiful glass bottles on Amazon. They look identical to mine.
- Strainer: You’ll need a fine mesh strainer to filter out yeast during the bottling process.
- Funnel: In order to transfer the kombucha into the bottles, you’ll need a funnel – plastic or stainless steel will work.
- Tea: You can purchase tea at the grocery store. If you’re making kombucha, you can use black, oolong, green, white or whatever tea you like. If you’re making jun, use green tea.
- Water: Use filtered, distilled or purified water so the water is free of contamination, which may hurt the culture. I have a filter on my tap water, so I use that water.
- Sugar or Honey: You’ll need a cup of sugar for brewing kombucha (or a cup of raw honey for brewing jun). You cannot brew kombucha with honey; you must use sugar or else you’ll throw the brew out of whack. On the other hand, jun cultures have been uniquely adapted to work with raw honey, not sugar. No artificial sweeteners, ever!
- Coffee filter and rubber band: You don’t need anything fancy to cover your kombucha, but you will want something to protect it from stuff getting in it but that still allows it to breath. Use a coffee filter and rubber band to cover your booch while it’s brewing.
How to Make Kombucha
Now let’s get to the good part – how to make your own kombucha. I’ll go through the step-by-step process so you know exactly what to do and what to look for in a healthy brew.
Make sure you use clean hands at all times as to not compromise the complex bacteria and yeast already in place in your kombucha brew and SCOBY.
Step #1: Brew Some Tea
The first thing you’ll want to do is brew the tea. You’ll want to brew about four cups of hot, filtered water with 4-6 tea bags in a four-cup Pyrex measuring cup or other container that is not prone to breaking with heat.
Steep the tea bags in the hot water for 10 minutes, then pour the slightly cooled liquid into the glass vessel. Do not put the hot water in the glass vessel as it might crack the jar (yep, happened to me!).
I then fill the Pyrex with another four cups of hot filtered water and allow the tea bags to steep for a couple of minutes while I work on Step #2.
Step #2: Add Sugar for Kombucha (or Raw Honey for Jun)
While the second set of tea bags are steeping, add 1 cup of sugar (for kombucha) or 1 cup of raw honey (for jun) to the hot mixture to allow it time to dissolve.
Use a long wooden spoon to mix it until the sugar or honey is completely dissolved.
Warning: You must use sugar or honey in your brew as the yeast and bacteria feed off of it and it enables them to reproduce. But don’t worry, while you’ll end up with a sweet beverage, much of the sugar will be consumed by the yeast and bacteria leaving very little sugar content in the finished product. No artificial sweeteners, ever, under no circumstance. OK?
Step #3: Fill Remainder of Jar with Filtered Water
Now you’ll want to add the rest of the tea to the vessel + fill up the vessel with additional filtered water until it’s nearly to the top (leave room for the SCOBY and 1 cup starter fluid). Allow the mixture time to cool (you can add in a few ice cubes to cool it more quickly). You do not want to place your SCOBY in hot liquid.
Step #4: Add SCOBY and Starter Liquid
Once the mixture is cooled, add your SCOBY and about one cup starter liquid (liquid reserved from a prior batch).
Step #5: Cover and Store Mixture
Next, you’ll want to cover the mixture with a coffee filter secured in place with a rubber band. This ensure no particles get in to compromise the mixture.
Then store the jar on your warming mat in a dark place in your kitchen (sunlight should not be beaming on it). Do not move it! This will disrupt the fermentation.
Step #6: Wait
The first fermentation process takes seven or more days to complete depending on the maturity of your SCOBY and starter fluid, as well as the temperature of the mixture.
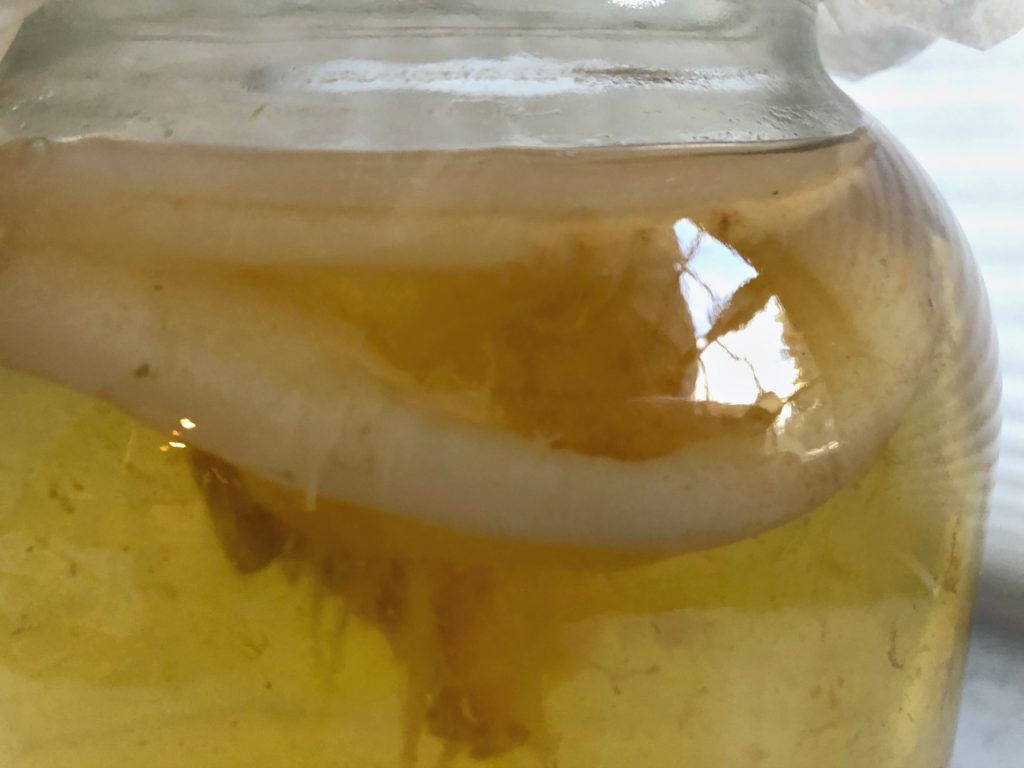
You’ll know your kombucha is a healthy brew if the SCOBY reproduces itself. You should have a thick baby SCOBY that is about one half inch thick and hardy (it shouldn’t tear easily).
If it’s too thin, it indicates a weak culture. If it’s too thick, enough oxygen may not have reached the brew. The SCOBY baby should be white to light tan in color and you should see plenty of yeast strands attached to the bottom of the culture and floating in the liquid.
The new SCOBY will reproduce on top of the old SCOBY. Sometimes they are piled on top of each other, other times the mother SCOBY is floating around or at the bottom of the mixture. It doesn’t matter, as long as she reproduces.
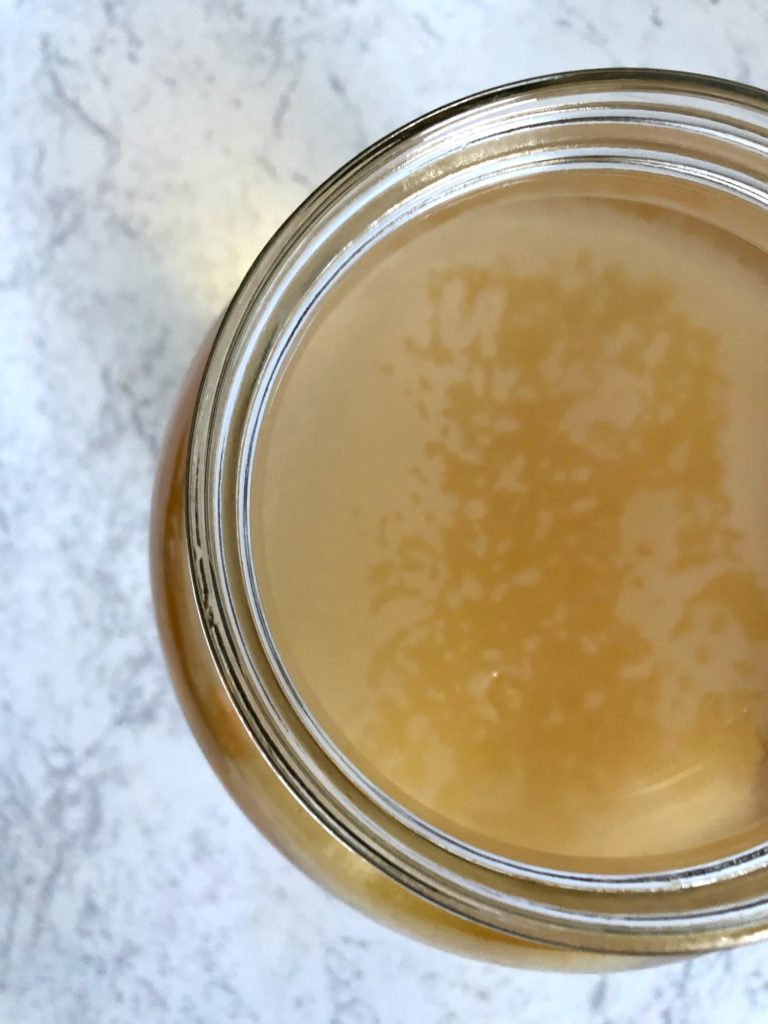
Here are some other signs of a healthy brew:
- Slight vinegar aroma: There will be a sweet yet sour waft coming from your booch. This means you’ve had a successful brew.
- SCOBY growth: As mentioned, a fully formed new SCOBY that covers the top of your brew means your brew is healthy and good to go.
- Yeast strands: While not appetizing, the formation of yeast strands means you’ve created a normal and desirable brew. Good job!
- Taste: While I don’t recommend tasting your brew until the second ferment is complete, once you do taste it, if it’s sweet and fizzy, you’ve done your job (if not, something went awry along the way).
- No Mold: You may notice some brown on your SCOBY and this is totally fine, it is not mold. You can remove it by hand and toss in the trash. If it’s mold, you’ve gotta kick that booch and SCOBY to the curb (aka, trash). Reference Kombucha Kamp for troubleshooting mold. I’ve never had mold, so I don’t have any pictures to show you, but mold is usually evident by blue and white spores floating around in your brew or attached to your SCOBY.
Step #7: Flavoring and Bottling
You are now ready to flavor and bottle your fermented mixture – yay! You’ll want to use some sort of fruit as the flavoring because it contains sugar and will really help your mixture carbonate well. The more sugar, the more carbonation present in your final product.
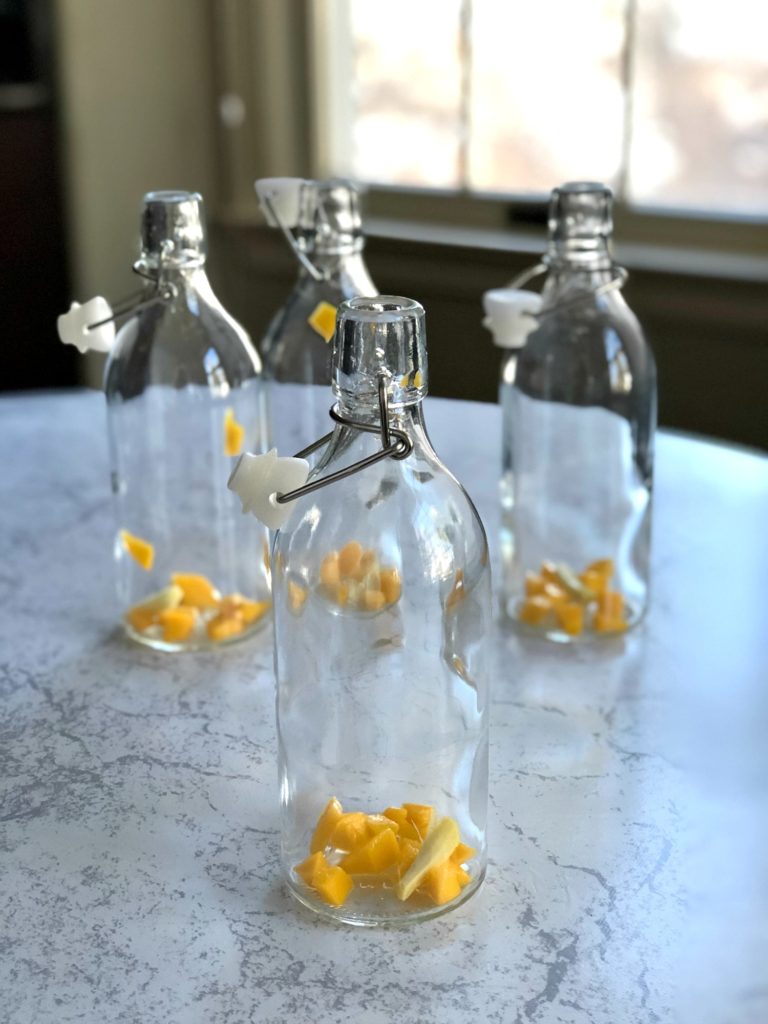
My favorite flavoring is a combination of mango chunks + ginger. This results in a magnificent brew that is top-dog for me, but you can experiment with different flavors and look for recipes online.
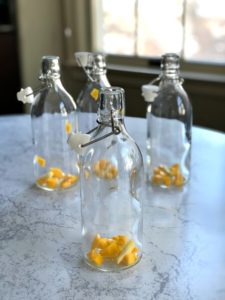
Simply chop up a few bits of mango and ginger and stick them inside your bottle (nothing too big or they’ll get stuck in the bottles).
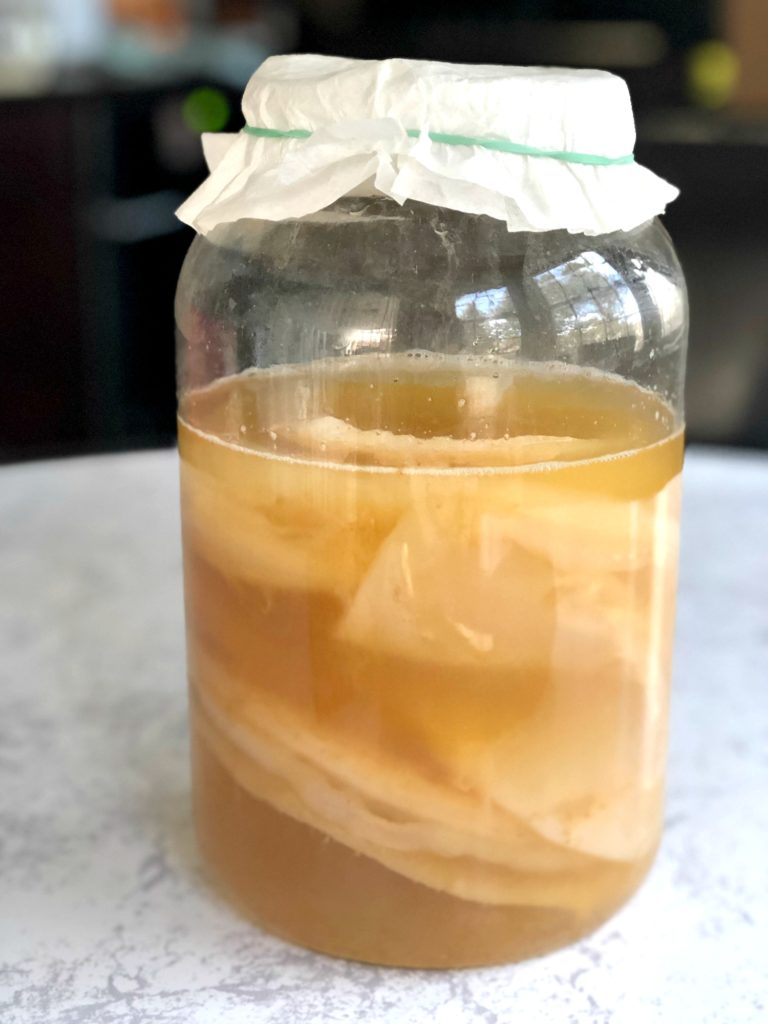
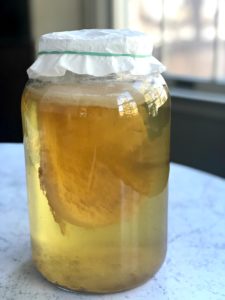
Before bottling the liquid, be sure to remove your SCOBY from the mixture along with at least one cup of starter liquid. If you want to save the new SCOBY, you’ll need to save several additional cups of your kombucha mixture and build up what is affectionately called a SCOBY Hotel.
Here is what my SCOBY Hotel looks like:
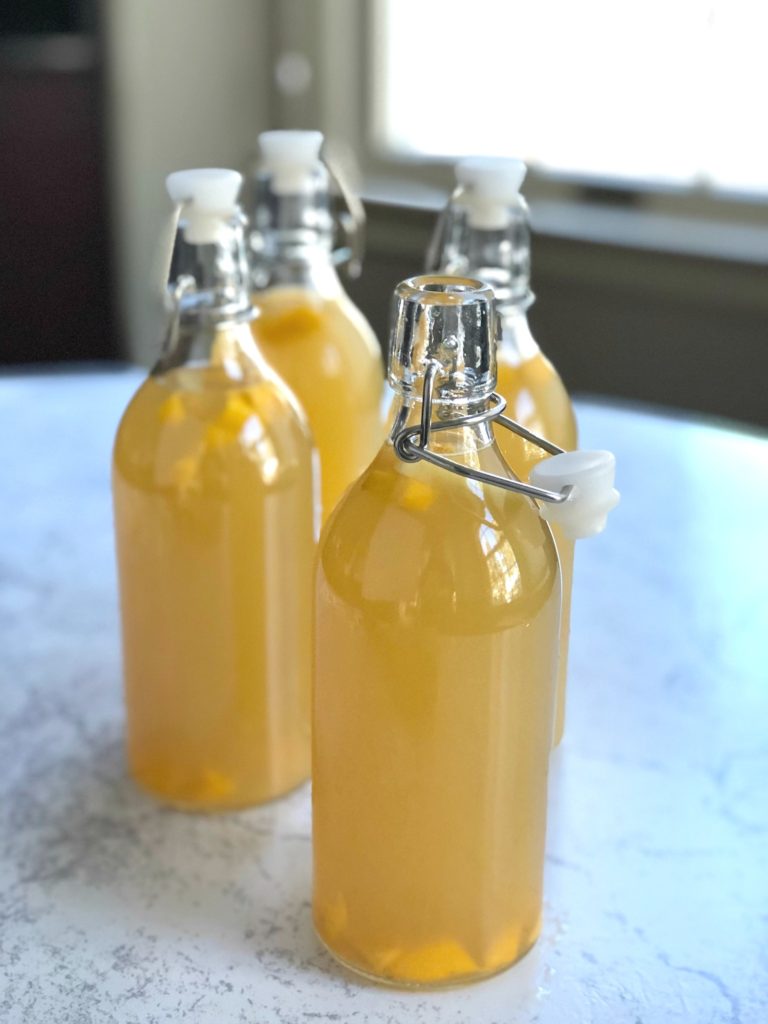
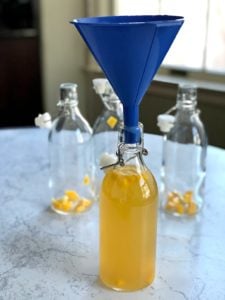
You’ll then want to strain the mixture and pour it through a funnel for bottling. You’ll want to leave about one inch of air space at the top of each bottle as pictured:
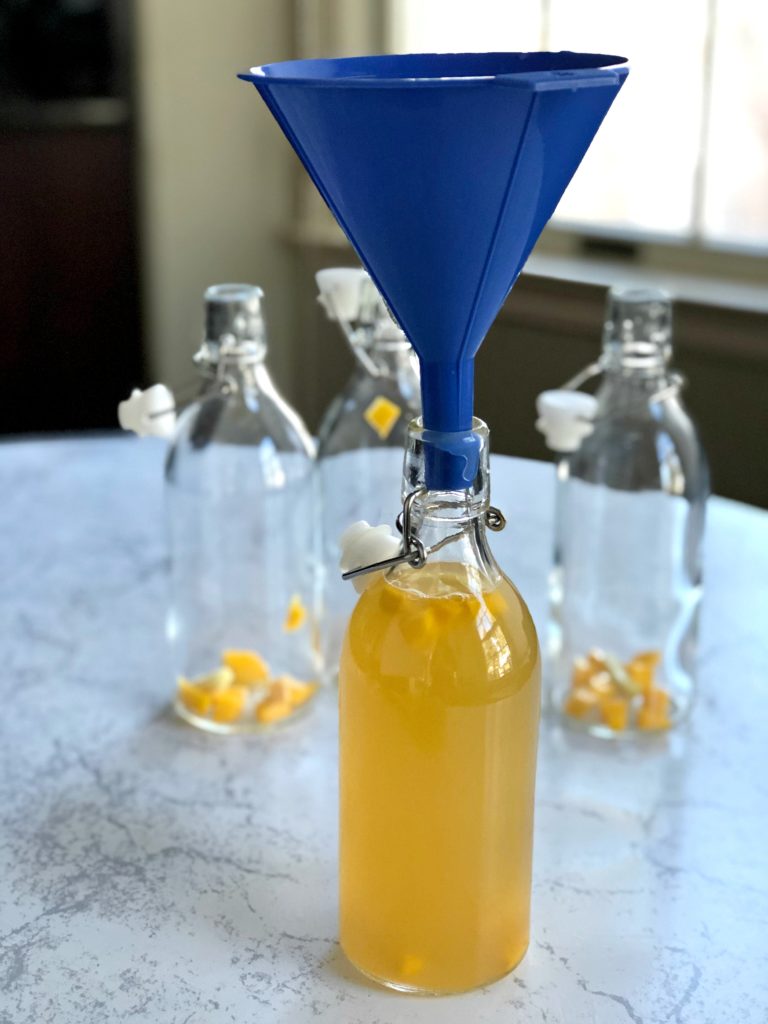
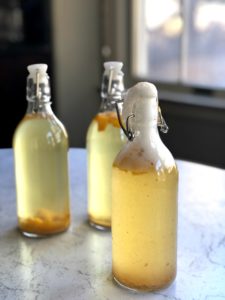
You’ll end up with 4-6 beautiful bottles full of delicious fermented tea (the number of bottles will vary depending on how much you reserve for your SCOBY Hotel). And don’t forget to reserve at least one cup of fluid for your next brew.
Step #8: Second Ferment (or How to Get Fizzy Kombucha)
Once the booch is bottled, you’ll want to leave it in those air-tight sealed jars for 4-7 days. This is the second fermentation process where the yeast and bacteria feed off the sugar from the fruit.
Because the gases cannot escape from the mixture, the mixture carbonates (like soda) and is super fizzy. If you’ve ever wondered how to get fizzy kombucha, this is it!
WARNING: This mixture is alive and when you open your booch, it can explode EVERYWHERE. Aim it away from your face (a must) and cover it with a dish towel over the sink upon opening for the first time.
Once you snap open the top, there’s a chance it will fizz everywhere if you’ve left it ferment too long, so covering it with a dishtowel will make clean up so much easier. Have a glass close by so you can capture the liquid if it overflows from the jar upon opening.
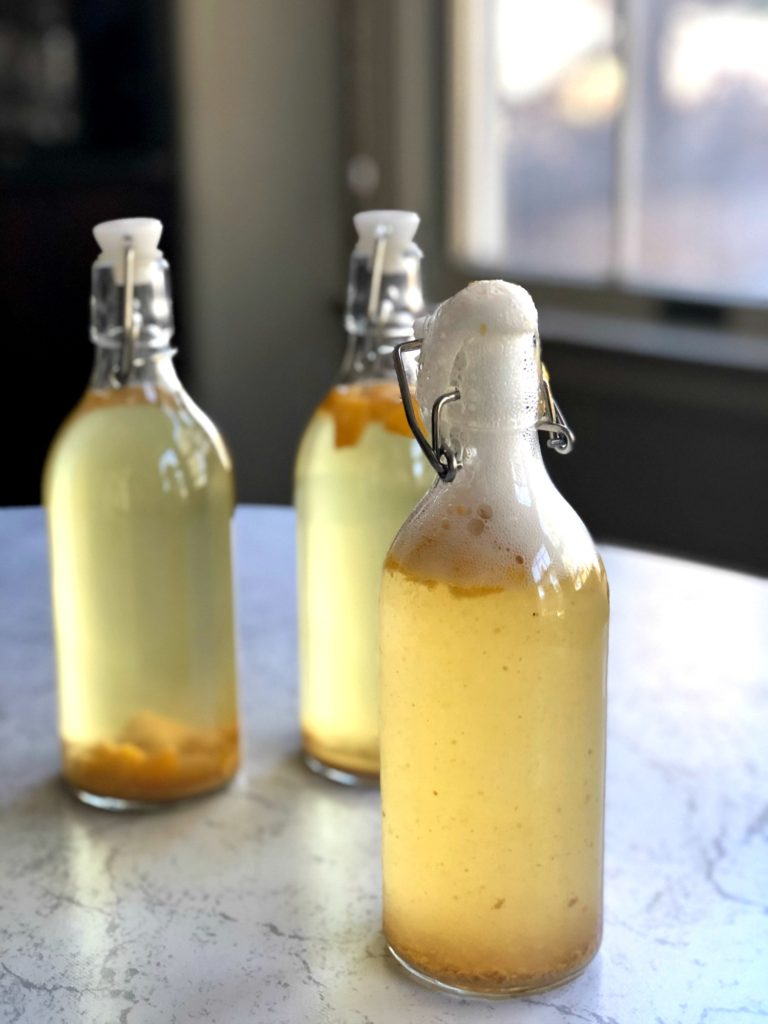
Once the second ferment is complete (and it’s fizzy to your liking), put the bottles in your fridge. This will stop the fermentation process and give you a few days to enjoy your booch.
Hurry up and drink them… because if you started another batch after bottling, you’ll soon be ready to bottle your new brew.
Don’t Want to Brew Your Own?
If the thought of making your own kombucha makes you a little nervous, or even skirmish, you’re in luck because kombucha is everywhere and you can buy it at just about any grocery store nationwide.
You can even find it in bars (many have kombucha on tap) or even at kombucha tap houses where a variety of micro-brewed kombucha is on tap or in bottles ready for you to drink.
You’ll have to taste them all to find out which ones you like best. Some of my personal favorite brands include:
- Health-Ade Kombucha
- Brew Dr. Kombucha
- GT’s Kombucha
- Synergy Kombucha
- Kevita Kombucha
I love trying home brews as well as brews on tap at bars. Just don’t over consume kombucha at night – it’s still tea and contains caffeine. Learned that lesson the hard way during a sleepless night not too long ago.
So tell me, do you like kombucha? Would you consider brewing your own or does the process intimidate you?
Remember, your skills (and brew) will get better with time. I’ve been brewing my own booch for almost a full year and feel like I’ve definitely found my stride.
Want more tips to healing your gut naturally? Take my free 7-day Heal Your Gut Challenge!
Make Your Own Kombucha or Jun
Ingredients
- 1 gallon filtered or distilled water
- 4-6 tea bags black, oolong, green, white or whatever tea you like for kombucha, green tea for jun
- 1 SCOBY
- 1 cup starter liquid from a previous kombucha brew
- 1 cup sugar (kombucha) or raw honey (jun)
- 1/2 ripe mango cut into chuncks
- 1 inch ginger root peeled and cut into 5-6 long strips
Instructions
- Brew four cups of hot, filtered water with 4-6 tea bags in a four-cup Pyrex measuring cup. Steep the tea bags in the hot water for 10 minutes, then pour the liquid into the glass vessel. Do not pour hot water in the glass vessel as it might crack the jar (yep, happened to me!). Fill the Pyrex with another four cups of hot filtered water and allow the tea bags to steep for a couple of minutes.
- Add 1 cup of sugar (for kombucha) or 1 cup of raw honey (for jun) to the hot mixture to allow it time to dissolve. Use a long wooden spoon to mix it until the sugar or honey is completely dissolved.
- Add the rest of the tea to the vessel. Fill up the vessel with additional filtered water until it’s nearly to the top. Allow the mixture time to cool (you can add in a few ice cubes to cool it more quickly). You do not want to place your SCOBY in hot liquid.
- Once the mixture is cooled, add your SCOBY and about one cup starter liquid (liquid reserved from a prior batch).
- Next, you’ll want to cover the mixture with a coffee filter secured in place with a rubber band. This ensure no particles get in to compromise the mixture. Then store the jar on a warming mat in a dark place in your kitchen (sunlight should not be beaming on it). Do not move it! This will disrupt the fermentation.
- The first fermentation process takes seven or more days to complete depending on the maturity of your SCOBY and starter fluid, as well as the temperature of the mixture.You’ll know your kombucha is a healthy brew if the SCOBY reproduces itself. You should have a baby SCOBY that is about one half inch thick and hardy (it shouldn’t tear easily). If it’s too thin, it indicates a weak culture. If it’s too thick, enough oxygen may not have reached the brew. The SCOBY baby should be white to light tan in color and you should see plenty of yeast strands attached to the bottom of the culture and floating in the liquid.The new SCOBY will reproduce on top of the old SCOBY. Sometimes they are piled on top of each other, other times the mother SCOBY is floating around or at the bottom of the mixture. It doesn’t matter, as long as she reproduces.See full article for “Signs of a healthy brew.”
- You are now ready to flavor and bottle your fermented mixture. You’ll want to use some sort of fruit as the flavoring because it contains sugar and will really help your mixture carbonate well. The more sugar, the more carbonation present in your final product.My favorite flavoring is a combination of mango chunks + ginger. Simply chop up a few bits of mango and ginger and stick them inside your bottle (nothing too big or they’ll get stuck in the bottles).Before bottling the liquid, be sure to remove your SCOBY from the mixture along with at least one cup of starter liquid. If you want to save the new SCOBY, you’ll need to save several additional cups of your kombucha mixture and build up what is affectionately called a SCOBY Hotel. See full article for details.
- Strain the mixture with a mesh strainer and pour it through a funnel for bottling. You’ll want to leave about one inch of air space at the top of each bottle as pictured. You’ll end up with 4-6 beautiful bottles full of delicious fermented tea (the number of bottles will vary depending on how much you reserve for your SCOBY Hotel). And don’t forget to reserve at least one cup of fluid for your next brew.
- Once the booch is bottled, you’ll want to leave it in those air-tight sealed jars for 4-7 days. This is the second ferment where the yeast and bacteria feed off the sugar from the fruit. Because the gases cannot escape from the mixture, the mixture carbonates (like soda) and is super fizzy.WARNING: This mixture is alive and when you open your booch, it can spurt EVERYWHERE. Aim it away from your face (a must) and cover it with a dish towel over the sink upon opening for the first time. Once you snap open the top, there’s a chance it will fizz everywhere if you’ve left it to ferment too long, so covering it with a dishtowel will make clean up so much easier. Have a glass close by so you can capture the liquid if it overflows from the jar upon opening.
- Once the second ferment is complete (and it’s fizzy to your liking), put the bottles in your fridge. This will stop the fermentation process and give you a few days to enjoy your booch. Hurry up and drink them… because if you started another batch after bottling, you’ll soon be ready to bottle your new brew.
Leave a Comment