
Even though you can’t eat gluten, you can still enjoy pull-apart gluten-free dinner rolls at your Thanksgiving or Christmas table. The rolls are light, fluffy, buttery, and they’re made without gluten, a protein found in wheat, rye, and barley. This post contains affiliate links. Please see my disclosures.
Bread is one of the trickiest things to make in gluten-free baking. You’ll notice that I don’t venture into the bread zone often, and when I do, I need the recipe to be just right. I don’t want to lead you astray.
As Thanksgiving approaches, my craving for soft dinner rolls grows. I love a doughy dinner roll and soft-baked crescent rolls. These items are typically off-limits at the Thanksgiving table when you have celiac disease, gluten intolerance, or non-celiac gluten sensitivity.
Instead of missing doughy dinner rolls, I developed a recipe that tastes fantastic right out of the oven. If you can time these to finish baking just as your Thanksgiving meal commences, they will taste the best and be the talk of the table.
What You Need
To start your dinner roll-making adventure, you need to gather a few key ingredients.
Gluten-Free Flour: I have made this recipe with two gluten-free flour blends I regularly keep in my pantry: Bob’s Red Mill 1-to-1 Gluten-Free Flour and Hand + Heart All-Purpose Gluten-Free Flour (formerly known as Lorraine’s Gluten-Free).
Hands down, I can say this recipe looks better with Hand + Heart All-Purpose Flour. The dough (batter) feels thicker and is easier to handle, while the rolls made with Bob’s Red Mill flour spread and were stickier.
As for taste, I think they’re both excellent, but I give the taste win to Hand + Heart All Purpose Flour.
You may need to experiment to find the right flour blend for you. Make sure whatever flour you choose contains xanthan gum, a binder that holds baked goods together. Without it, your dinner rolls would crumble.

Milk: I used 2% milk, but you could use whole milk or dairy-free milk like almond milk, cashew milk, or soy milk. Remember, dairy-free milk may result in a different texture.
Honey: Honey adds a touch of sweetness to this recipe, and it helps to bloom the yeast. I use raw honey native to Colorado. I think raw honey from your hometown will taste the best.
Active Dry Yeast: Buy a jar of active dry yeast so you can measure out 1 tablespoon of it. Yeast packets don’t quite contain a full tablespoon of yeast.
Butter: I use unsalted butter; you could also use vegan butter. Results may vary.
Eggs: Eggs are essential to giving these dinner rolls rise and texture. Don’t skip the eggs. I do not have an egg-free version.
Apple Cider Vinegar: Apple cider vinegar is widely used in gluten-free bread recipes because it helps give the dough rise.
Kosher salt: A little salt goes a long way in enhancing the flavor of the bread.
How to Make Gluten-Free Dinner Rolls
Combine the warm milk and honey in a large bowl, then sprinkle the mixture with active dry yeast. Make sure the milk is warm but not hot. If you have a thermometer, you want the milk to be between 95-115º F, which will perfectly activate the yeast. Use your microwave or heat a small saucepan to warm the milk.
Gently whisk the yeast mixture and let the yeast work for about 8-10 minutes to bloom. If your yeast is fresh and active, your mixture will bubble and look frothy. If it doesn’t, it’s time to get new yeast.
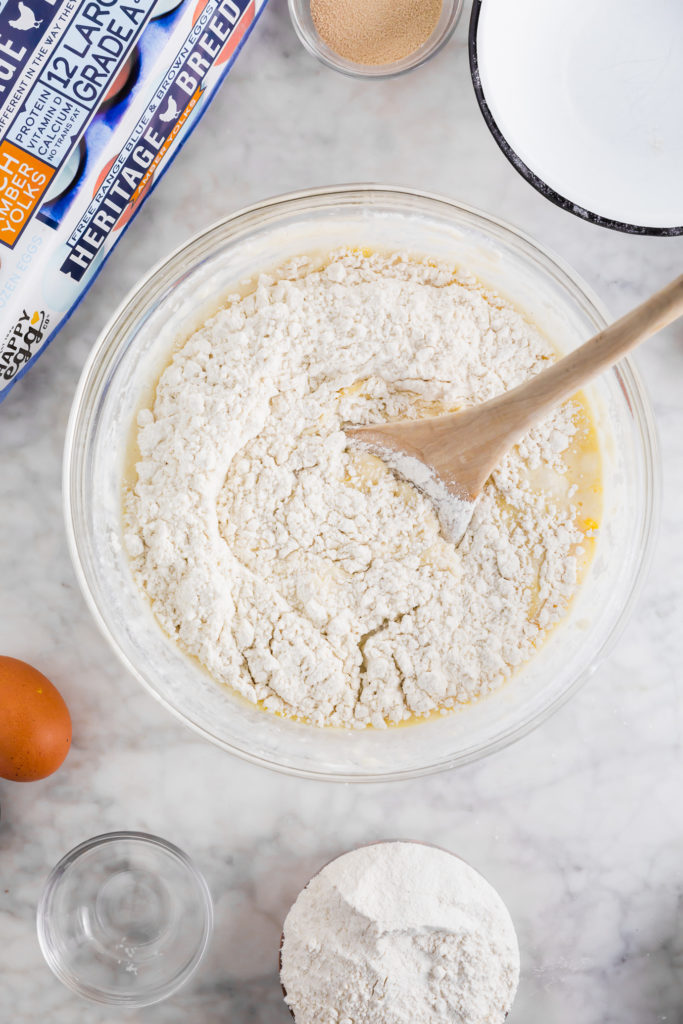
Once the yeast is activated, add the melted butter, eggs, and apple cider vinegar to your standing mixer and mix for 20 seconds. Add the Kosher salt and Hand + Heart All Purpose Gluten-Free Flour (or other flour of choice) and blend for 30 seconds on low, then 4 minutes on medium-high speed.
Once the dough is ready, use a cookie scoop or large spoon to divide the dough into 18-20 equal portions. The cookie scoop helps create uniform rounded scoops. Adding a little cooking spray to the cookie scoop will prevent the dough from sticking to it. Place each scoop of dough in a lightly greased 9×13 baking dish (five rows of four each).

To get that beautiful, smooth look on top, wet your fingers and then smoothed out the top of the dough. You don’t have to do this step; I don’t mind misshapen rolls.
Cover the dough with plastic wrap or a clean kitchen towel and let the dough rise for one hour in a warm place. I use the proofing setting in my oven because my house is cold. The dough should double in size. If your house is cold, you may need to wait 2-3 hours for the dough to double in size before baking.
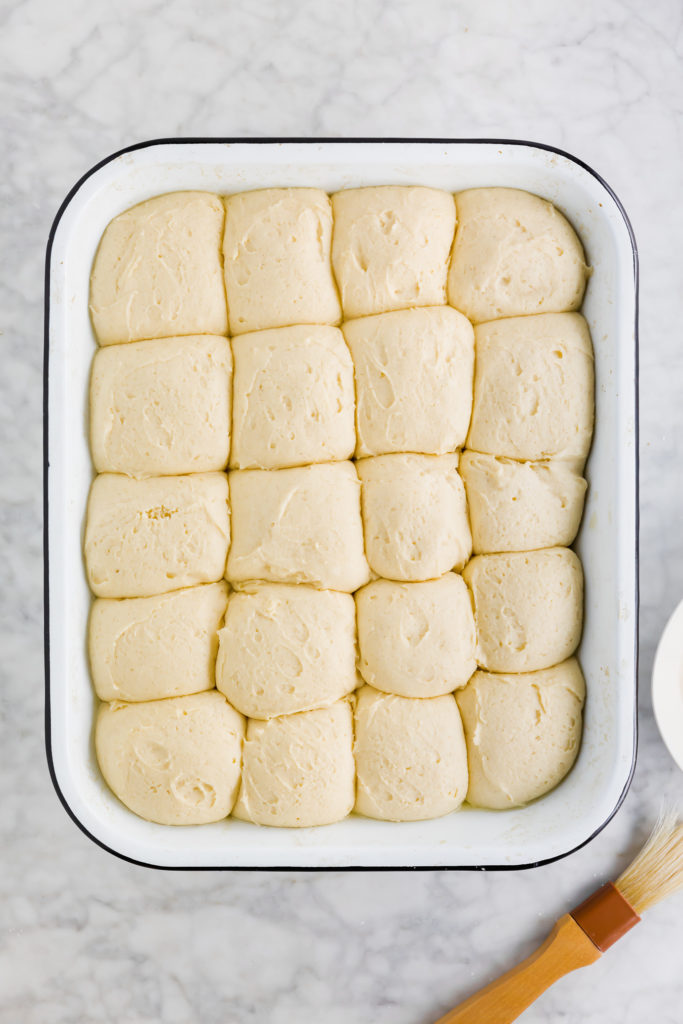
Once the dough has doubled and all sides are touching one another, preheat the oven to 400º F.
As the oven preheats, create an egg wash in a bowl by combining one egg + 1 tbsp of water. Gently brush the egg wash over the top of each dough ball, being extra careful not to deflate the dough. The egg wash will give the pull-apart gluten-free dinner rolls a beautiful brown sheen on top once baked.
Bake the pull-apart gluten-free dinner rolls for 18-20 minutes or until the bread has reached an internal temperature of 210º F and the tops are browned. Let cool before serving.
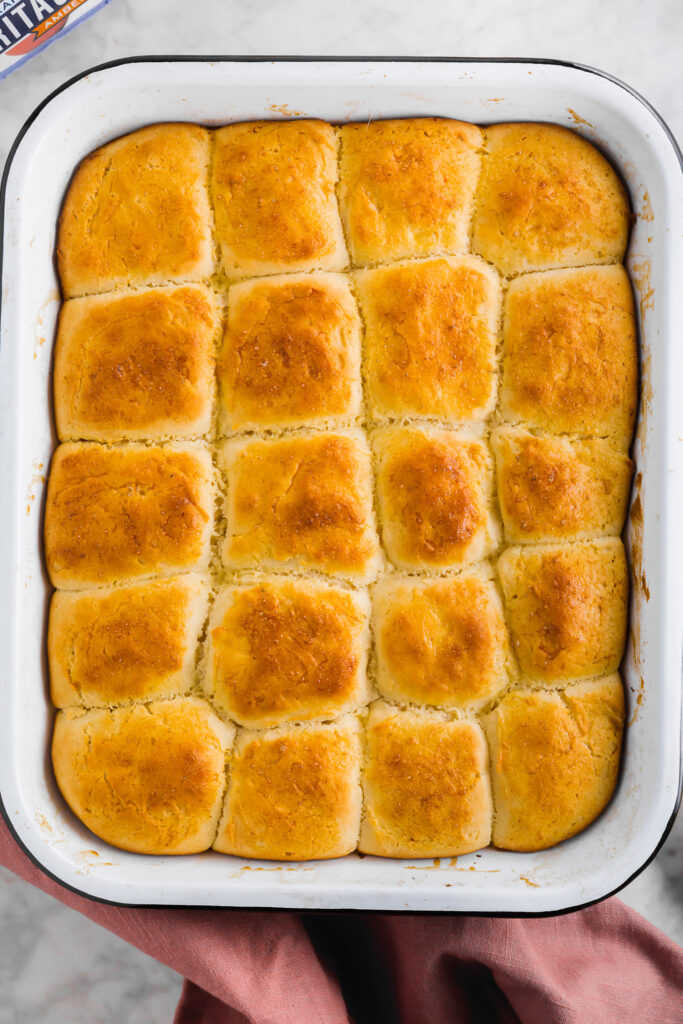
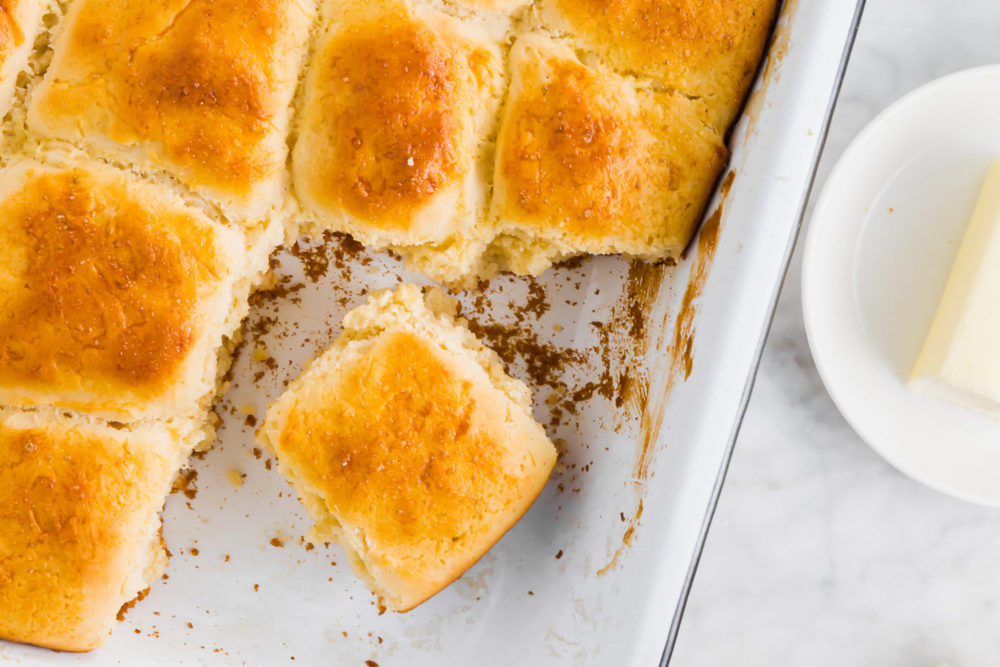
Now, stand back and look at your beautiful creation. Hello Thanksgiving! It’s a no-brainer that these dinner rolls will be a HUGE hit!
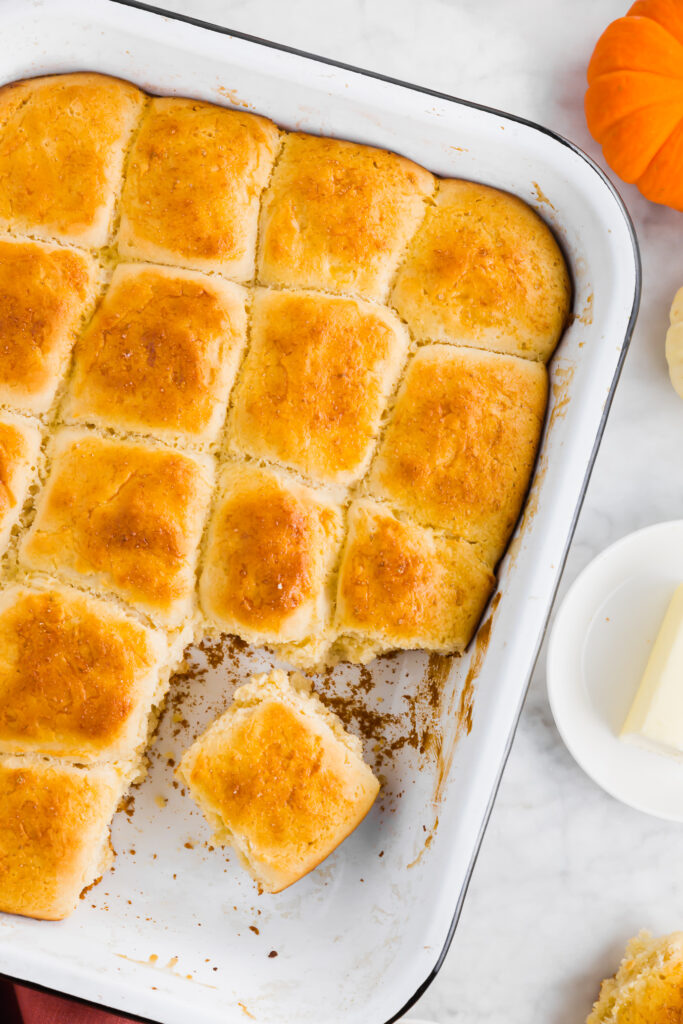
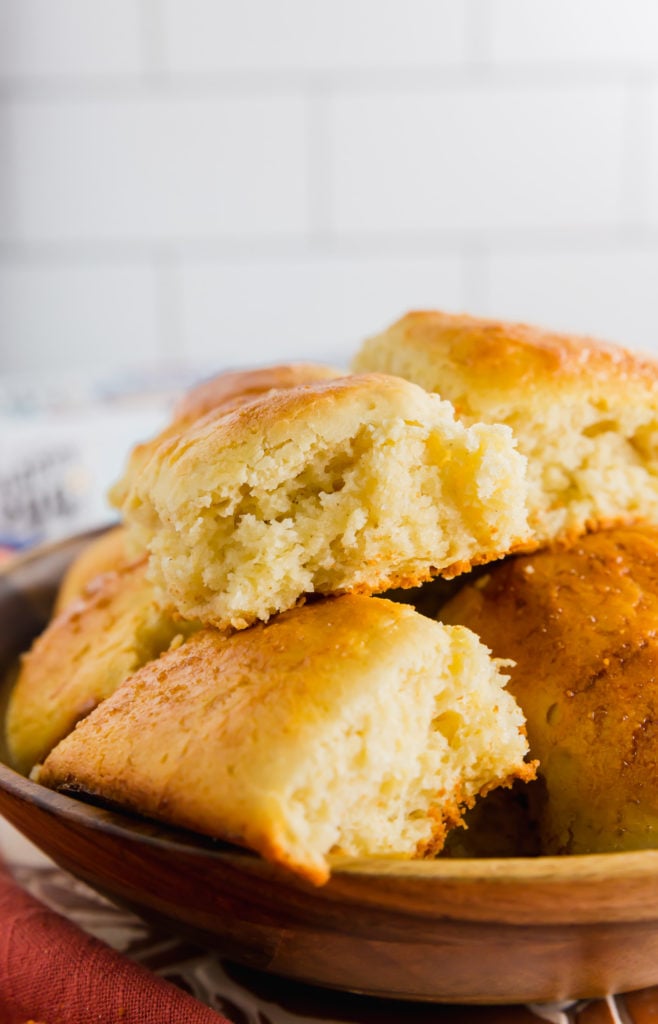
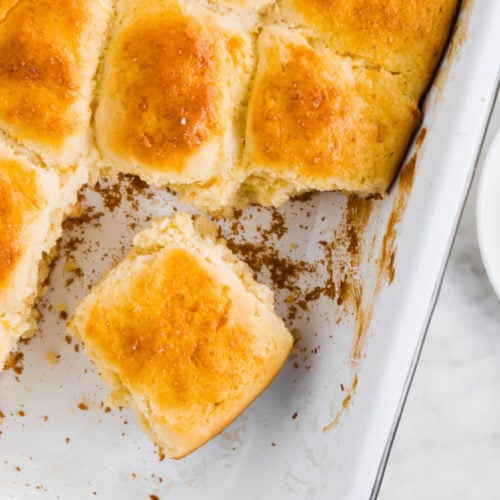
The rolls are doughy inside and have a soft-yet-crisp buttery crust on the outside. I recommend brushing the tops with melted butter right out of the oven to give them an extra buttery and moist flavor. Happy Thanksgiving to you!
Recipe Tips
Storing Leftovers: Leftovers will quickly deteriorate, as all gluten-free bread made with preservatives doesn’t last long. I recommend baking the rolls right before you want to enjoy them so they’re soft, fresh, and warm. Store leftovers in an airtight container or zip-top bag. Heat each roll in the microwave for 10-15 seconds to bring it back to life. They will only taste good for a few days after baking.
Flour Matters: I highly recommend using Hand + Heart All Purpose Flour for this recipe. Not all gluten-free flour blends work well for making bread. I used to use Bob’s Red Mill 1-to-1 Gluten-Free Flour, but I found it didn’t work well for making bread, so I switched to Hand + Heart with excellent results. The Hand + Heart dough feels thicker, and the bread rises higher and fluffier than the pictures show. Please note the pictures were taken when I first developed this recipe using Bob’s Red Mill 1-to-1 Flour (before Hand + Heart existed!).
Measuring Flour Properly: For the best results, spoon the flour into your measuring cup and then level it off. Do not directly scoop the flour with the measuring cup. It will add too much flour to the dough and create a heavier, denser roll.
Yeast: Be sure to use fresh active yeast. Old yeast will lose its luster and won’t rise. Fresh yeast will ensure this recipe rises high. If you have instant (vs. active) yeast, you can use that instead. You can add the yeast right into the bowl with the rest of the ingredients without letting it sit in the warm milk mixture first.
Warm Milk Tips: It is best to have a thermometer to ensure the milk mixture is at the correct temperature. You want it to be between 95-115º F. If it’s any lower, it will not activate the yeast. If it’s higher, it will kill the yeast. I like to keep my milk around 105-110º F. You can heat it in the microwave or a small saucepan on the stovetop.
Type of Milk: I recommend using whole or 2% milk. Dairy-free milk will work but will give the bread a slightly denser texture.
No Kneading Needed: Typically, when making bread, you knead the dough for about 10 minutes to develop the gluten, and then you let the dough do a first rise before shaping and proofing. Gluten-free dough does not work the same way. It’s best to shape the dough after preparing it, then let it go through one rise before baking.
Shaping the Dough: A cookie scoop is the best way to portion the dough evenly. You won’t be able to shape the dough by hand because the dough is very sticky. Spray the cookie scoop with cooking spray to prevent the dough from sticking to it.
Oven Temperatures Vary: All ovens work differently, so it’s best to check the internal temperature of the rolls to know if they’re done. They should reach 210º F in the center of the bread. If the bread is browning too fast, cover it with aluminum foil.
More Gluten-Free Thanksgiving Recipes
Try these delicious tried-and-true gluten-free recipes, all of which are perfect for Thanksgiving dinner and dessert:
- Pull Apart Gluten-Free Dinner Rolls (such a great addition to any Thanksgiving meal)
- Gluten-Free Sweet Potato Casserole with Pecan Topping
- Easy Gluten-Free Pie Crust Recipe (3 Ingredients!)
- The BEST Gluten-Free Apple Pie Recipe (what would Thanksgiving be without apple pie?)
- Amazing Gluten-Free Pumpkin Pie Recipe (super tasty – a must!)
- Delicious Thanksgiving Cranberry Sauce Recipe (super easy and better than the canned stuff)
- Baked Brie with Walnuts, Pomegranates, and Honey (great Thanksgiving appetizer!)
- Gluten-Free Gravy Mixes – Tested for Hidden Gluten
Are you struggling with your gluten-free diet this holiday season? Enroll in my Gluten-Free Holiday Survival Mini-Course to learn how to navigate the holidays with ease and without compromising your diet or health.
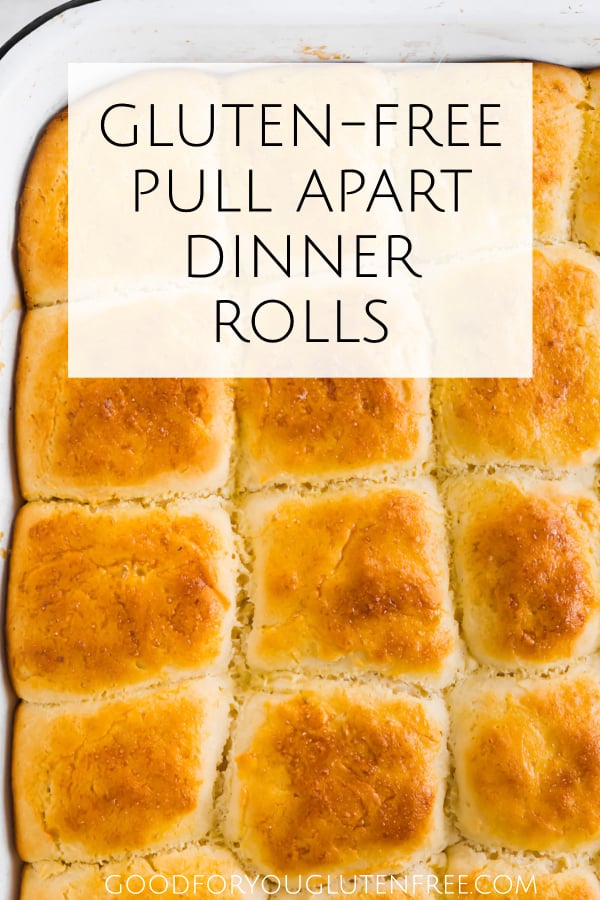
Pull Apart Gluten-Free Dinner Rolls
Equipment
- 1 Standing or handheld mixer
- 1 9×13 casserole dish
- 1 medium cookie scoop
- cooking spray
Ingredients
For the Dinner Rolls
- 1 1/2 cups warm milk Temperature should be between 95-115º F
- 1/4 cup raw honey
- 1 Tbsp active dry yeast
- 4 Tbsp butter unsalted, melted
- 2 large eggs
- 1 Tbsp apple cider vinegar
- 1/2 Tbsp Kosher salt
- 4 cups gluten-free flour blend with xanthan gum I highly recommend Hand + Heart All Purpose Gluten-Free Flour – see notes
For the Egg Wash
- 1 egg
- 1 tsp water
Instructions
- Lightly grease a 9×13" baking dish. Set aside.
- Combine warm milk and honey in a large bowl. Add the active dry yeast and gently whisk the mixture to combine. Let the yeast mixture sit for 8-10 minutes until the yeast blooms. The mixture will bubble up and look very frothy. If it doesn’t, your yeast may be dead because your milk mixture was too hot or your yeast is too old.
- Once the yeast is activated, add the yeast mixture, melted butter, eggs, and apple cider vinegar to the bowl of your standing mixer. Combine for 20 seconds.
- Add the gluten-free flour and salt, and mix on low for 30 seconds, then crank up the mixer to medium-high speed and mix the dough for 4 minutes.
- With a medium-sized cookie scoop or large spoon, portion out the dough into 18-20 equal parts. The cookie scoop helps create uniform scoops. Lightly grease the cookie scoop to prevent the dough from sticking to it.
- Place each scoop of dough in the prepared baking dish (5 rows of 4). Smooth out the top with wet fingers or a wet spatula, if desired.
- Cover the dish with plastic wrap and let it rise for an hour in a warm environment free from drafts. I use the proofing setting on my oven. If your house is cold, you may need to allow an additional 1-2 hours of rise time. Once the dough has doubled in size, preheat the oven to 400º F.
- In a small bowl, beat an egg and water to create an egg wash. Carefully brush the egg wash on the top of each dough ball, ensuring not to deflate the dough.
- Bake for 18-20 minutes until the bread has reached an internal temperature of 210º F and the tops are browned. Let the rolls slightly cool before serving.
- Optional: For an extra buttery roll, brush the rolls with melted butter as soon as they come out of the oven.
I used the paddle attachment
What type of attachment do you use to mix the dough in the stand mixer?
Great idea! Maybe scoop 4 into a small pan and freeze them. Bring to room temperature before baking. Enjoy!
I wonder if these rolls could be frozen before they are baked? It’s just my husband and I so it would be great if I could just bake 2-4 at a time for a meal. Otherwise it would also be nice to have them ready to go in the freezer.
Amazing to hear. I love your tips too!
Easily 5 stars. I made the dough exactly as directed. I had a smaller scoop so I had 5 rows of 5 buns each.
I made these on Wednesday night, put them in the fridge right away, traveled on Friday morning, and cooked them Friday night. They were a massive hit, and already have been requested again.
For anyone who travels with food, this recipe made it very easy. The dough was made at home with all my own safe ingredients and I didn’t need to haul a stand mixer anywhere. I put them in a 9×13 cake pan that has a top, put that in a large cooler with some ice packs, and just made sure it stayed flat in the car.
Thank you for this recipe!
Yes, then bake before serving.
These look amazing! I’m going to be traveling for Thanksgiving and he been asked to bring some buns. Do you think these could be fully prepped, but left in the 9×13 dish in the fridge for a day or 2 before baking?
Yes you can.
Can you use less salt?? I’m on a low sodium diet. 1/2 Tbsp is a lot.
Yes it should work.
Can dough be made ahead of time and sit overnight?
I can never get the gf dough to rise. I NEED to try this one out.
Looks great! I can see cutting off the top half of them all in one swoop and making ham and cheese sliders! (Of course then putting the tops back on) Cant wait to try these !
Absolutely the best GF rolls I have ever tried! It’s now my go to recipe. I always add heavy cream to my egg wash instead of water – I think it gives it more shine and a better brown in my oven.
Yes should be fine.
Can Almond milk or coconut milk substitute for regular milk?
Yes the cooked rolls can be frozen.
These are amazing!
Thankyou for recipe 😋
I assume they can be frozen?
I think so but I haven’t tried it.
Could we substitute butter for coconut oil??
I haven’t done this before but I imagine it would work. I would bring the dough to room temp before baking though.
Can you freeze these once they are baked? Could you freeze the dough?
These rolls were so good and easy to make! Everyone liked them. My mom was impressed on how easy they were to make without getting your hands dirty. (No kneading) I will definitely be making these rolls again!
Yay thank you for the feedback.
Loved, loved, loved these yeast rolls. Haven’t had this for over 10 years and they are fabulous. Thank you so much! Thank you! Bonnie K
No it doesn’t.
Doesn’t yeast have Gluten ?