These gluten-free raspberry bars have the perfect combination of sweetness and tartness and taste incredible. A buttery cookie crust is topped with a bounty of fresh raspberries and a sweet crumble topping. This post is sponsored by Bob’s Red Mill and contains affiliate links. Please see my disclosures.
While chocolate dessert is my first love, a dessert filled with fresh fruit is a close second. And today I’m sharing ridiculously easy recipe for gluten-free raspberry bars that tastes incredible and celebrates the bounty of raspberries available during the summer months.
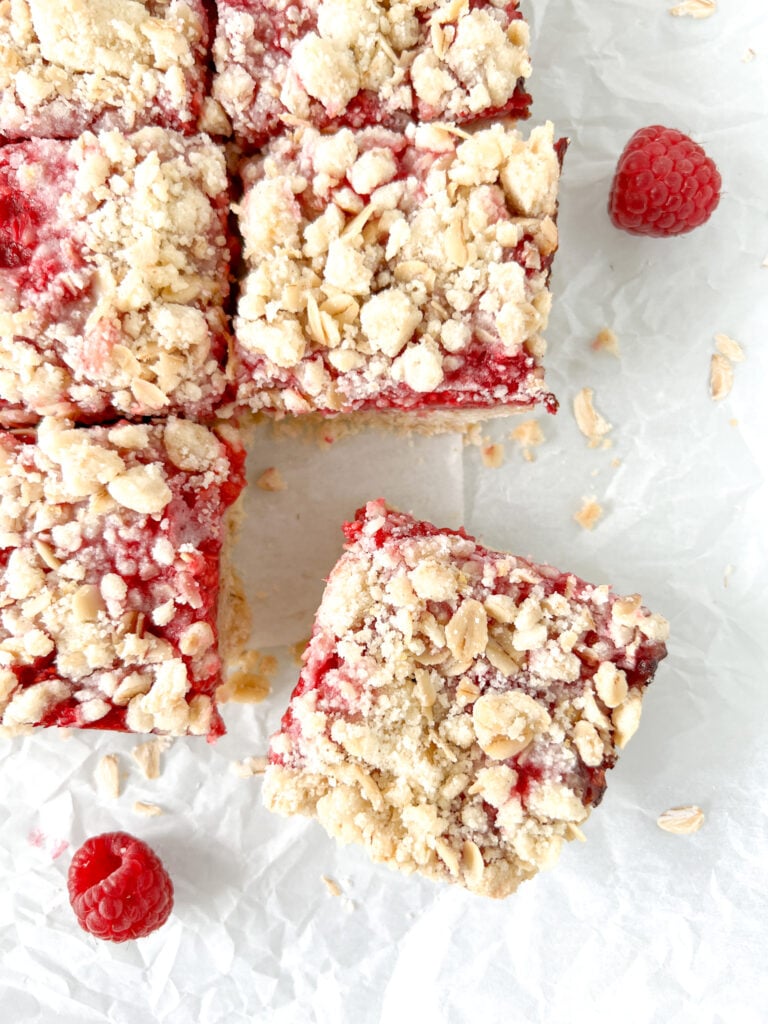
These gluten-free raspberry bars start with a sweet and buttery shortbread crust. The middle layer is loaded with fresh tart raspberries that have been slightly sweetened with raspberry jam. And everything is topped with an oat crumble to add even more texture and crunch.
In this post, I’ll take you step-by-step through the process for making these gluten-free raspberry bars. And I promise you, no one will know this is gluten free.
Ingredients for Raspberry Bars
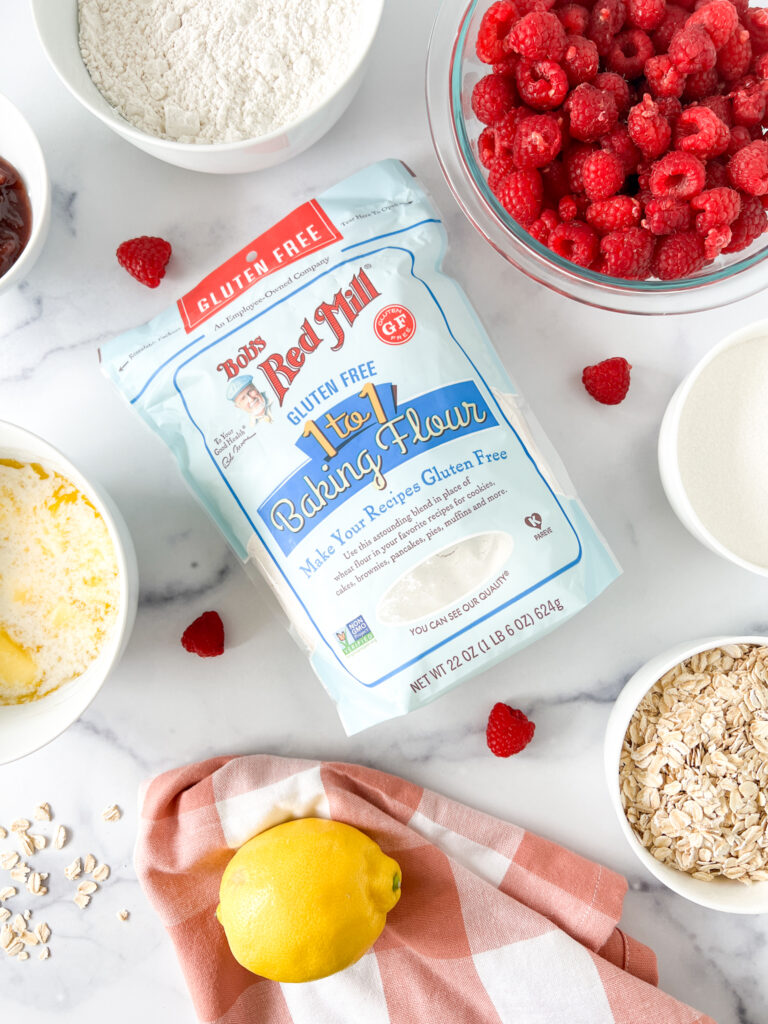
Here’s what you need to make this seasonal dessert:
For the cookie crust:
- 1 2/3 cups Bob’s Red Mill 1-to-1 Gluten-Free Flour Blend (246 grams)
- 1 cup Bob’s Red Mill Gluten-Free Rolled Oats (100 grams)
- 3/4 cup sugar (150 grams)
- zest of 1 lemon
- 2/3 cup butter (155 grams) – dairy-free butter ok, see notes below
For the raspberry filling:
- 400 grams raspberries, fresh
- 1 tsp lemon juice
- 1 1/2 tbsp cornstarch
- 2 tbsp raspberry jam
Instructions
Preheat your oven to 350º F. Grease an 8×8 square baking pan and line it with parchment paper, leaving a little overhang so you can easily remove the bars from the pan.
To make the cookie crust, combine the flour, oats, sugar and lemon zest in a large bowl. Give it a stir until combined.
Add the melted butter and mix well with a spatula. It will be a slightly wet, but also dry with many clumps. You can also use your hands to clump parts of the mixture together.
Add two-thirds of the cookie mixture to the bottom of a greased pan, reserving one-third of the mixture in a bowl. Press it firmly into place using the palm of your hands. Place the reserved cookie mixture in the freezer to harden a bit while you prepare the raspberry filling.
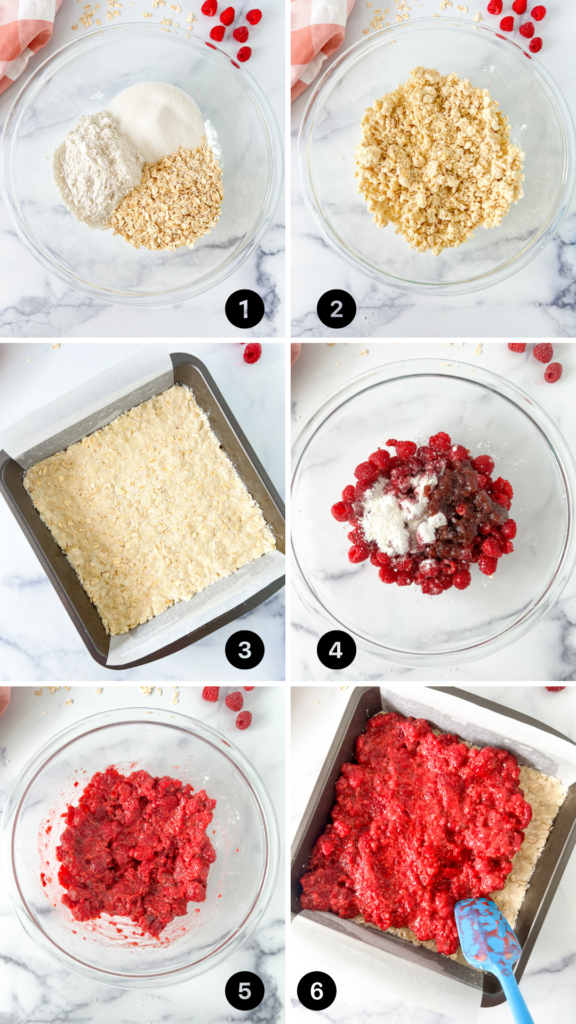
For the raspberry filling, combine the raspberries, lemon juice, cornstarch and jam in a medium bowl and stir to combine well, breaking up the raspberries as you gently mix them.
Spread the raspberry mixture evenly on top of the prepared cookie crust using a spatula.
Add the remaining one-third of the cookie crust to the top of the raspberries, spreading it out and ensuring there are small and big chunks of cookie crumbles adorning the top of the raspberry mixture.
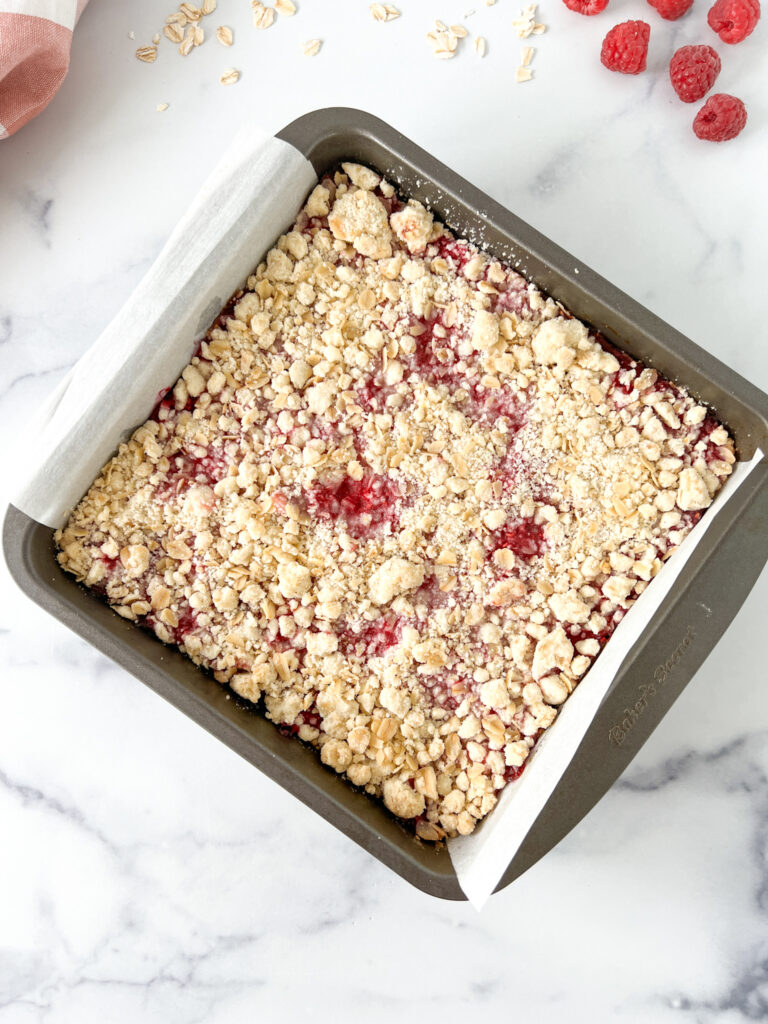
Bake for 45 minutes until the top begins to brown and the filling is bubbly. Be sure to allow the mixture time to cool completely in the baking pan before handling.
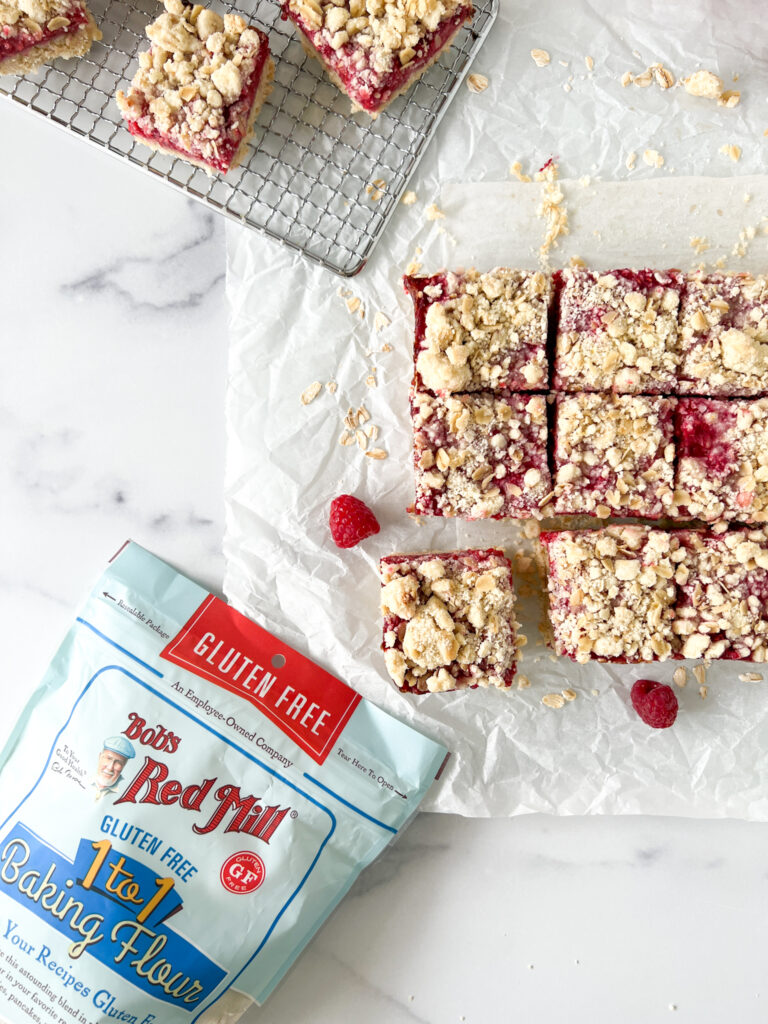
I also recommend that you refrigerate the bars, while they’re still in the baking pan, for at least one hour, before removing it from the pan and cutting it into about 16 evenly-sized squares.
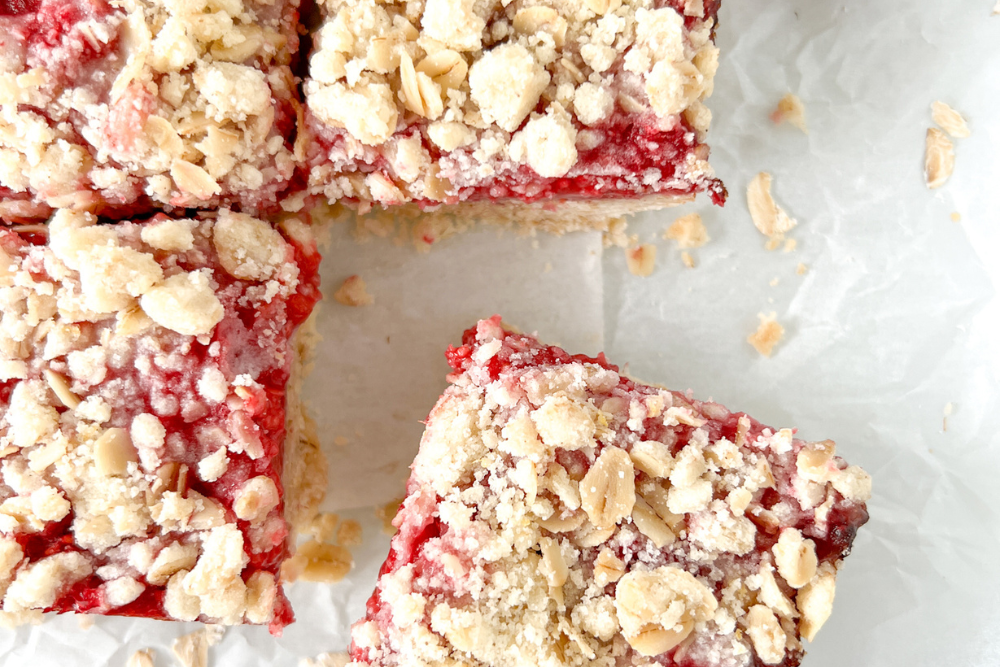
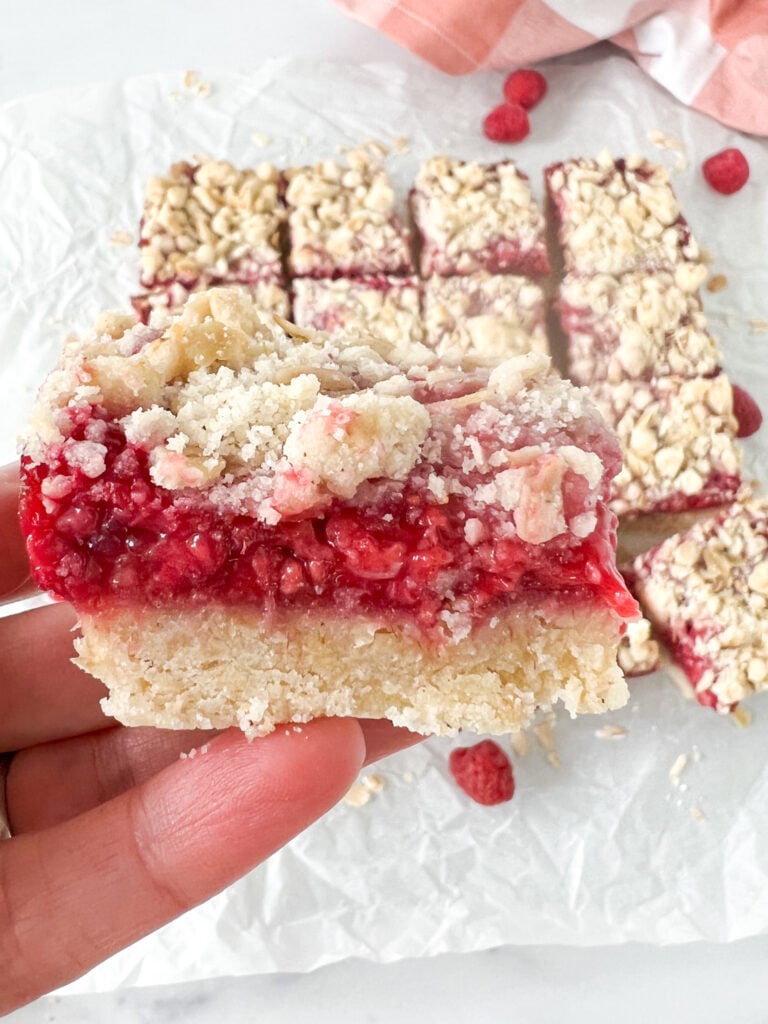
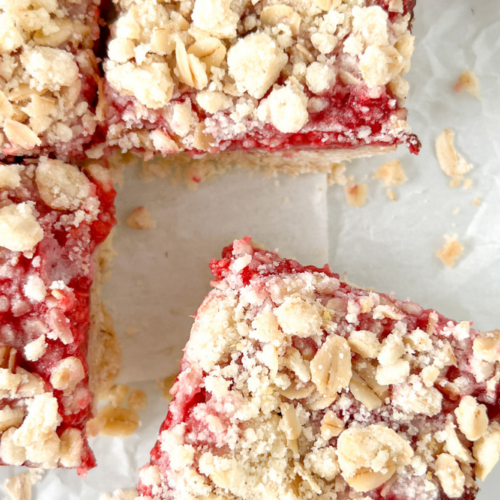
These gluten-free raspberry bars are perfect and have just the right amount of sweetness thanks to the buttery, sweet shortbread crust, and just the right amount of tart thanks to the fresh raspberries.
And it’s gorgeous. Just look at one of these raspberry bars up close!
Tips and Tricks:
The Flour: I highly recommend using Bob’s Red Mill 1-to-1 Gluten-Free Flour blend. It already contains xanthan gum, a binder that helps hold gluten-free baked goods together, and it just works well. You won’t know these are gluten free. There’s no gritty texture or aftertaste. Just a delicious dessert that happens to be gluten free!
The Oats: When baking with oats, make sure the package is labeled “gluten free.” Bob’s Red Mill Gluten-Free Rolled Oats are gluten free and safe for anyone with celiac disease or gluten sensitivity to consume. That said, oats are highly cross contaminated with wheat, so be sure to buy your oats from reputable gluten-free suppliers. (Read: Are Oats Gluten Free? Putting Bob’s Red Mill to the Test.)
The Raspberries: Raspberries offer a wonderful tartness to this recipe, but you can swap raspberries for strawberries and it will still come out delicious. Simply slice the strawberries before combining them with the other filling ingredients. This recipe is adapted from a strawberry crumble bar recipe I love from the book, How to Plan Anything Gluten Free.
Dairy-Free Option: You can absolutely use dairy-free butter (I recommend these vegan butter sticks) to make this recipe. All other ingredients, including the flour, are already dairy free.
Other Fruity Gluten-Free Desserts
Try these other gluten-free desserts made with fruit and Bob’s Red Mill products!
- Gluten-Free Chocolate Cupcakes with Raspberry Buttercream
- Gluten-Free Raspberry Thumbprint Cookies
- Gluten-Free Strawberry Shortcake – Easy and Delic!
- Easy Gluten-Free Peach Cobbler (Dairy Free)
- Gluten-Free Pop Tarts – Homemade
- Gluten-Free Apple Cranberry Granola Crisp
Gluten-Free Raspberry Bars
Equipment
- 1 8×8 square baking pan
Ingredients
For the cookie crust:
- 1 2/3 cups Bob’s Red Mill 1-to-1 Gluten-Free Flour Blend 246 grams
- 1 cup Bob's Red Mill Gluten-Free Rolled Oats 100 grams
- 3/4 cup sugar 150 grams
- zest of 1 lemon
- 2/3 cup butter 155 grams
For the raspberry filling:
- 400 grams raspberries fresh
- 1 tsp lemon juice
- 1 1/2 tbsp cornstarch
- 2 tbsp raspberry jam
Instructions
- Preheat your oven to 350º F. Grease an 8×8 square baking pan and line it with parchment paper, leaving a little overhang so you can easily remove the bars from the pan.
- To prepare the cookie crust, combine the flour, oats, sugar and lemon zest in a large bowl. Give it a stir until combined.
- Add the melted butter and mix well with a spatula. It will be a slightly wet slightly dry mixture with many clumps. Use your hands to clump parts of the mixture together.
- Add two-thirds of the cookie mixture to the bottom of your greased pan, reserving one-third of the mixture in a bowl for the topping. Press the mixture firmly in place using the palm of your hands. Place the reserved one-third cookie mixture in the freezer to harden a bit while you prepare the raspberry filling.
- For the raspberry filling, combine the raspberries, lemon juice, cornstarch and jam in a medium bowl and stir to combine well, breaking up the raspberries as you gently mix them. Spread the raspberry mixture evenly on top of the prepared cookie crust using a spatula.
- Add the remaining one-third of the cookie crust to the top of the raspberries, spreading it out and ensuring there are small and big chunks of cookie topping.
- Bake for 45 minutes until the top begins to brown and the raspberry filling is slightly bubbly.
- Allow the mixture to cool completely in the baking pan before handling and then refrigerate for 1 hour before cutting into 16 squares.
This was so delicious! My whole family loved it!