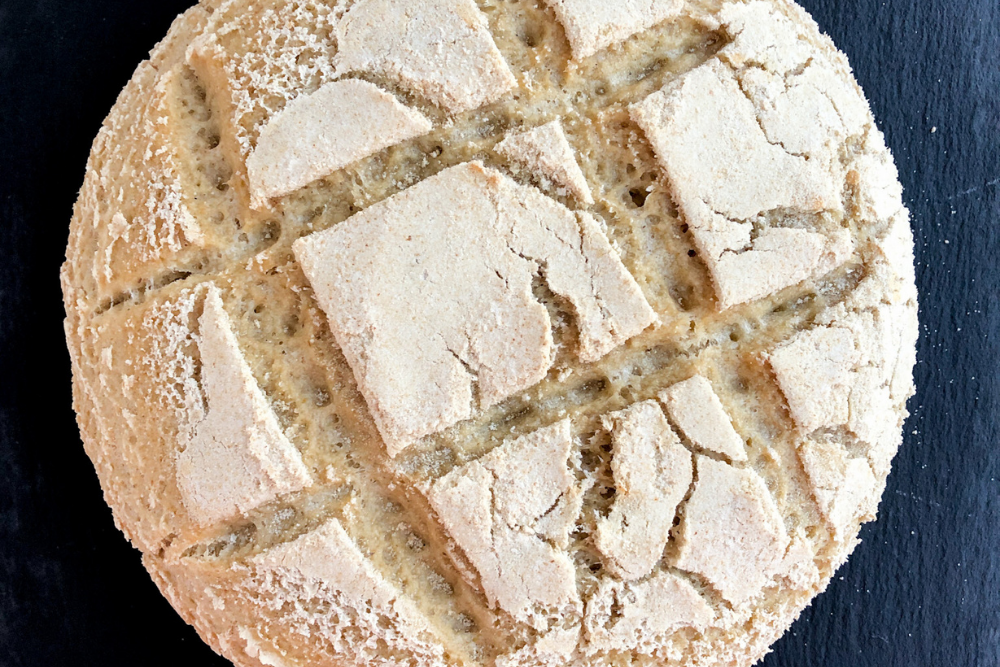
If you love a rustic artisan bread with a soft center and crusty outside, you’ll love this gluten-free artisan bread recipe. I’ve been dreaming of a recipe like this for years, and I feel like after years of playing with different recipes and trying different things, I have finally cracked the code on making a gluten-free bread fit for a fancy meal. This post contains affiliate links. Please read my disclosures.
Bread is the staff of life. It’s the food that has sustained the human population for centuries. However, when you have celiac disease or gluten sensitivity, bread is no longer the source of life; rather it’s the source of physical pain and emotional strife.
But it doesn’t have to be that way. In fact, you can love bread again, without the gluten, and still find joy in this simple food made from flour, water, salt and yeast. I’ll show you exactly how to do it.
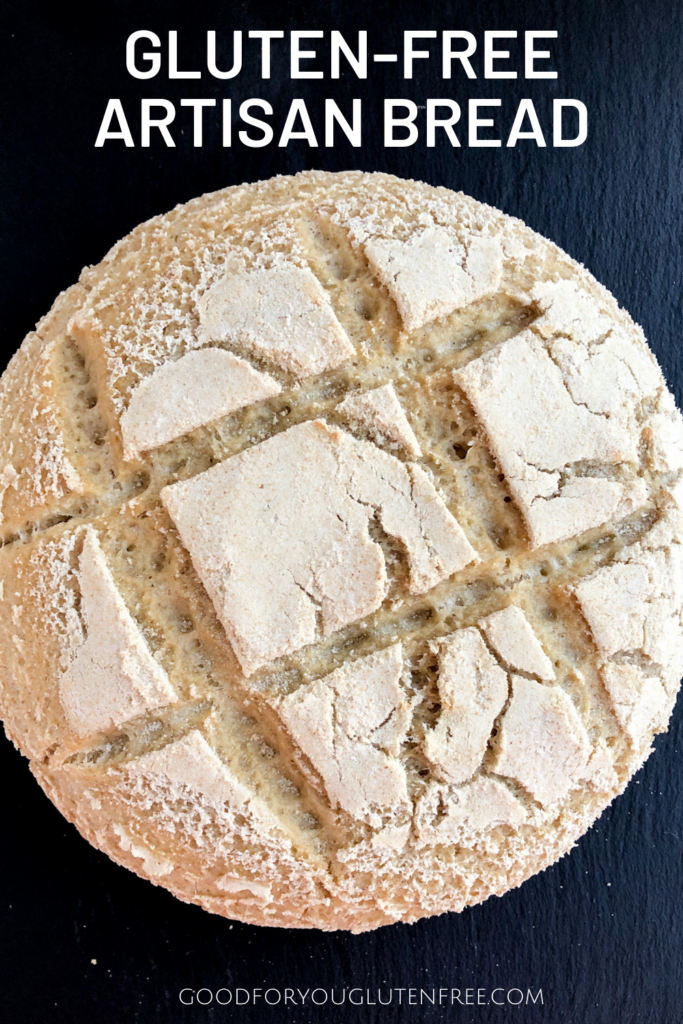
What is Artisan Bread?
An artisan bread is defined as a warm homemade bread similar to a bread you’d buy from bread bakery in France. Think of a bread basket filled with baguettes and boule-shaped (rounded) breads. These are artisan breads.
Artisan breads typically have a hard outer crust and a soft, doughy center. They must be eaten on the day they are made as they quickly go stale due to the lack of preservatives.
What I love about the artisan bread recipe I’m sharing below is that you’ll be able to measure out the exact ingredients you need to make one boule (ball) or loaf of bread. This recipe is perfectly measured out for you.
How to Make an Artisan Bread
To make your own artisan bread without gluten, first gather the following supplies:
(1) Dutch oven: A Dutch oven is a heavy, cast iron cooking pot with a tight fitting lid. It’s excellent for cooking stews and braised meats as it evenly distributes the heat to the entire dish, and it’s also essential to making an artisan bread at home.
A Dutch oven works by trapping the steam inside the bread, thereby creating an at-home steam-injected oven, which is an ideal oven for baking artisan breads. The steam transforms the dough into a crusty loaf with a soft and doughy center. The trapped steam also forces open any “scores” (cuts or slits in the top of the bread) made in the dough before baking, giving your bread crisp ridges and a crunchy texture, all signature components of a beautiful artisan bread.
I use an affordable 4-quart round Dutch oven by Tramontina for under $100, but a lot of artisan chefs use fancy Dutch ovens from brands like Le Creuset, which can run you $400+.
(2) Kitchen scale: When baking bread, it’s important to measure your flour with a kitchen scale. You will get the most accurate measurements and consistent results when you measure your flour by weight vs. volume. If the measurements are off, you could end up with a dry or crumbly bread.
I use this inexpensive kitchen scale I got on Amazon long ago. It’s a great investment and I use it all the time.
(3) Standing mixer: While you could certainly mix everything by hand, a standing mixer will make the process much faster and easier. I’m still using this KitchenAid standing mixer I got as a wedding gift 20+ years ago.
Once you have your supplies ready, you’re ready to assemble your dough.
Step #1: Prepare the Yeast Mixture
To prepare the yeast mixture, simply combine the following ingredients in a bowl:
Yeast: You’ll need 10 grams yeast, which is equal to about 1 tbsp. (If you have a gluten-free sourdough starter, you can use that instead of yeast. Please see my gluten-free sourdough bread recipe – it’s similar to this with slightly different measurements.)
Psyllium husk: You’ll need 10 grams psyllium husk, which is equivalent to about 2 tbsp. Psyllium husk is a dietary fiber that is often used to keep the digestive tract healthy and treat digestive issues, mostly notably constipation.
In gluten-free baking, psyllium husk is used as a binder to help baked goods maintain moisture, structure and stretch. It’s a healthier alternative to using xanthan gum or guar gum, which are other binders used in gluten-free baking.
You may need to look for psyllium husk in your natural grocery store in the dietary supplement section if you can’t find it in the baking section. You can also easily order it online from Amazon. It lasts a long time and you’ll get plenty of bread-baking action from this small container of it.
Water: You’ll need two cups of warm tap water for this recipe. Make sure the water is warm but not hot. The warm water will help to activate the yeast.
Mix everything together and set the yeast mixture aside. The yeast will activate and the psyllium husk will start to gel while you prepare your other ingredients.
Step #2: Combine the Dry Ingredients
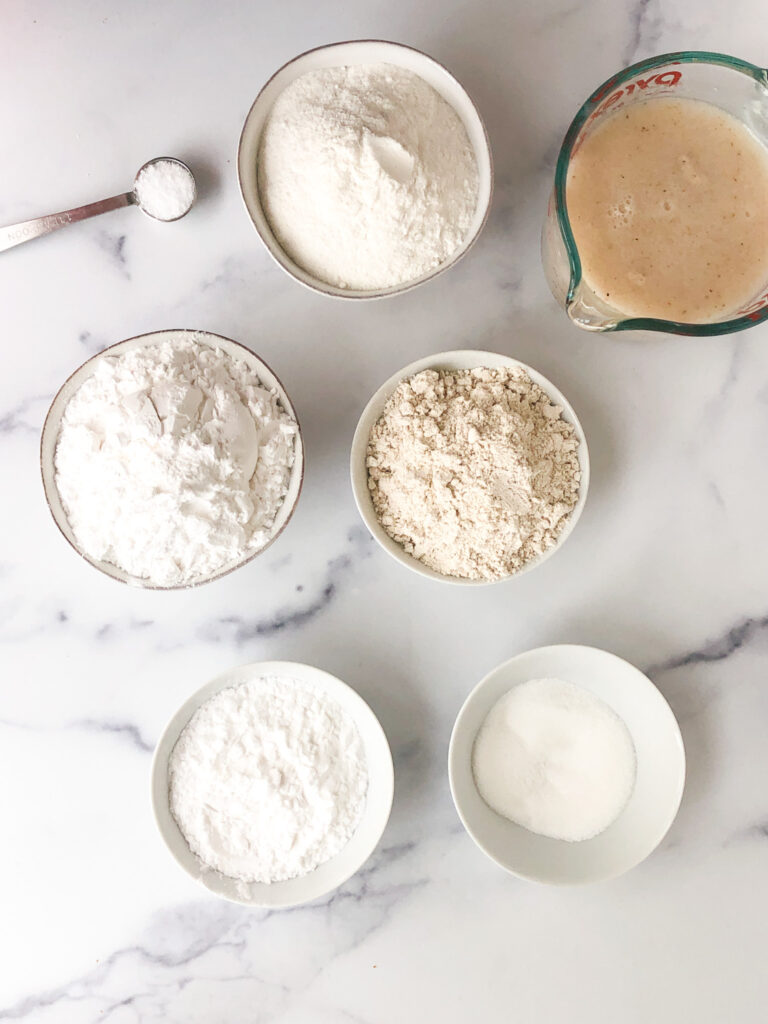
Now combine the following dry ingredients in the large bowl attached to your standing mixer. Always measure dry ingredients by weight, using a kitchen scale vs. measuring cups, so you get the most accurate measurements possible. Here’s what you need:
Rice flour: You’ll need 200 grams of brown rice flour for this mixture. You can also use white rice flour as the two flours work interchangeably. Brown rice flour includes the bran of the rice seed, which will give your bread more fiber and an earthy taste.
Tapioca flour or starch: Measure out 200 grams of tapioca starch for this gluten-free artisan bread recipe. Tapioca flour and tapioca starch are the same thing and come from the ground root of the cassava plant.
Oat or Buckwheat flour: You can use either 100 grams of gluten-free oat flour or buckwheat flour for this recipe. If you use oat flour, make sure the product is labeled “gluten free” as not all oats are gluten free. Buckwheat flour does not contain wheat despite the fact that it has “wheat” in its name. Buckwheat is neither a grain or grass; rather, it’s a plant closely related to rhubarb. Both flours will add earthy tones and fiber to your bread.
Potato starch: You’ll need 100 grams of potato starch for this recipe. Do not confuse potato starch with potato flour. Potato starch comes from the starchy part of the potato, while potato flour is made from whole ground up potatoes. You’ll need potato starch to add texture and to help bind the bread together since there is no gluten present to do that. Potato starch offers little to no nutritional benefits. It’s purpose is only functional.
Sugar: You’ll need just 30 grams sugar, which is about 2 tbsp. The sugar will “feed” the yeast and aid in helping your bread rise, but you will not taste its sweetness in the final bread.
Salt: Use about 1 tsp of Kosher salt as a flavor enhancer. You won’t taste the salt in the final bread either.
Whisk all the dry ingredients together and set aside. You’re now ready to assemble your dough.
Step #3: Combine Dry and Wet Ingredients
Slowly add the yeast mixture to the flour mixture and allow your standing mixer to do the work. Set the dial on your standing mixer to run on medium speed for one minute. Now add 15 grams of olive oil to your dough and continue to mix on medium speed for another minute. Don’t forget the olive oil!!
Olive oil is an essential fat and adds beautiful texture to the final bread. Once you add the olive oil, take a whiff of your dough. It officially smells like fresh bread dough!
Step #4: Knead the Dough
Bread recipes made with gluten require extensive kneading of the dough to develop the gluten, however, this recipe requires just a little kneading since there’s no gluten to develop.
I knead the dough for about a minute just to add more air into the dough. Plus, it’s fun to “knead” bread and this dough has the texture of a doughy bread made with gluten.
To knead the dough, sprinkle a little rice flour on your countertop or flat surface, add the dough, and gently fold the dough over onto itself over and over again. If the dough is really sticky, add a bit more flour.
Step #5: Allow the Dough to Rise
Scoop up the dough with your hands and gently form it into a nice round shape before placing it in a bowl to rise. You can do this by tucking the sides of the dough down and forming a rounded boule-shape by hand. You’ll notice the dough stays together well, and even has some stretch to it, which is the exact texture we’re looking for.
Add some rice flour to your bowl to prevent the dough from sticking, then place the dough inside the bowl.
Cover the bowl with a clean dish towel and place it in a warm spot in your house to rise. I use a seedling warming mat to ensure my yeast breads and pastries rise well. I also use it to keep my homemade kombucha at a warm temperature as my house tends to get very cold. I highly recommend investing in one. You could alternatively proof the bread in your oven or just find a warm spot and hope for the best. You can also use the proofing setting on your oven to ensure a warm rise environment.
If the conditions are just right, your bread is ready to bake in about two hours. You want it to rise and poof up, and it may even nearly double in size. You’ll notice little bubbles throughout the dough, a good sign of a perfect rise.
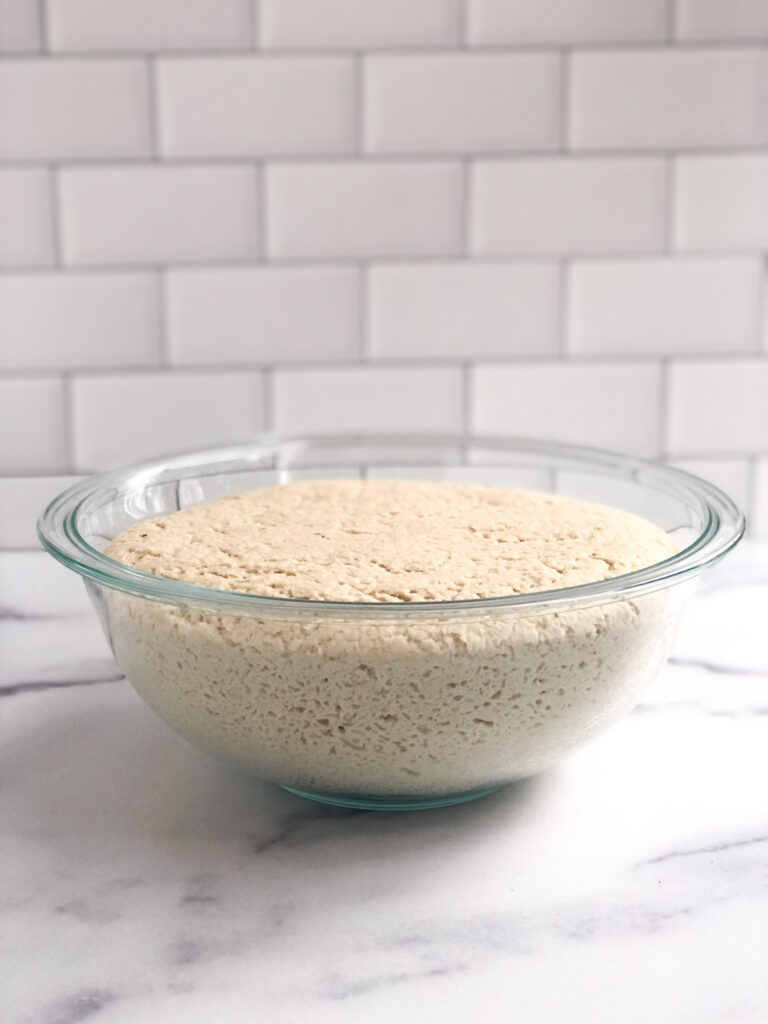
Troubleshooting the Rise: If the bread doesn’t rise, or rises very little, two issues could be at play.
First, your house could be too cold and the yeast won’t rise as quickly in a cold house. Give the bread an additional 2-4 hours to rise.
Second, your yeast could be dead. It may be old or expired. Because gluten-free ingredients cost more than traditional wheat flour, you don’t want to risk losing a batch due to expired yeast. Always use fresh yeast when possible, and make sure your yeast blooms in the warm water before adding it to your recipe to avoid wasting precious gluten-free ingredients.
Step #6: Preheat Oven and Dutch Oven
Once the dough has poofed up and nearly doubled in size, you’re ready to bake that beautiful gluten-free artisan bread.
Add your Dutch oven to your oven and set the oven temperature to 425º F. Allow the Dutch oven to warm up along with the oven. Do NOT add an empty Dutch oven to a hot oven. Allow the Dutch oven to come to temperature slowly with the oven as it preheats.
Please note that many Dutch oven manufacturers advise against heating an empty Dutch oven as it may crack. This is especially true of enameled Dutch ovens, which are at higher risk of cracking. I recognize the risk, and my Dutch oven hasn’t cracked when I preheat it slowly with my oven.
Carefully remove the Dutch oven from the oven with oven gloves, remove the lid and set it aside. You’re ready to move on to step #7.
Step #7: Prepare Dough for Baking
Your dough should be beautifully risen and ready to bake. Use a flat and bendable rubber spatula to gently loosen (shimmy) the edges of the dough from the sides of the bowl.
Now carefully tilt the bowl so the dough begins to loosen and roll out of the bowl. You’ll want it to roll and turn over into the hot Dutch oven so the bottom is now the topside of the bread. Remember, the Dutch oven is very hot. Be careful!!
Once the dough is inside the Dutch oven, I recommend scoring it. Scoring is a process of cutting shallow slits in the dough to allow the dough to expand during the baking process. Use a sharp knife to score lines on the top of your dough. There is no need to wet your knife as you would with gluten-bread baking, as the gluten-free dough will not stick to your knife.
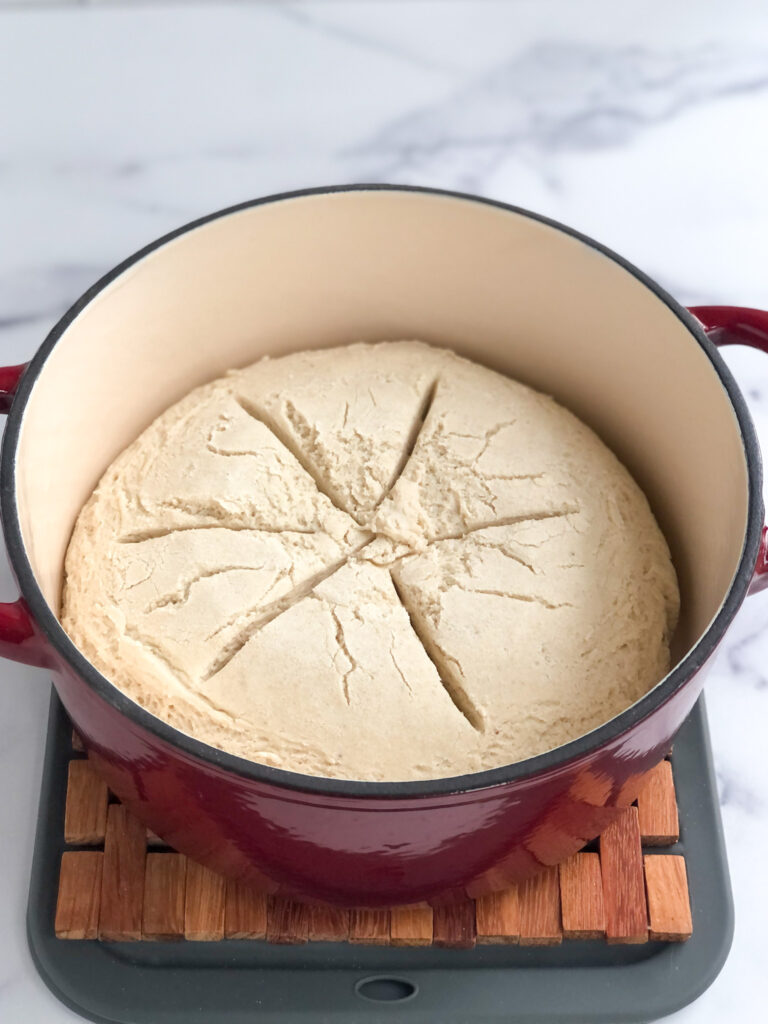
The slits in the dough will open up and create crusty ridges along the top of the bread, giving this bread its signature artisan look.
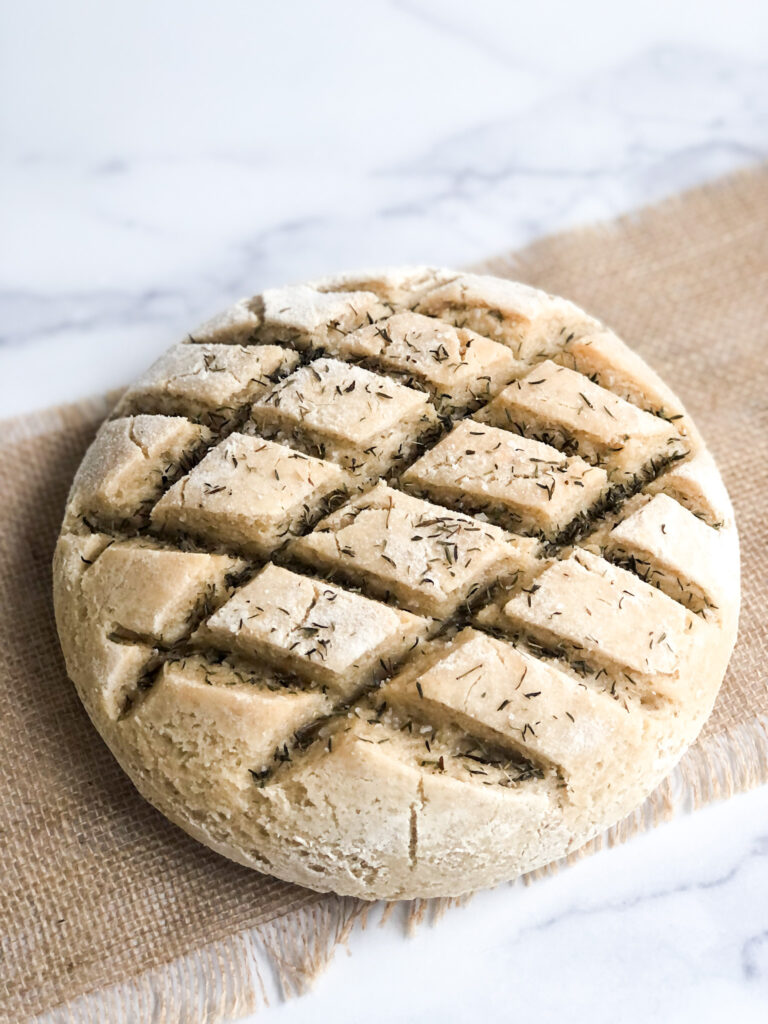
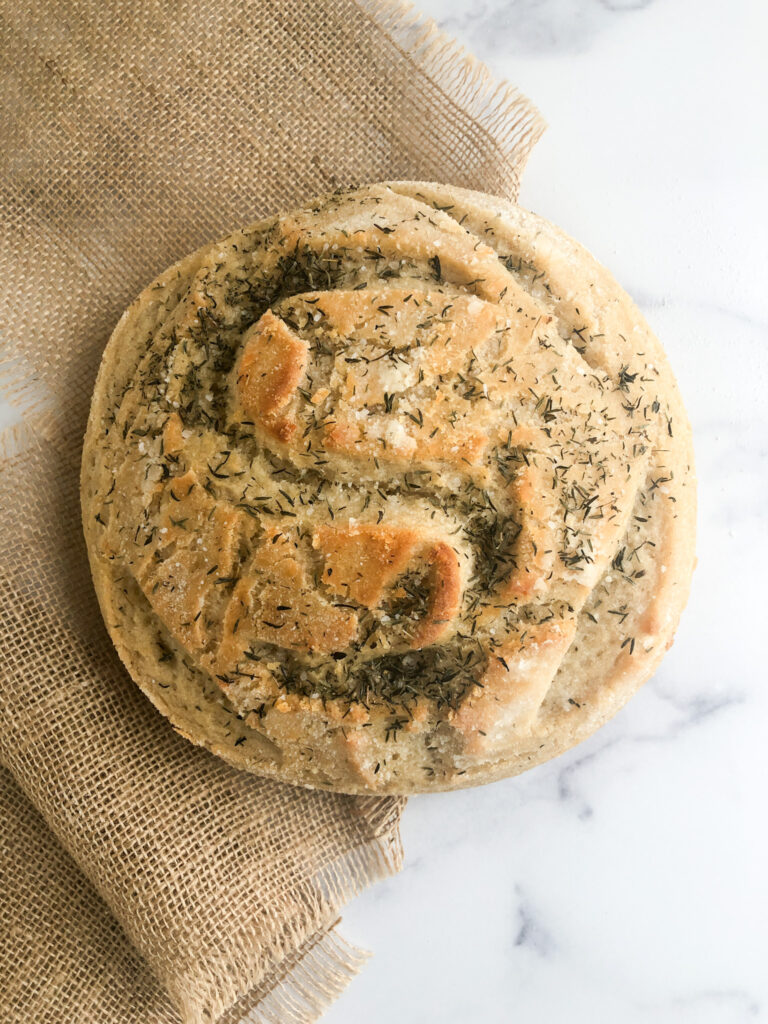
Tip! If you want to get really creative, Google “bread scoring ideas” and you’ll find all sorts of techniques and tutorials you can follow to add beautiful designs to the top of your artisan bread. The picture below is another way to score your bread. The more “scores”, the easier it is to break off a piece by hand.
Cover the Dutch oven with its tight fitting lid and place it back into the oven to bake for 35 minutes. After 35 minutes, remove the cover from the Dutch oven and continue baking the bread for 15 minutes.
Tip! Before putting the bread back into the oven to bake for the additional 15 minutes, brush it with olive oil and sprinkle it with Kosher salt and thyme.
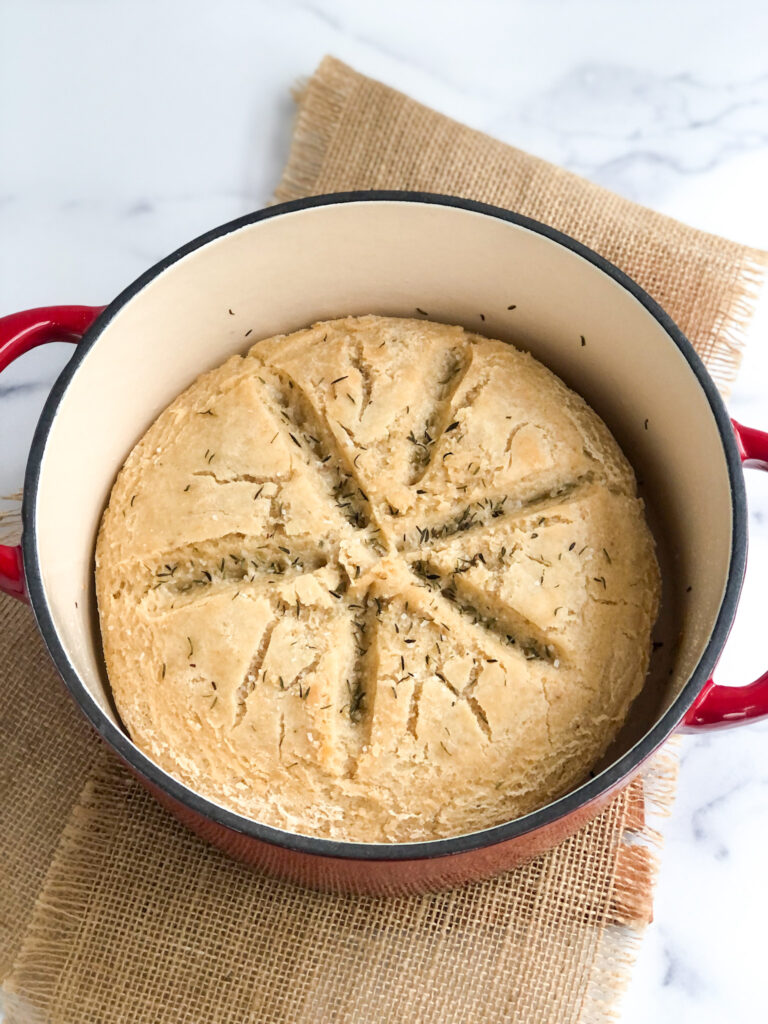
Remove the Dutch oven from your oven and allow the bread about 10 minutes to cool inside the Dutch oven before handling it. Remember, the Dutch oven is very hot. Be careful.
Step #8: Eat!
You’ll notice your gluten-free artisan bread has a wonderful hard crust and a doughy soft center. This is the magic of baking it inside a Dutch oven.
Can you believe you made this rustic artisan bread without gluten?

The more I make this bread, the easier the process becomes. In fact, I’m able to prepare the dough in just a few minutes, and then I let it rise and bake it right before I’m ready to enjoy or serve it.
Bread baking doesn’t have to be a lot of work. It’s actually quite simple if you’re armed with the right tools, right ingredients, and right techniques.

Don’t be intimated just because this bread recipe looks artisan. You can do it … and when you do, you’ll be rewarded with the best gluten-free bread you’ve ever had.
Remember, enjoy this bread the day its baked for best results, and if you’re able to serve it warm, you will be handsomely rewarded with the best taste and texture this recipe has to offer.
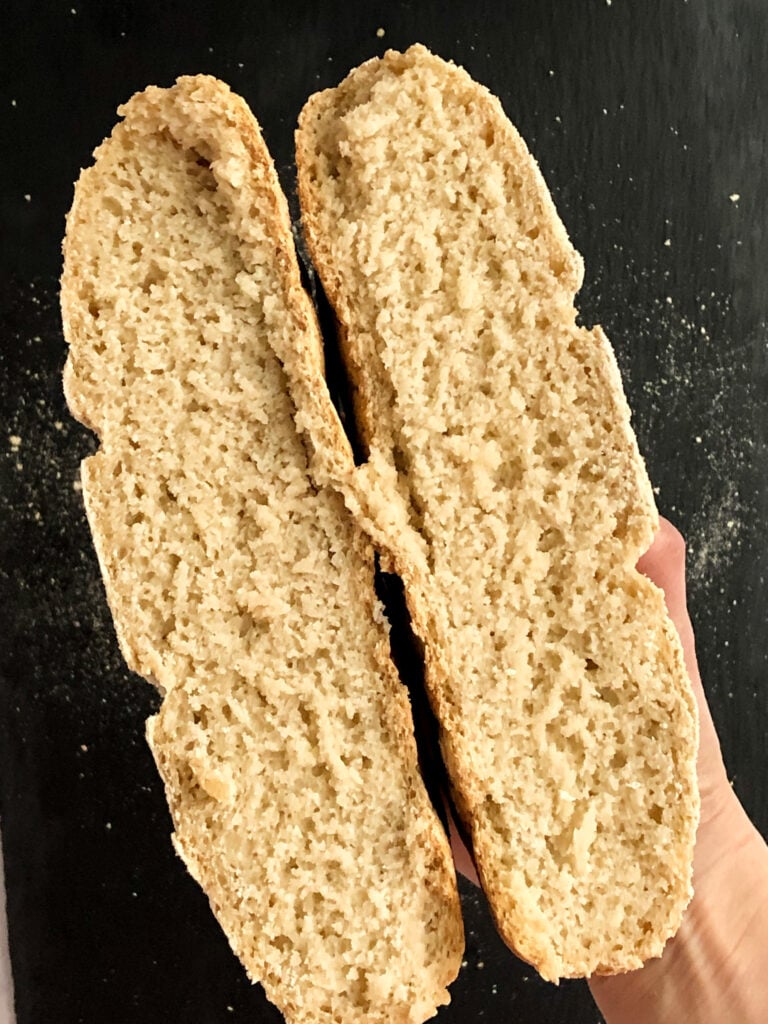
To reheat leaftover bread on day #2, zap it in your microwave for 30-60 seconds.
How to Enjoy this Bread
This bread is meant to be shared. I serve it in its beautiful boule-shaped glory, and then either cut it with a serrated knife or have everyone pull a section off to enjoy it.
Serve it with different dips and infused olive oils. My friend bought me this sampling of beautiful olive oils for my birthday and we have loved sampling them all with my gluten-free artisan bread recipe.

You could also jazz up the flavor of the bread by brushing it with olive oil or melted better and then sprinkling Kosher salt and other seasonings, like thyme, rosemary, or even garlic, on top.
This rustic bread also pairs well with a warm soup (for dipping) or served with mashed avocado for a fancy avo-toast breakfast.
Thank you to Bee on Adventure for inspiring this recipe!
Other Recipes
Gluten-Free Sourdough Bread: Use this recipe to make a gluten-free sourdough bread. Remember, you’ll need a gluten-free sourdough starter first!
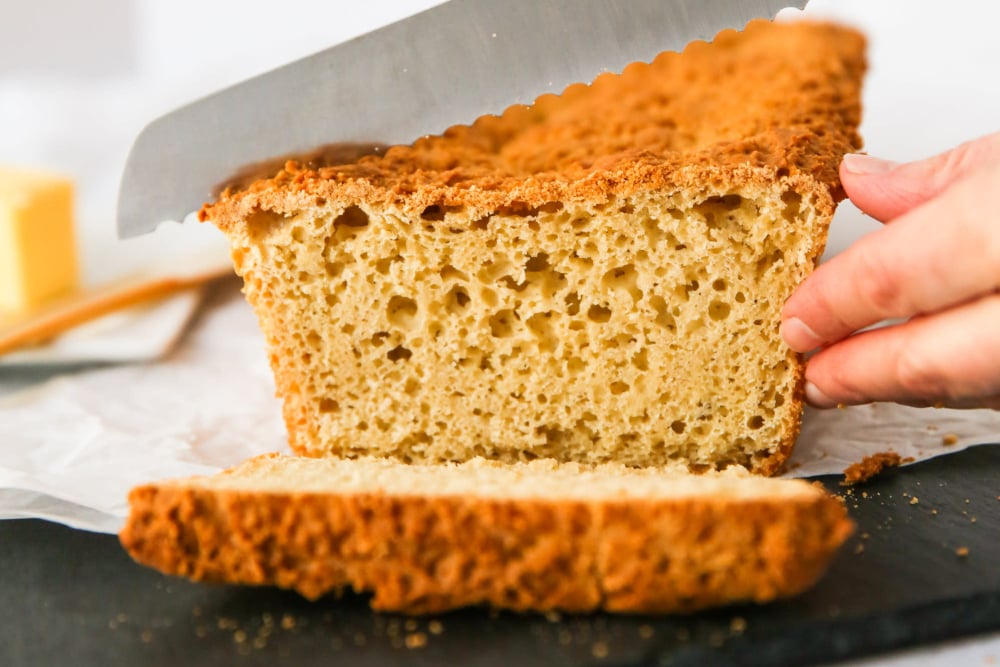
Loaf of Bread: Want to make a simple loaf of bread using a 1:1 gluten-free flour blend? Try this easy gluten-free bread recipe.
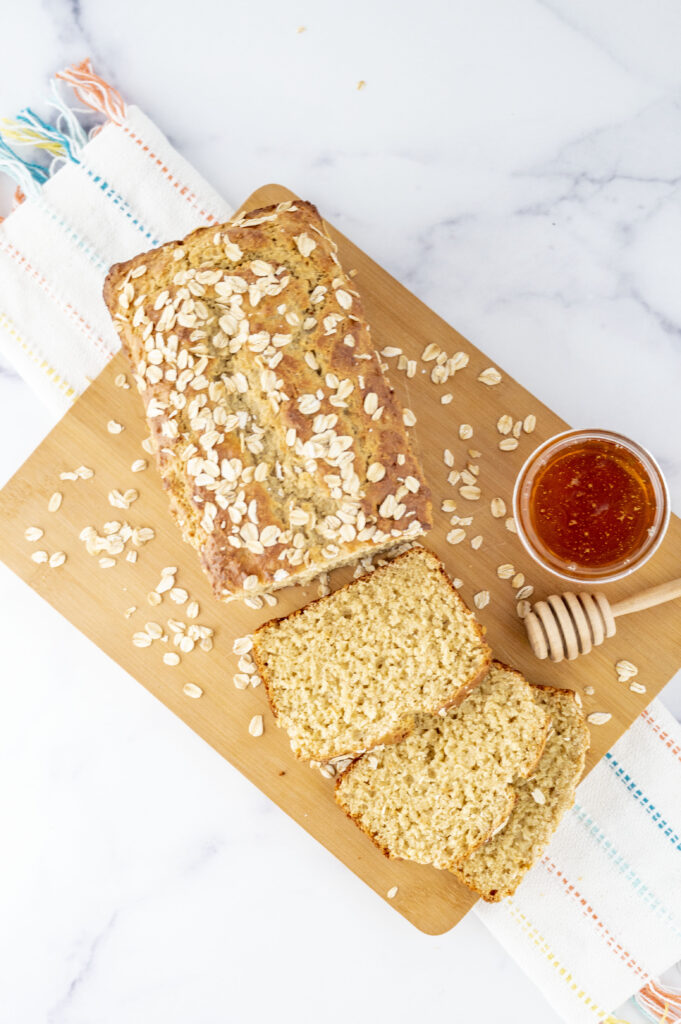
Oat Bread: Enjoy this earthy gluten-free oat bread for breakfast or lunch!
Dinner Rolls: Entertaining and want to make some fun pull-apart dinner rolls? Try this fun gluten-free pull-apart dinner roll recipe.


Gluten-Free Artisan Bread
Equipment
- Dutch oven (round or oval)
- Standing mixer (recommended but not required)
- Kitchen scale
Ingredients
- 10 grams yeast about 1 tbsp
- 10 grams psyllium husk about 2 tbsp
- 2 cups warm water
- 200 grams brown rice flour or white rice flour
- 200 grams tapioca starch
- 100 grams gluten-free oat or buckwheat flour
- 100 grams potato starch
- 30 grams sugar about 2 tbsp
- 1 tsp Kosher salt
- 15 grams olive oil
Instructions
- In a small bowl, combine yeast, psyllium husk and warm water. Mix together and set aside to activate the yeast.
- In a large bowl (preferably the bowl attached to your standing mixer), combine rice flour, tapioca starch, oat flour, potato starch, sugar and salt. Whisk together.
- Set the dial for your standing mixture to mix on low-medium and slowly add yeast mixture to the flour mixture. Mix on medium speed for 1 minute. Add olive oil and continue mixing ingredients on medium speed for another minute.
- Lightly flour a countertop or flat surface with rice flour and add your bread dough. Knead the dough for 1 minute to add air to the mixture (remember, you don't need to knead it to develop the gluten since there is no gluten). Form the dough into a round shape by folding the dough under itself, then place the rounded dough into a lightly floured bowl. Cover with a clean dish towel and place it in a warm place to rise or proof in your oven.
- Allow the bread to rise for at least 2 hours (if rising in a warm place) or 4 hours (if your house is cold). The dough will bulk up but not quite double in size. Please see notes below to troubleshoot the rise.
- Add your Dutch oven to your oven and set the temperature to 425º F. Allow your Dutch oven to heat up and get hot. Do NOT add an empty Dutch oven to a heated oven. See notes below.
- Carefully remove the hot Dutch oven from your oven using oven mitts and place it on a heat-protected surface. Use a spatula to loosen the sides of the dough from the bowl and then gently flip it upside down to allow the dough to roll out of the bowl and into your hot Dutch oven. Be very careful not to touch the hot Dutch oven. Score the top of the dough by cutting shallow lines on top in decorative patterns of choice.
- Cover the Dutch oven with its tight-fitting lid and place it in your oven to bake for 35 minutes. After 35 minutes, remove the lid and continue baking for 15 minutes. (See Alternative instruction below)
- Alternative Instruction: After the initial 35 minutes in the oven, remove the cover, brush top of the bread with olive oil and sprinkle with Kosher salt and thyme. Bake for 15 minutes uncovered.
- Remove Dutch oven from oven and allow the bread to cool for 10 minutes before handling. The bread is best served warmed and the day it's made so plan accordingly. Store leftover bread in a sealed container and heat in your oven or 30-60 seconds in your microwave before enjoying.
Video
Notes
- You can use white rice flour instead of brown rice flour.
- You can use buckwheat flour instead of oat flour.
- Always check labels to ensure your oat flour – and all ingredients – are gluten free.
- Always measure flours by weight when baking artisan bread. Invest in a kitchen scale. You will use it time and time again.
- Be sure to use fresh or unexpired yeast. Old yeast will deter a proper rise.
- The dough will rise best in a warm environment. Use a warming mat or proof the dough in your oven for best results. If your house is cold, allow the dough to rise for 4+ hours until it nearly doubles in size.
- Please note some Dutch oven manufacturers warn against heating an empty Dutch oven as it may crack. I recommend adding the Dutch oven to your cold oven and then preheating the oven and Dutch oven simultaneously. There is a risk your Dutch oven will crack. I have not had any issues but am aware of the risk (and you are now too).
Thanks for this recipe. I made the bread yesterday. I used xantham gum because I have a lot of it. I put it in the oven (turned off) to rise – the oven light keeps it at about 80. It rose very well in just an hour. I was confused by the bit about needing to add sugar – there is so much for the yeast to feed on in tapioca starch alone, I didn’t add any. It turned out well – nice crust, but a little gummy – I’ll try psyllium husk next time. I will add more salt – probably half again as much.
I haven’t tried it but I thunk it could work.
so excited to find a gf dutch oven bread recipe that doesn’t require a 1:1 flour! do you think i would be able to use arrowroot starch as opposed to potato?