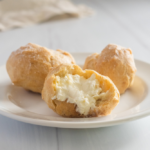
Classic Gluten-Free Cream Puffs
Get ready to enjoy cream puffs again! My gluten-free cream puff recipe takes you step-by-step through the process of making this delicate pastry without gluten.
Servings: 36 cream puffs (regular size)
Calories: 81kcal
Equipment
- 1 Electric Mixer standing or handheld
Ingredients
Pastry Dough
- ½ cup butter see notes for dairy-free options
- 1 cup water
- ¼ tsp salt
- 1 cup gluten-free flour I used Bob’s Red Mill 1-to-1 gluten-free flour. You can also use a blend of rice flour, tapioca starch, and potato starch – see notes.
- 4 eggs room temperature
Filling
- 1 ½ cups heavy cream see notes for dairy-free options
- ½ cup powdered sugar
- 1 tsp vanilla extract
Instructions
To Prepare the Dough (Choux Pastry)
- Bring the butter, water, and salt to a boil in a pot over medium-high heat.
- Once the mixture boils, remove the pot from the heat and immediately stir in the gluten-free flour, working quickly to avoid large lumps. The dough will pull away from the sides of the pot and appear gummy. Let it cool for at least 10 minutes.
- While the dough cools, preheat the oven to 400°F. Line two baking sheets with parchment paper or silicone baking mats.
- After your dough has cooled for at least 10 minutes, transfer the dough to a medium/large bowl. Add the eggs one at a time and beat until smooth using a hand-held or standing electric mixer.
- To transfer the dough to the baking sheet, you can (1) place the dough into a piping bag fitted with your tip of choice (optional) OR a large zip-lock bag with the corner snipped off, or (2) use a spring-loaded cookie scoop. Pipe or place the dough onto the prepared baking sheets three inches apart. For regular-sized cream puffs, pipe or scoop approximately one heaping tablespoon of dough into a ball shape. If piping, hold the bag perpendicular to the pan, pipe, and then release. Smooth the top of each cream puff using a slightly wet finger so the gluten-free pate choux doesn’t stick to your fingers. (For mini cream puffs, pipe approximately two teaspoons of choux dough.)
- Bake the cream puffs in the preheated oven for 30-35 minutes (regular sized) or 25-30 minutes (minis). The dough will be a darker (not blonde) golden brown color and will be set.
- Immediately after removing the cream puffs from the oven, poke a small hole into the bottom of each cream puff to allow the steam to escape. This will prevent them from getting soggy. Let them cool completely on the pan.
To Prepare the Filling
- Using your standing or handheld mixer, beat the heavy cream into soft peaks. Add the powdered sugar and vanilla extract and beat the mixture until stiff peaks form.
- Once the cream puffs are cool, you can fill them one of two ways: (1) Cut them in half, scrape out any soft dough from the inside, and fill them with a scoop of whipped cream. (2) Using a pastry bag fitted with a round tip, gently poke the tip into the steam escape hole in the bottom of each cream puff and squeeze the whipped filling inside.
- Dust the tops of the cream puffs with powdered sugar before serving.
- The cream puffs taste the best the same day, but for longer storage, store them in a freezer-safe container in the freezer Thaw for a few minutes before serving.
Notes
Butter: Instead of butter, use a dairy-free or vegan substitute, like Earth Balance, Melt, or Plant Butter, to make the cream puffs dairy-free. You can also use palm shortening or canola oil to make the cream puffs dairy- and soy-free.
Whipping Cream: You can find dairy-free whipping cream at many supermarkets. Silk and Country Crock make dairy-free whipping cream options.
Flour: I used Bob’s Red Mill’s 1-to-1 Gluten-Free Flour. If you’re using another flour blend, results may vary. Be sure your flour blend contains xanthan gum or add ¾ teaspoon of it to the flour before adding it to the boiling water. In addition to Bob’s Red Mill’s 1-to-1 Gluten-Free Flour, this recipe has been tested with the following homemade flour blend:
- ½ cup rice flour
- ¼ cup tapioca starch
- ¼ cup potato starch
- ¾ tsp xanthan gum
- More expert tips on how to get the perfect gluten-free cream puffs.
- Additional filling ideas beyond whipped cream.
- How to use the pastry dough to make gluten-free eclairs.
Nutrition
Calories: 81kcal | Carbohydrates: 4g | Protein: 1g | Fat: 7g | Saturated Fat: 4g | Polyunsaturated Fat: 0.4g | Monounsaturated Fat: 2g | Trans Fat: 0.1g | Cholesterol: 36mg | Sodium: 46mg | Potassium: 17mg | Fiber: 0.3g | Sugar: 2g | Vitamin A: 251IU | Vitamin C: 0.1mg | Calcium: 12mg | Iron: 0.2mg